This post contains affiliate links. As an Amazon Associate I earn from qualifying purchases.
If you’ve always wanted to make a simple chicken and rice dish but felt intimidated by the thought of juggling multiple pans or worried about dry chicken, this is your starting point. I’m Martha, and I’ve watched countless families transform their weeknight dinners with this exact recipe. It’s forgiving, affordable, and honestly? It tastes like you spent way more effort than you actually did. This one-pan wonder teaches you foundational cooking skills you’ll use forever, whether you’re making beef meatballs or exploring other main dishes down the road.
How to Make Easy One-Pan Chicken and Rice for the First Time (You’ve Got This)
My first attempt at cooking a complete protein-and-grain meal happened in my tiny apartment kitchen during my first year as a registered dietitian. I was exhausted from clinical rounds, my budget was stretched paper-thin, and I needed to prove to myself that eating well didn’t require takeout money. I grabbed four chicken thighs from the discount bin, a bag of white rice, and whatever herbs I had in my spice rack.
The chicken came out tender. The rice absorbed every bit of that savory, herbed broth. And I stood there in my kitchen—actually amazed—because I’d created something that tasted like restaurant quality on a grocery store budget. That night changed how I thought about home cooking. I realized that simple doesn’t mean inferior. Affordable doesn’t mean boring. And a single baking dish can hold an entire meal.
That’s what this recipe is. It’s that exact night, simplified for you.
What to Expect Before You Start
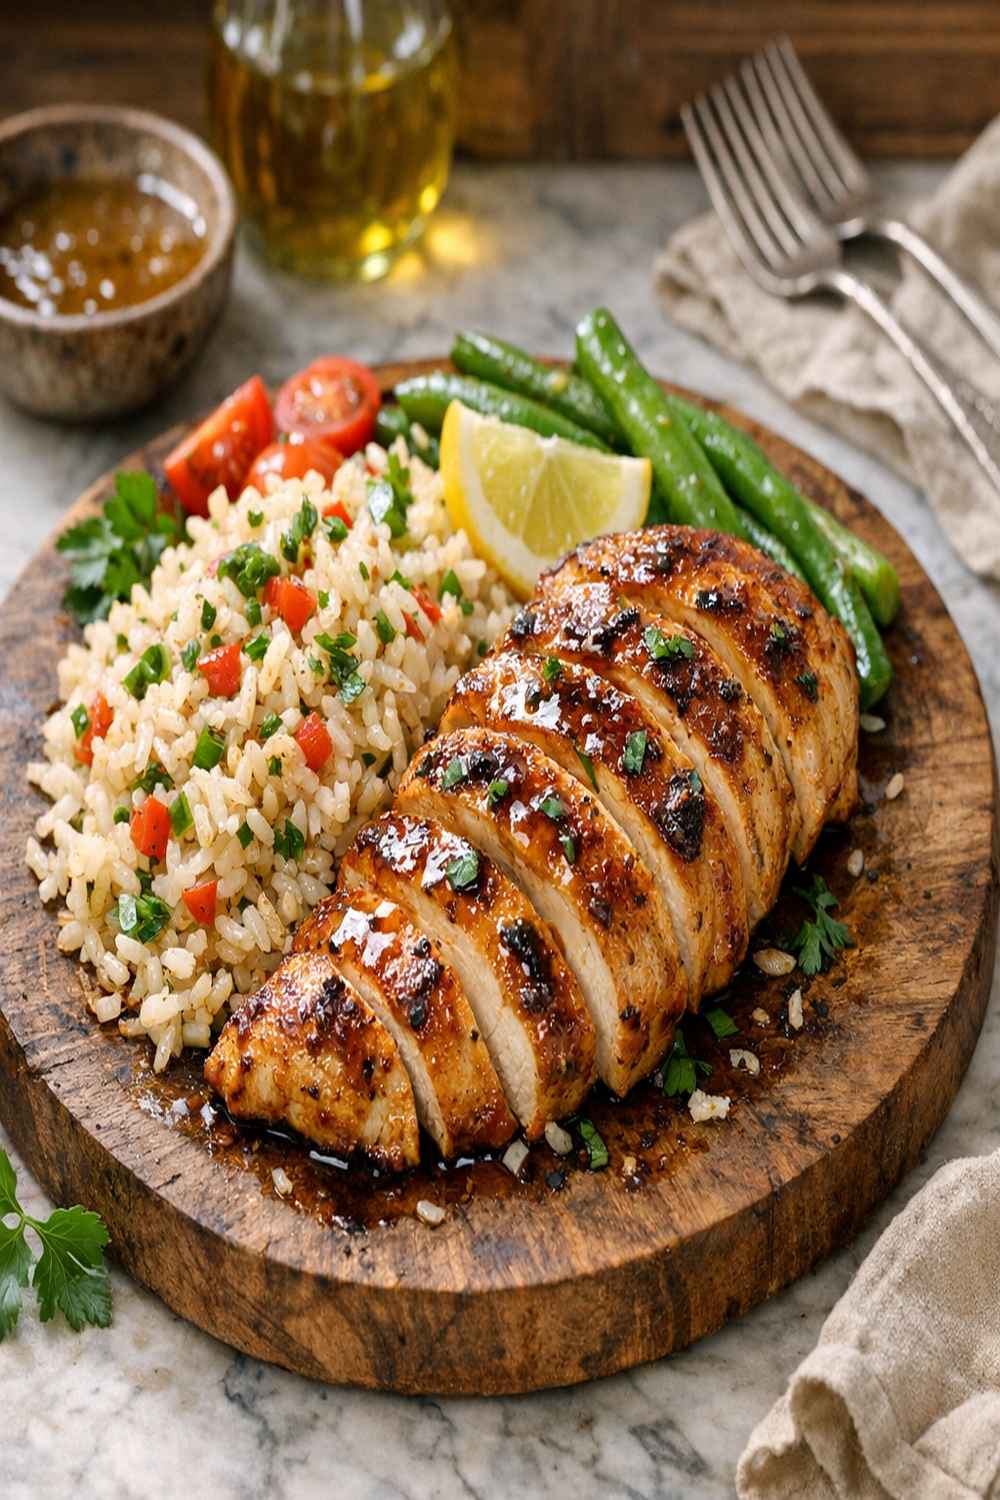
Let me set your expectations so you feel confident stepping into the kitchen. This recipe takes about 50 minutes total, though most of that time is hands-off oven time. You’ll actually spend maybe 10 minutes on active cooking. This isn’t a difficult recipe—it’s a straightforward one that teaches you how moisture, heat, and time work together to create tender protein and fluffy grain.
- The hardest part is patience during cooking – Once your dish goes in the oven, resist the urge to peek constantly. Each time you open that oven door, heat escapes and cooking time extends. Check it once around the 28-minute mark, and then again when the timer goes off. That’s it.
- You might worry about dry chicken – This won’t happen because the chicken sits in liquid the entire time. The rice below and the broth around it create humidity. Your chicken will be the opposite of dry—it’ll be moist and tender.
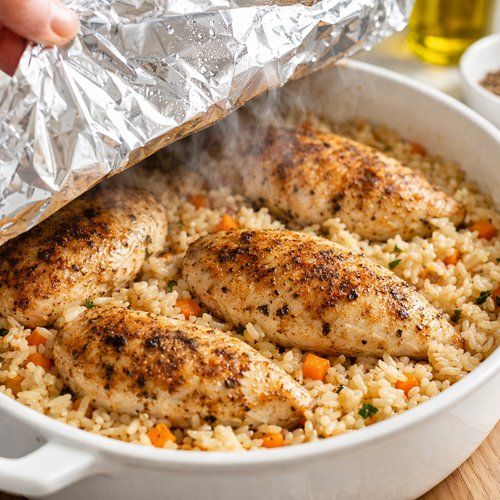
- Success looks like absorbed liquid and golden chicken – When you remove the foil at the end, you should see very little liquid remaining in the pan. The rice grains should be tender but not mushy. The chicken should have a light golden exterior.
Equipment You’ll Need (And What You Can Skip)
I’m a believer in cooking with what you have. You don’t need fancy equipment to make incredible food. Here’s exactly what you need and what you can live without.
- One rectangular baking dish – You need something that’s roughly 9×13 inches (25×35 cm). This is the workhorse of budget cooking. If you don’t have one, a large cast-iron skillet works perfectly, or even a deep baking pan. Any oven-safe vessel that holds about 3 quarts will do the job.
- A kitchen knife and cutting board – Essential for chopping your onion and mincing garlic. Nothing fancy needed—a $5 knife from any grocery store works fine.
- Measuring cups and spoons – You need these for accuracy, especially with broth and water ratios. Eyeballing liquid ratios is where things fall apart.
- Aluminum foil – This covers your pan during the first phase of cooking. If you don’t have foil, a baking sheet placed upside-down over the top works.
- A spoon for mixing – Any spoon from your drawer. You’ll use this to stir the rice after the first 15 minutes.
- Optional: An oil spray bottle – This gives the chicken a slightly crisper exterior, but it’s genuinely optional. Your chicken will be delicious without it.
The Ingredients – A Beginner’s Shopping Guide
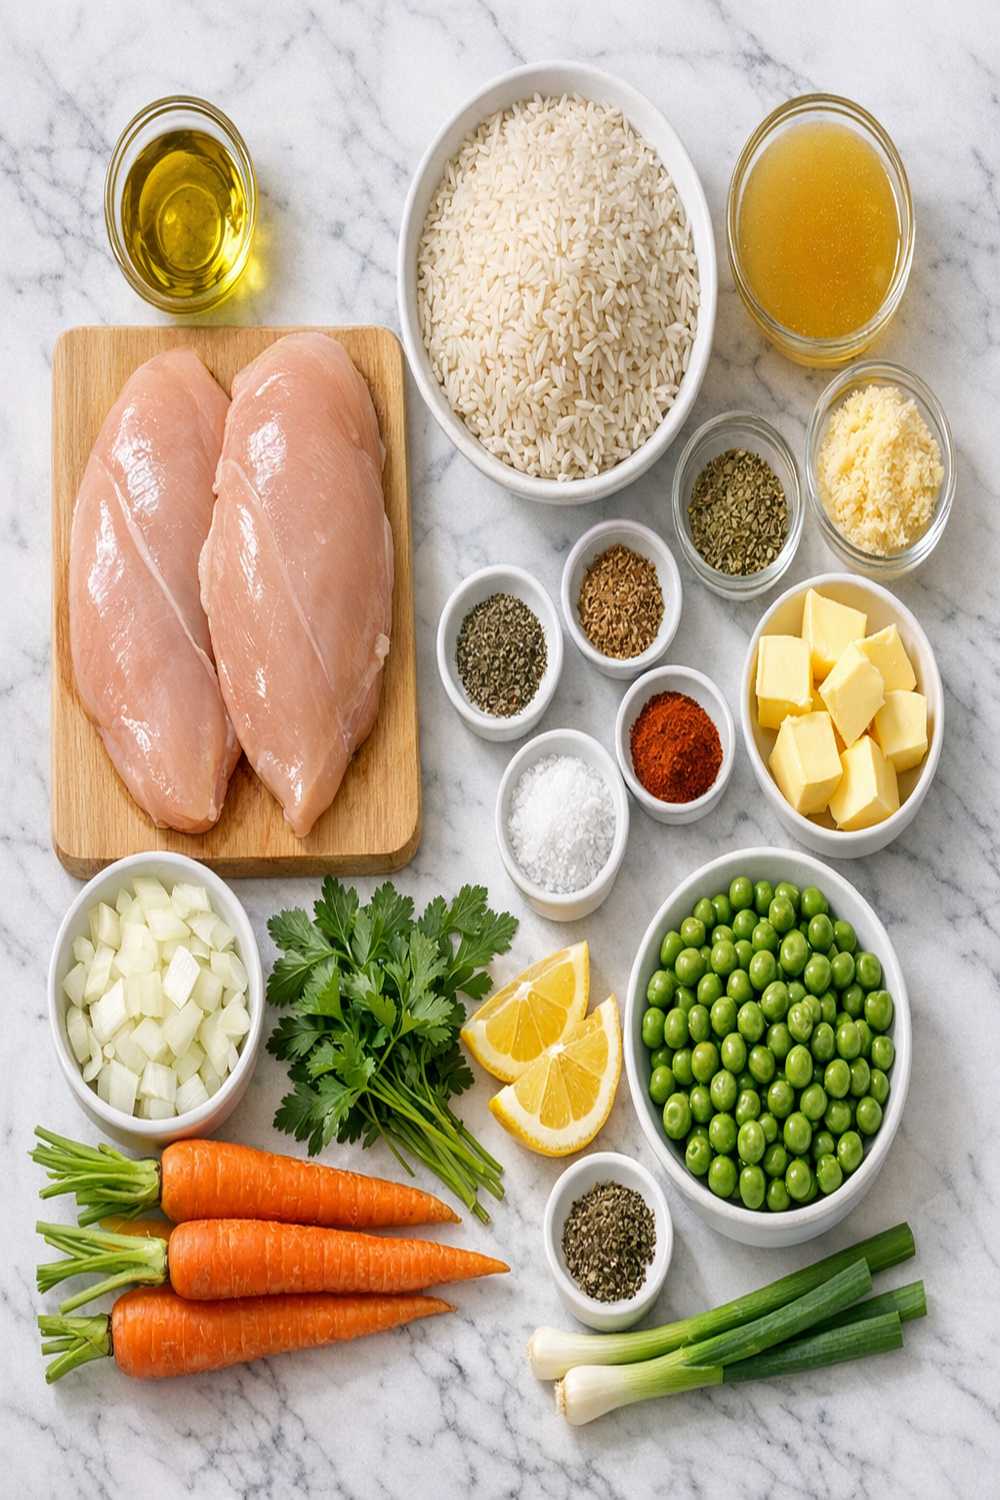
Let me walk you through where to find each ingredient and what to look for. Shopping smart is half the battle in budget cooking. I’ve learned which sections of the store offer the best value and what quality indicators to watch for.
- ¾ teaspoon salt (table salt or kosher; I prefer kosher for better texture distribution)
- ½ teaspoon garlic powder (not garlic salt—you control salt separately)
- 2 tablespoons butter or olive oil (either works; use whatever you have; olive oil is slightly cheaper in bulk)
- 1½ cups uncooked white rice (regular long-grain, the least expensive rice variety; buy in bulk bins if available)
- 1 teaspoon dried thyme (find in the spice aisle; buy in bulk bins rather than small jars)
- Black pepper (freshly cracked if possible; pre-ground is fine if that’s what you have)
- 1¼ cups hot tap water (literally from your faucet)
- 4 medium chicken thighs with skin removed (look for thighs on sale—they’re cheaper than breasts and more forgiving because they stay juicy; find them in the fresh meat section, or buy frozen and thaw overnight)
- 3 large garlic cloves (minced; fresh garlic from the produce section—never buy pre-minced, as it loses potency and costs three times as much)
- ½ teaspoon onion powder (another flavor builder for pennies)
- Fresh parsley or thyme for garnish (optional but beautiful; one small bunch feeds you for multiple meals)
- 1 teaspoon paprika powder (adds color and mild warmth; the cheapest spice that makes the biggest difference)
- 1 medium yellow onion (chopped into rough pieces; any color onion works, but yellow is cheapest and most versatile)
- 1½ cups chicken broth (low-sodium works best; check the sale flyer and buy when on promotion; store-brand tastes identical to name-brand)
Shopping Tips from My Kitchen: Buy chicken thighs when they’re marked down. They freeze beautifully for up to three months. Stock your spice cabinet slowly—buy just what you need rather than full jars. Rice and broth are staples worth buying in bulk. One bulk shopping trip with sale coupons can lower your cost per serving to under $2.
Step-by-Step: Your First One-Pan Chicken and Rice Recipe
I’m going to walk you through this with the kind of detail I wish someone had given me during my first attempt. Every step matters, and I’ll explain why as we go. You’ve got this.
Step 1: Prepare Your Oven and Workspace
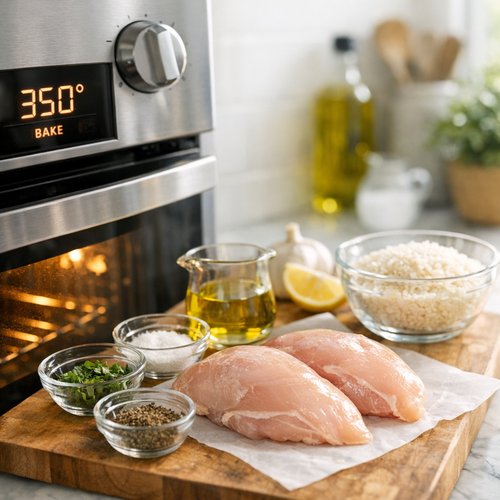
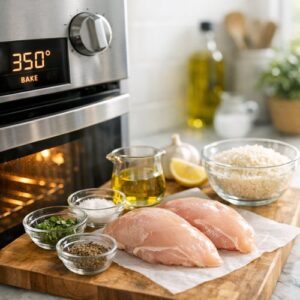
Turn your oven on to 350°F (180°C). As it heats up, you can do your prep work. Don’t skip the preheating—this is essential so your food cooks evenly. While the oven warms, gather all your ingredients on the counter in front of you. This is called mise en place, and it’s a professional technique that keeps you calm and organized. When everything is already measured and ready, the actual cooking part feels less stressful.
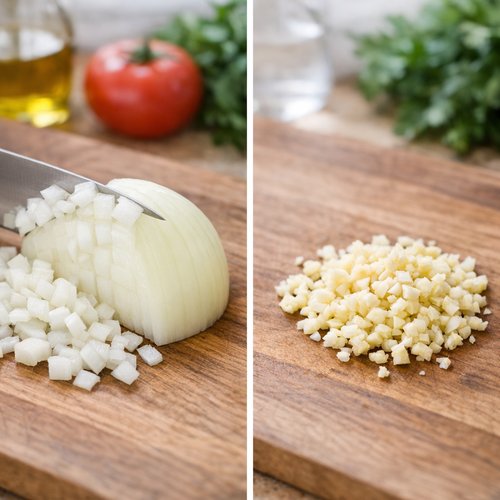
Step 2: Chop Your Onion and Mince Your Garlic
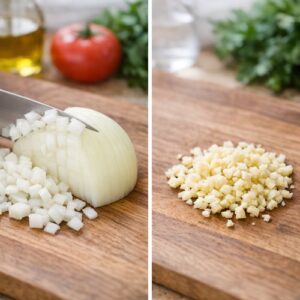
Cut your onion in half, peel away the papery outside layer, and place the flat side down on your cutting board. This makes it way more stable and safer. Slice the onion into rough pieces—you don’t need uniformity here. Smaller pieces will soften faster during that initial 15-minute bake. For garlic, smash each clove gently with the flat of your knife before mincing. This loosens the skin and makes mincing easier. Mince until pieces are roughly the size of a grain of rice. Your hands might smell garlicky—this is normal and washes away with soap and water.
Step 3: Scatter Onion and Garlic, Add Your Fat
Grab your baking dish and scatter the chopped onion across the bottom. Don’t worry about arranging it perfectly—just distribute it loosely. Sprinkle the minced garlic over the onion. Place your 2 tablespoons of butter (or olive oil) directly in the center of the dish. Put the baking dish in the preheated oven for exactly 15 minutes. This step is crucial. You’re softening the onion and infusing your fat with garlic flavor. Peek in around the 12-minute mark to make sure nothing is browning too quickly. If you see bits turning dark, give it a gentle stir. Some golden color is perfect, but blackened bits will taste bitter.
Step 4: Make Your Chicken Seasoning Blend
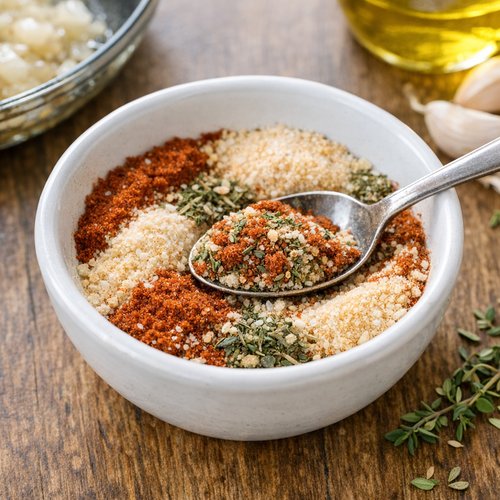
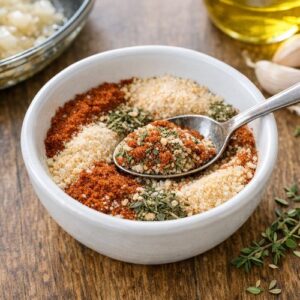
While the onion and garlic soften, combine your spices in a small bowl. Mix together the paprika, dried thyme, garlic powder, onion powder, salt, and black pepper. Stir everything together with a spoon until evenly combined. This blend is your chicken rub. The beauty of mixing spices ahead of time is that they distribute evenly rather than clumping in one spot. This is why pre-made seasoning mixes cost more—you’re paying for this convenience.
Step 5: Season Your Chicken
Pat your chicken thighs dry with a paper towel. Moisture on the surface keeps seasoning from sticking properly. Take each thigh and sprinkle your spice blend generously on both sides. Use about one-quarter of your mixture per thigh. Rub it gently into the surface with your fingers. Don’t be timid—these seasonings are there to flavor your meat. You want to see color on the chicken.
Step 6: Check Your Onions, Then Add Rice
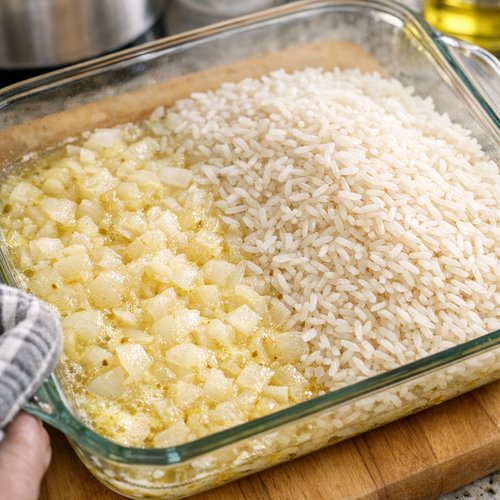
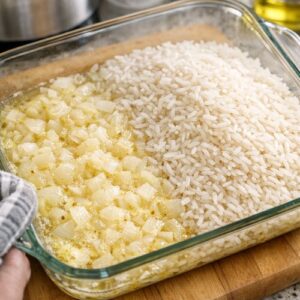
When the 15 minutes are up, carefully remove your baking dish from the oven. The butter should be melted and the onion should look soft and slightly golden. If you see any pieces of onion that look too dark, stir them under. Pour your 1½ cups of uncooked rice into the pan. Stir everything together thoroughly. You’re coating the rice in that buttery, garlicky onion mixture. This step is why the finished rice tastes incredible—every grain gets coated in flavor.
Step 7: Arrange Chicken on the Rice Bed
Create a small space in the center of the rice and lay each chicken thigh, skin-side up, on top of the rice. Don’t push them down hard—just nestle them gently into place. They don’t need to be completely submerged. They’re sitting on top like little islands. This arrangement is intentional. The chicken cooks gently from the steam rising up, and the skin-side-up position lets the top get slightly crispy.
Step 8: Pour Liquid Carefully Around (Not Over) the Chicken
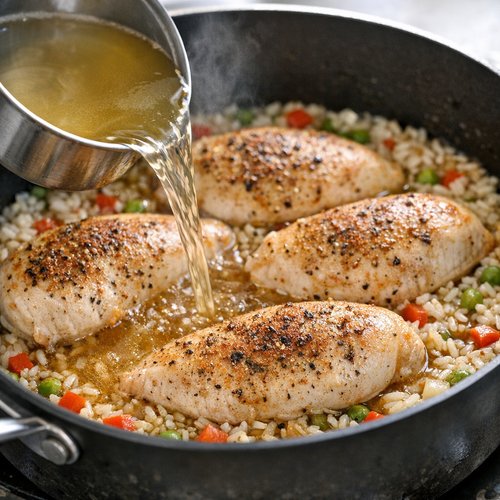
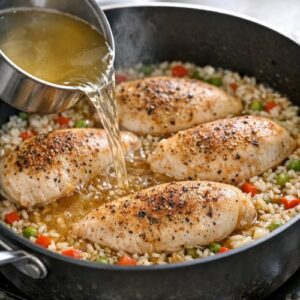
Measure out your chicken broth and hot water. You can microwave the broth for 90 seconds if it’s cold from the fridge—this helps everything cook more evenly. Pour the broth and water around the chicken, not directly over it. Pour slowly and carefully. If liquid splashes onto the top of the chicken, that’s okay, but you’re aiming to pour around the edges. The liquid should reach about three-quarters of the way up the rice layer.
Step 9: Cover and Bake Phase One
Tear off a piece of aluminum foil large enough to cover your baking dish loosely. Press it gently over the top—you’re not sealing it hermetically, just creating a loose tent. This foil traps steam inside without creating so much pressure that liquid boils violently. Bake covered for 30 minutes. Don’t open the oven door during this time. The moisture is doing important work inside.
Step 10: Remove Foil and Finish Cooking
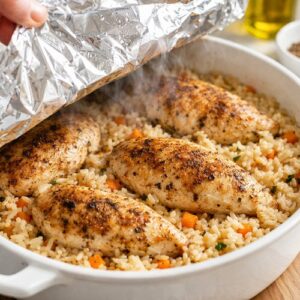
After 30 minutes, carefully remove the foil (watch out—steam can surprise you). At this point, your liquid should be mostly absorbed. The rice will look nearly cooked. If your chicken pieces look very pale, spray the top lightly with cooking oil (this is optional but creates a nice golden finish). Return the dish to the oven, uncovered, for a final 20 minutes. The chicken will cook the rest of the way, the rice will finish absorbing any remaining moisture, and the chicken skin will get slightly golden.
Step 11: Check for Doneness
After 20 minutes, remove the baking dish. Look for two things: The rice should have absorbed the liquid (very little liquid visible in the pan), and the chicken should be cooked through (no pink inside when you cut into the thickest part). The internal temperature should be 165°F if you have a meat thermometer, but honest conversation? Most home cooks don’t have one. Instead, cut into the thickest thigh. If the juices run clear and there’s no pink, you’re done.
Step 12: Rest and Fluff
Remove the baking dish from the oven and let it sit undisturbed for 5 minutes. This resting time is non-negotiable. It lets carryover cooking finish the job gently and lets the rice absorb any final bits of moisture. After 5 minutes, remove the chicken pieces to a plate, then take a fork and gently fluff the rice. Don’t mash it—just separate the grains with the tines of your fork. Sprinkle with fresh parsley or thyme if you have it.
How to Tell If You Did It Right
Success in cooking is recognizing the signs. Here’s what a perfectly executed dish looks like, smells like, and tastes like.
- The rice is fluffy and tender, not mushy or crunchy – Each grain should be distinct and separate. When you take a bite, it should have a slight resistance before giving way. If it’s mushy, you had too much liquid or cooked it too long. If it’s crunchy, the opposite happened. Next time, adjust liquid slightly or cooking time.
- The chicken is moist and pulls away from bone with slight pressure – Take a bite and the meat should be tender enough to cut easily. If it shreds when you handle it, that’s actually perfect—that’s fall-apart tender. The skin should be slightly golden and taste flavorful from your herb rub.
- There’s little to no liquid remaining in the pan – Maybe a tablespoon or two of liquid clings to the rice, but that’s it. If you have a pool of broth at the bottom, you cooked it too short. If you see no moisture at all and the rice looks dry, you overcooked it.
- The aroma is warm, savory, and herb-forward – You should smell the thyme and paprika. That smell is your cue that cooking is working correctly. If there’s no aroma, your herbs might be stale—upgrade them next time.
What Went Wrong? Beginner Fixes
- My rice turned out mushy – This happens when there’s too much liquid or the cooking time goes too long. Water-to-rice ratio is critical. Next time, measure your liquids carefully. Also, resist opening the oven door during cooking—every peek extends cooking time slightly. If this happens again, reduce liquid by ¼ cup next time.
- My chicken came out dry – Dry chicken usually means the chicken cooked longer than the rice needed. This recipe is designed to prevent this, but if it happened, your oven might run hot. Lower your temperature 25°F next time and add 10 minutes to cooking. Also, thighs stay juicier than breasts—stick with thighs if you’re nervous.
- The rice is crunchy in the center – Undercooking. The rice didn’t get enough time or the liquid wasn’t hot enough when it went in (this is why I suggest warming broth). Add an extra 5-10 minutes next time, or make sure your liquid is truly hot before pouring.
- My onion burnt during the initial baking – Your oven runs hot or the butter temperature was too high. Next time, check at 12 minutes instead of waiting until 15. Stir it if it’s browning too quickly. Some color is good; blackness isn’t.
Your Next Steps After Mastering This
This recipe teaches you something profound: how to cook protein and grain together in moisture. Once you own this technique, you can adapt it endlessly. Try different proteins—swap the chicken for pork chops or white fish fillets. Change your grain—use brown rice, farro, or even quinoa (adjust liquid and timing accordingly). Swap herbs—Italian seasoning, cumin-based spices, or curry powder all work beautifully.
You’ve also learned that a baking dish can be your main cooking vessel, which opens up options like easy oven BBQ chicken or BBQ chicken with different cuts. The skills stack on each other. Before long, you’ll be improvising dishes based on what’s in your pantry, which is where real cooking confidence begins.
Can I Store One-Pan Chicken and Rice Recipe?
Yes, and it stores beautifully. This is exactly the kind of dish that tastes just as good—if not better—the next day because the flavors meld together.
Refrigerator storage: Let the dish cool to room temperature, then transfer everything to an airtight container. This keeps for 3-4 days in the fridge. To reheat, warm gently in a 325°F oven for about 15 minutes, or in the microwave in 2-minute increments, stirring between bursts. A splash of water helps restore moisture if it’s dried out.
Freezer storage: Yes, you can freeze this. Separate the chicken from the rice for better reheating. Wrap chicken tightly and freeze for up to 3 months. Rice freezes for 2-3 months. Thaw in the refrigerator overnight, then reheat as above.
Make-ahead tip: You can prep everything the night before—chop onion and garlic, measure spices, measure rice and liquids into separate containers. In the morning, your active cooking time drops to literally 5 minutes. This is how busy families actually eat well. Prep on Sunday for a weeknight victory on Tuesday.
Nutrition Information
Per serving (1 chicken thigh plus rice, makes 4 servings):
Calories: 425 | Protein: 32g | Carbohydrates: 42g | Fat: 12g | Fiber: 1g | Sodium: 620mg
Expert’s Nutritional Tip: Chicken thighs get unfair criticism for their fat content, but here’s what ten years in clinical nutrition taught me—that fat is where the flavor lives, and it’s the right kind of fat. Thighs contain more B vitamins and minerals like selenium and zinc than breasts. The fat is primarily unsaturated, and it actually helps your body absorb fat-soluble vitamins. This dish delivers complete protein (all essential amino acids), paired with whole grains if you substitute brown rice. It’s genuinely nutritious, not just cheap. The USDA recognizes chicken thighs as a nutrient-dense protein source, and the combination of protein and complex carbohydrate from rice creates steady blood sugar—no energy crash in two hours.
What Can I Serve With One-Pan Chicken and Rice?
This dish is complete as-is, but here are some simple additions that elevate it without much effort or cost.
- Steamed green vegetables – A handful of frozen green beans or broccoli steamed separately adds color, nutrition, and freshness. Drizzle them with a splash of olive oil and a pinch of salt.
- Simple green salad – Just lettuce, a squeeze of lemon juice, salt, and pepper. The acidity cuts through the richness of the chicken beautifully.
- Sliced tomato with fresh herbs – If tomatoes are in season or on sale, slice them and layer with fresh basil or parsley. No dressing needed.
- Plain yogurt on the side – A dollop of plain yogurt (way cheaper than sour cream) on the side adds creaminess and tang.
- Pickled vegetables – Any fermented or pickled vegetable from your pantry adds brightness. Think pickled onions, cucumber, or cabbage.
For wine pairing (if that’s relevant), a simple white wine like Sauvignon Blanc or even a light red like Pinot Noir complements the herbs beautifully. For non-alcoholic beverages, iced tea or lemon water works perfectly.
Seasonal Variations
This recipe is foundation enough to adapt through the year. Here’s how I change it seasonally to match what’s affordable and in season.
Spring: Replace half the rice with farro for texture. Add fresh lemon zest to your spice rub and finish with fresh dill instead of parsley. Swap dried thyme for fresh if you can find it cheap at farmers markets.
Summer: Add diced bell pepper (whatever color is cheapest) to the initial onion bake. Use fresh basil and oregano if you grow them. The herbs brighten everything. Consider using chicken breasts instead of thighs if they’re on sale—summer is when they sometimes drop in price.
Fall: Add a pinch of ground sage and nutmeg to your spice blend. Use apple cider vinegar instead of some of the water for subtle depth. Brown rice instead of white feels more autumn-appropriate and adds nuttiness.
Winter: This is thyme and rosemary season. Add a pinch of dried rosemary to your spice blend. Consider adding a diced carrot to the initial onion bake—it gets sweet as it cooks. Chicken thighs are perfect in winter because their fat is comforting and rich.

Boneless Chicken Breast And Rice Recipe
Ingredients
Method
- Turn your oven on to 350°F (180°C). As it heats up, you can do your prep work. Don't skip the preheating—this is essential so your food cooks evenly. While the oven warms, gather all your ingredients on the counter in front of you. This is called mise en place, and it's a professional technique that keeps you calm and organized. When everything is already measured and ready, the actual cooking part feels less stressful.
- Cut your onion in half, peel away the papery outside layer, and place the flat side down on your cutting board. This makes it way more stable and safer. Slice the onion into rough pieces—you don't need uniformity here. Smaller pieces will soften faster during that initial 15-minute bake. For garlic, smash each clove gently with the flat of your knife before mincing. This loosens the skin and makes mincing easier. Mince until pieces are roughly the size of a grain of rice. Your hands might smell garlicky—this is normal and washes away with soap and water.
- Grab your baking dish and scatter the chopped onion across the bottom. Don't worry about arranging it perfectly—just distribute it loosely. Sprinkle the minced garlic over the onion. Place your 2 tablespoons of butter (or olive oil) directly in the center of the dish. Put the baking dish in the preheated oven for exactly 15 minutes. This step is crucial. You're softening the onion and infusing your fat with garlic flavor. Peek in around the 12-minute mark to make sure nothing is browning too quickly. If you see bits turning dark, give it a gentle stir. Some golden color is perfect, but blackened bits will taste bitter.
- While the onion and garlic soften, combine your spices in a small bowl. Mix together the paprika, dried thyme, garlic powder, onion powder, salt, and black pepper. Stir everything together with a spoon until evenly combined. This blend is your chicken rub. The beauty of mixing spices ahead of time is that they distribute evenly rather than clumping in one spot. This is why pre-made seasoning mixes cost more—you're paying for this convenience.
- Pat your chicken thighs dry with a paper towel. Moisture on the surface keeps seasoning from sticking properly. Take each thigh and sprinkle your spice blend generously on both sides. Use about one-quarter of your mixture per thigh. Rub it gently into the surface with your fingers. Don't be timid—these seasonings are there to flavor your meat. You want to see color on the chicken.
- When the 15 minutes are up, carefully remove your baking dish from the oven. The butter should be melted and the onion should look soft and slightly golden. If you see any pieces of onion that look too dark, stir them under. Pour your 1½ cups of uncooked rice into the pan. Stir everything together thoroughly. You're coating the rice in that buttery, garlicky onion mixture. This step is why the finished rice tastes incredible—every grain gets coated in flavor.
- Create a small space in the center of the rice and lay each chicken thigh, skin-side up, on top of the rice. Don't push them down hard—just nestle them gently into place. They don't need to be completely submerged. They're sitting on top like little islands. This arrangement is intentional. The chicken cooks gently from the steam rising up, and the skin-side-up position lets the top get slightly crispy.
- Measure out your chicken broth and hot water. You can microwave the broth for 90 seconds if it's cold from the fridge—this helps everything cook more evenly. Pour the broth and water around the chicken, not directly over it. Pour slowly and carefully. If liquid splashes onto the top of the chicken, that's okay, but you're aiming to pour around the edges. The liquid should reach about three-quarters of the way up the rice layer.
- Tear off a piece of aluminum foil large enough to cover your baking dish loosely. Press it gently over the top—you're not sealing it hermetically, just creating a loose tent. This foil traps steam inside without creating so much pressure that liquid boils violently. Bake covered for 30 minutes. Don't open the oven door during this time. The moisture is doing important work inside.
- After 30 minutes, carefully remove the foil (watch out—steam can surprise you). At this point, your liquid should be mostly absorbed. The rice will look nearly cooked. If your chicken pieces look very pale, spray the top lightly with cooking oil (this is optional but creates a nice golden finish). Return the dish to the oven, uncovered, for a final 20 minutes. The chicken will cook the rest of the way, the rice will finish absorbing any remaining moisture, and the chicken skin will get slightly golden.
- After 20 minutes, remove the baking dish. Look for two things: The rice should have absorbed the liquid (very little liquid visible in the pan), and the chicken should be cooked through (no pink inside when you cut into the thickest part). The internal temperature should be 165°F if you have a meat thermometer, but honest conversation? Most home cooks don't have one. Instead, cut into the thickest thigh. If the juices run clear and there's no pink, you're done.
- Remove the baking dish from the oven and let it sit undisturbed for 5 minutes. This resting time is non-negotiable. It lets carryover cooking finish the job gently and lets the rice absorb any final bits of moisture. After 5 minutes, remove the chicken pieces to a plate, then take a fork and gently fluff the rice. Don't mash it—just separate the grains with the tines of your fork. Sprinkle with fresh parsley or thyme if you have it.
Notes
FAQs
Can I use boneless, skinless chicken breasts instead of thighs?
You can, but I don’t recommend it, especially for beginners. Breasts are leaner and have less margin for error—they dry out more easily. If you only have breasts available, pound them to an even thickness first, reduce the cooking time by about 5-10 minutes (they cook faster), and watch them closely. Thighs are more forgiving and actually less expensive, which is why they’re my recommendation for budget cooking.
My oven doesn’t have an accurate thermometer. How do I know it’s at 350°F?
Many older ovens run hot or cold. An oven thermometer is the cheapest tool you can buy ($5-10) and will reveal this. If you don’t have one, add 5-10 minutes to the cooking time and check doneness by looking at the rice absorption and chicken texture rather than relying on time alone. Visual cues matter more than the timer anyway.
Can I double this recipe?
Yes! Use two baking dishes instead of one, or find one large enough for double portions. Don’t crowd a single pan—that traps steam unevenly. Double the ingredients exactly as written. Cooking time stays the same since the depth of rice isn’t changing dramatically.
What if I don’t have chicken broth? Can I use water?
You can, but your dish will taste less flavorful. If you’re out of broth, add a bouillon cube to the water, or use vegetable broth (cheaper than chicken sometimes), or even half water and half milk for richness. In a pinch, a splash of soy sauce mixed with water adds salt and umami flavor. Broth is worth keeping on hand—it’s the secret to making simple food taste restaurant-quality.
Can I prep this the night before and bake it in the morning?
Absolutely. Prepare everything through Step 8 (liquid poured in). Cover with foil and refrigerate overnight. In the morning, remove it from the fridge 15 minutes before baking (this helps even cooking). Add 5-10 minutes to your baking time since it starts cold. This is a genuine time-saver for busy weekdays.
How do I know if my chicken is fully cooked without a meat thermometer?
Cut into the thickest part of a thigh. If the juices run clear (not pink), it’s done. If there’s any pink, it needs more time. Chicken thighs are actually harder to overcook than breasts because the extra fat keeps them moist even if they cook a bit longer than ideal. You’re actually safer with thighs if you’re worried about doneness.
More Beginner-Friendly Recipes
- Beef Meatballs Recipe – Uses similar flavor-building techniques with simple ground beef, teaches you how to season proteins properly
- Beef Stir-Fry Recipe – Another one-pan method that builds confidence with quick cooking and simple ingredients
- Best BBQ Wings Recipe – Similar oven-baking technique, teaches you how sauce adheres to protein
You’ve now got everything you need to walk into your kitchen and create something genuinely delicious. This dish has fed my family countless times, and I’ve watched dozens of nervous home cooks discover their confidence while making it. The beauty is in the simplicity—four components (protein, grain, aromatics, liquid) combine into something greater than the sum of its parts. That’s real cooking.
Your first attempt might not be picture-perfect, and that’s completely okay. Mine certainly wasn’t. But I promise you’ll eat it, you’ll feel proud, and you’ll want to make it again. That’s how cooking skills actually develop—through repetition, not perfection.
Go ahead. Turn on that oven. Chop that onion. Give yourself permission to create something that nourishes both your body and your budget. You’ve absolutely got this.
Happy Cooking!