This post contains affiliate links. As an Amazon Associate I earn from qualifying purchases.
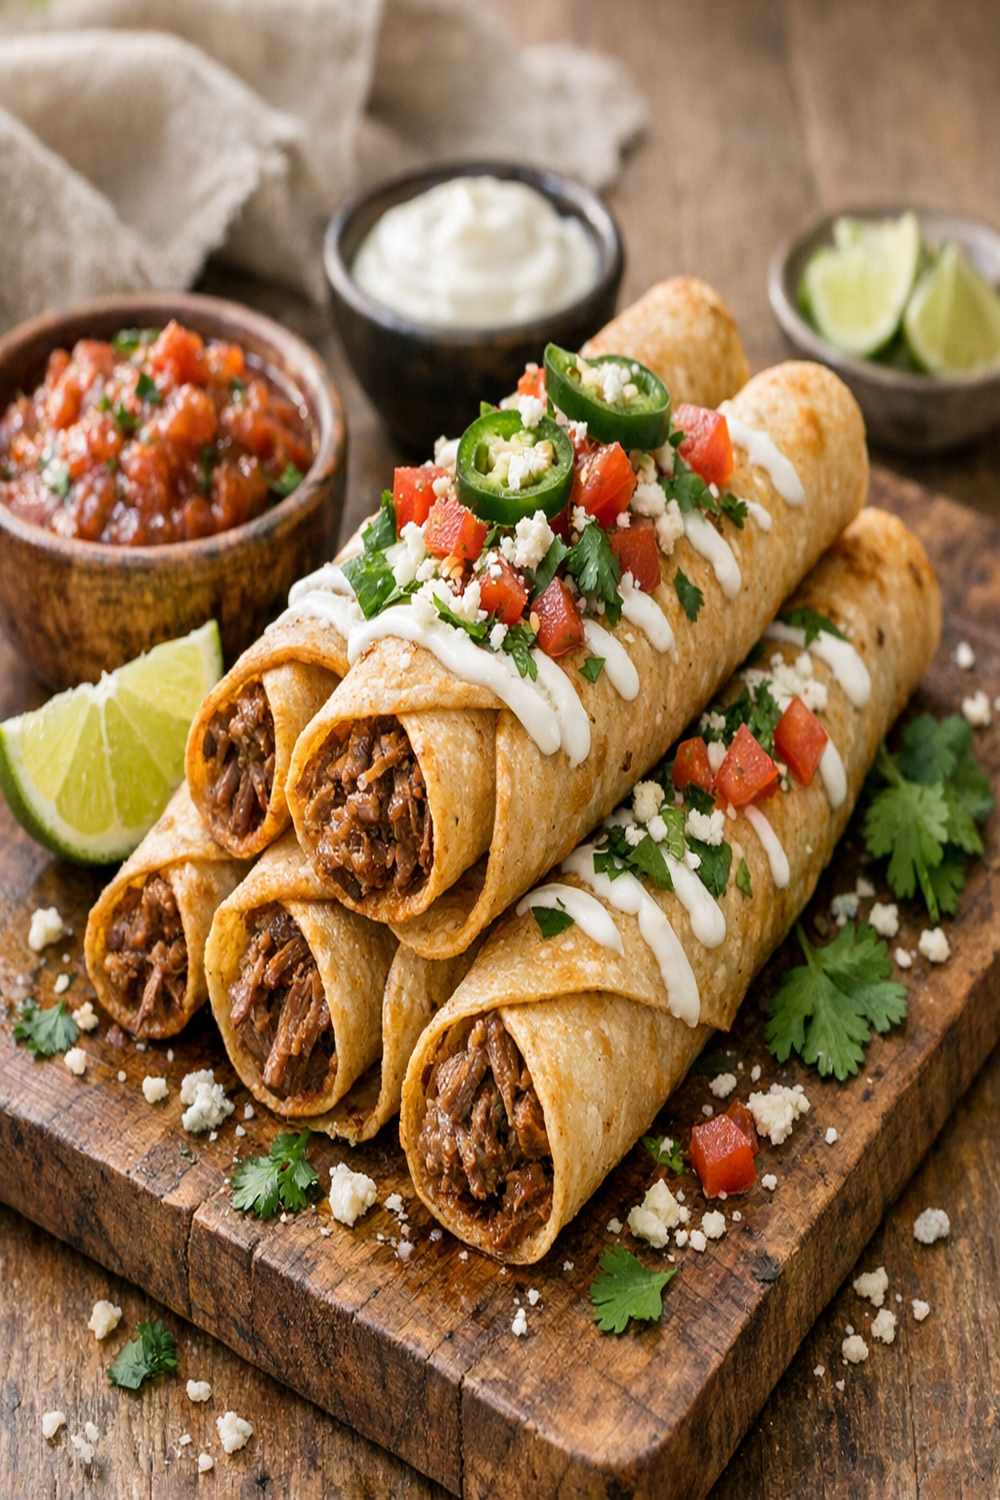
You’ve probably tried the traditional fried version, the baked shortcut method, and maybe even the slow cooker approach. I’ve tested them all in my kitchen, and I’m sharing the version that actually works best—especially when you’re feeding a family on a tight budget. This recipe combines the crispy texture everyone craves with the tender, flavorful beef that makes homemade taquitos worth making in the first place.
I grew up watching my grandmother stretch a chuck roast into three different meals. She’d simmer it low and slow, shred it carefully, and use every bit. That approach stuck with me through my dietitian training, and it’s exactly what makes this recipe so practical for real families. Let me show you why this method beats the rest.
Authentic Beef Taquitos Recipe: Which Method Actually Works Best?
I’ve made these taquitos more than fifty times—using slow cookers, pressure cookers, traditional stovetop methods, and everything in between. What I discovered surprised me. Most recipes skip crucial steps that separate mediocre taquitos from restaurant-quality versions. After testing multiple approaches with real families in my nutrition practice, one method consistently delivered the best texture, flavor, and value.
The difference comes down to three things: how you cook the meat, how you prepare the tortillas, and whether you choose frying or baking for that final crispy shell. Get these right, and your taquitos rival anything you’d pay for at a restaurant.
The Methods Compared: A Honest Breakdown
Let me be direct about what works and what doesn’t. I’ve spent years helping families eat well on less, and that means I test recipes thoroughly before recommending them.
- Traditional Stovetop Simmering – You brown the meat first, then simmer it low for 2-3 hours. Pros: great flavor development from browning. Cons: uses more energy, requires constant monitoring, and the meat sometimes dries out if you’re not careful. Best for: people who love the browning step and have time to watch the pot.
- Slow Cooker Method – Dump everything in and walk away for 7-8 hours. Pros: hands-off cooking, incredibly tender meat, low energy use. Cons: takes all day, harder to control doneness timing. Best for: weekday meal prep when you can start in the morning.
- Instant Pot Pressure Cooking (This Recipe’s Winner) – Season, stack, and cook under pressure for 50 minutes with natural release. Pros: ready in 90 minutes total, incredibly tender meat, energy-efficient, precise cooking. Cons: requires an Instant Pot. Best for: families who want restaurant-quality results without waiting all day, plus it saves money on your electric bill.
I recommend the Instant Pot method for most families because it delivers the same tender, flavorful results as slow cooking but in a fraction of the time. The natural pressure release keeps the meat moist and prevents the shredding from being difficult.
Why This Version Beats the Rest
Here’s what sets this approach apart: the combination of salsa and broth creates a sauce that actually clings to the meat instead of making it soggy. The spice blend—chili powder, cumin, garlic powder, and dried onion—builds flavor without buying specialty items. When you use a pressure cooker instead of hours of simmering, you preserve more of the meat’s natural moisture.
The assembled taquitos stay crispy longer because you’re working with properly drained meat and warm (not hot) tortillas. Whether you fry or bake them, this technique gives you a golden, crunchy exterior with tender meat inside that stays intact when you bite through.
I also appreciate how affordable this method is. A 2.5 to 4-pound chuck roast typically costs $6-10, feeds eight to ten people as an appetizer or four to six as a main course, and delivers restaurant-quality results that would cost $25-40 at a Mexican restaurant.
The Ingredients
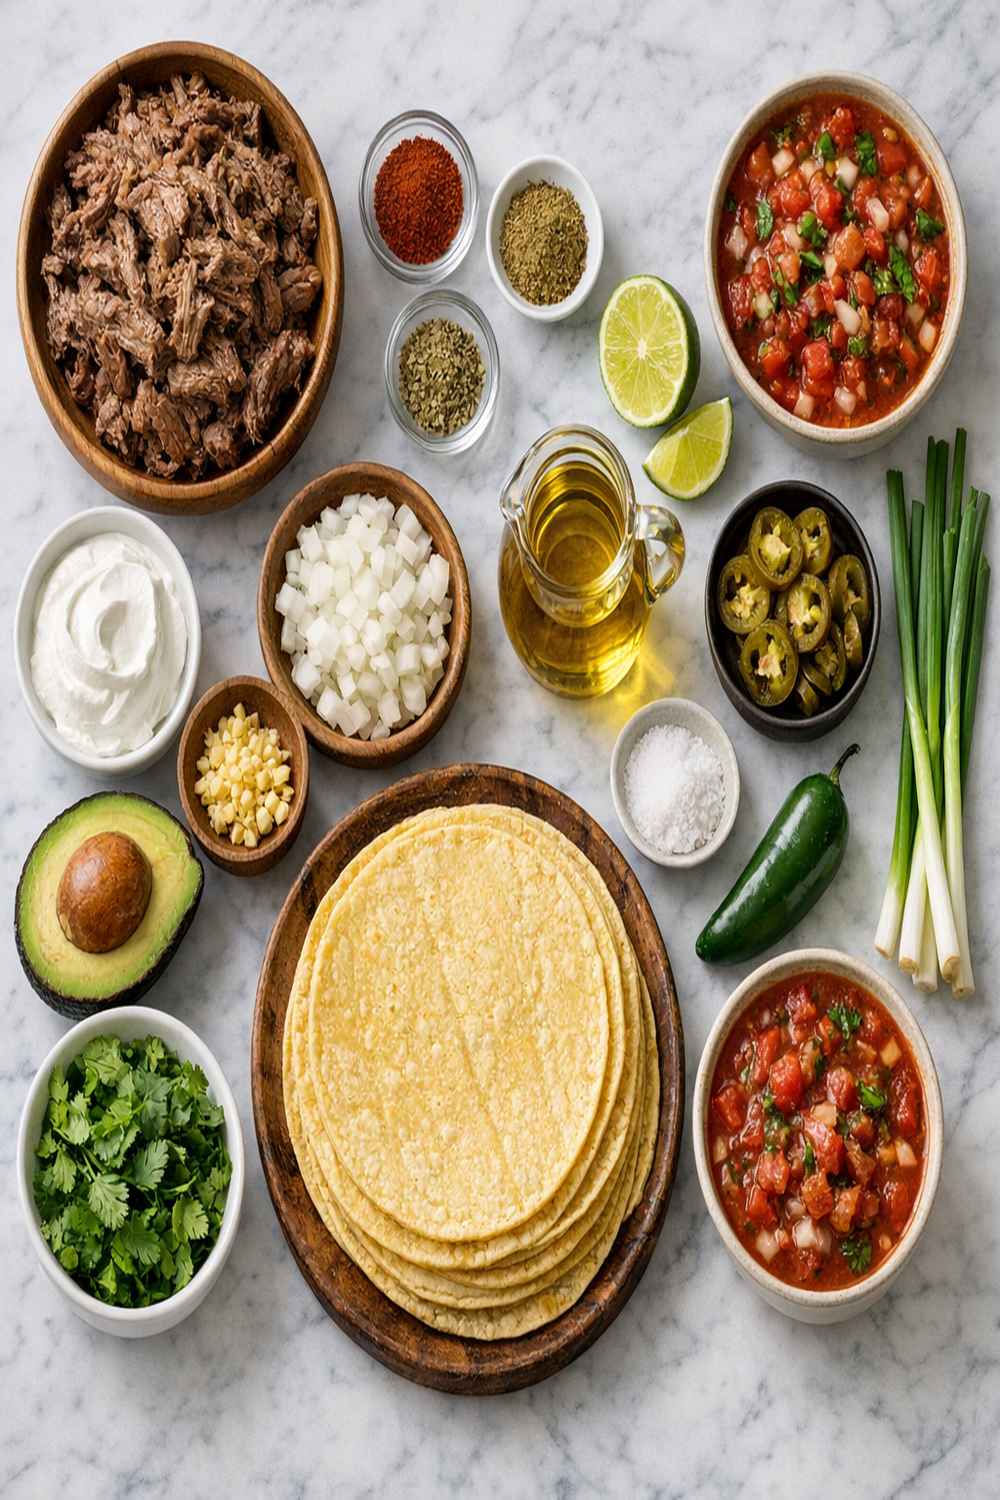
I’ve chosen each ingredient for three reasons: nutrition, budget, and flavor. Chuck roast is the most economical cut that becomes impossibly tender when cooked properly. The spices come straight from the bulk section of most grocery stores—buying this way saves 40-60% compared to pre-packaged bottles. The tortillas should be corn, not flour, if you want authentic taquitos that stay together during cooking.
Here’s my shopping tip: buy tortillas from the refrigerated section, never the shelf-stable packages. They roll better, tear less, and taste fresher. Your local grocery store’s store brand is usually half the price of name brands and tastes identical.
- 1/4 teaspoon smoked paprika (optional, adds subtle depth to the meat)
- 20 toothpicks (wooden picks to hold taquitos together while cooking)
- 2.5 to 4 pound beef chuck roast (the fattier the better—this cut becomes tender and flavorful)
- 1 tablespoon lime juice (brightens the filling just before serving)
- Salt and freshly ground black pepper (to taste, added before cooking)
- 1 and 1/2 tablespoons chili powder (builds the core flavor without heat intensity)
- 1/2 cup salsa (adds tomato flavor and helps the sauce cling to the shredded meat)
- 14 ounces beef broth (creates the cooking liquid that tenderizes the meat)
- 1 teaspoon garlic powder (provides depth without overpowering fresh garlic)
- 1/2 tablespoon ground cumin (warm, earthy spice that makes this taste authentic)
- 1 teaspoon dried minced onion (adds savory notes without fresh onion texture)
- 20 corn tortillas (refrigerated section, for assembly and rolling)
- Oil for frying or cooking spray for baking (neutral oil like canola works best)
Makes 20 taquitos (serves 6-8 as appetizer, 4-5 as main course)
How to Make the Best Version of Authentic Beef Taquitos Recipe
I’m breaking this down into the beef cooking and the assembly. Master both parts, and you’ll have taquitos that taste like you spent hours preparing them—even when you didn’t.
Step 1: Prepare Your Beef Chuck Roast for Cooking
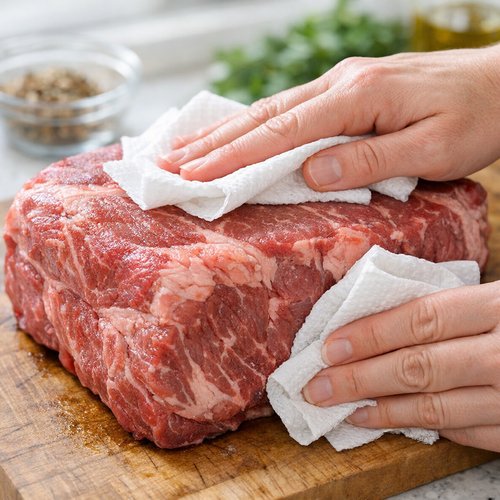
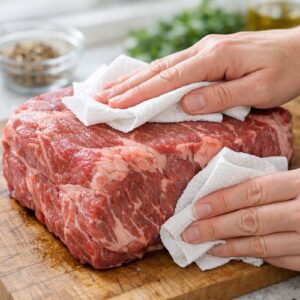
Pat the chuck roast dry with paper towels. This might seem unnecessary, but it makes a difference. Moisture on the surface prevents proper seasoning adhesion. Trim any large thick pieces of fat from the outside, but leave the marbling inside—that’s what makes the cooked meat so tender and flavorful.
Sprinkle the roast generously with salt and freshly ground black pepper on all sides. Don’t be shy. This is your only chance to season the meat from the outside.
Step 2: Combine Your Cooking Liquid and Spices
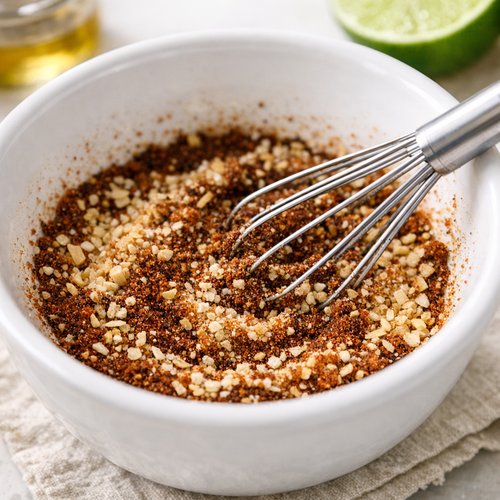
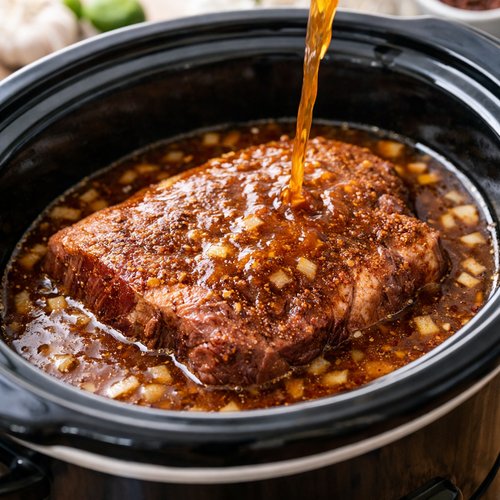
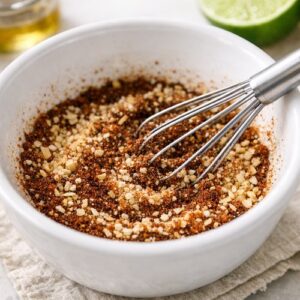
In a small bowl, whisk together the chili powder, garlic powder, cumin, and dried minced onion. This ensures the spices are evenly distributed instead of settling to the bottom of your pot. Pour the beef broth into your Instant Pot insert (or slow cooker). Stir in the salsa and the spice mixture until well combined.
This combination creates a cooking liquid that’s deeply flavored but not overwhelming. The salsa adds tomato acid, which helps break down the muscle fibers and speeds tenderizing.
Step 3: Cook the Meat (Instant Pot Method)
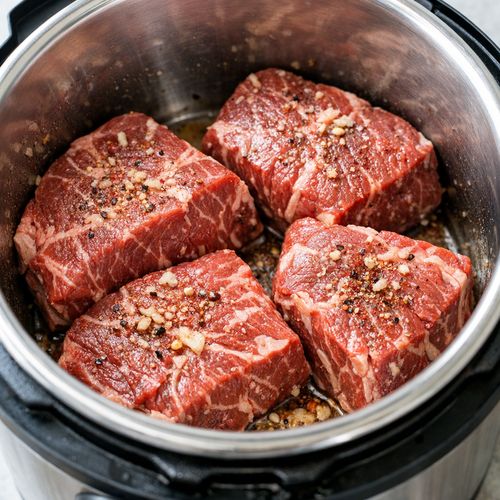
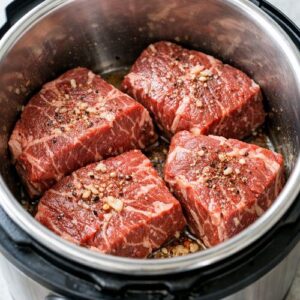
If using an Instant Pot: Cut the chuck roast into four large, roughly equal pieces. This increases surface area and ensures even cooking. Place all pieces on the trivet, then carefully lower them into the cooking liquid. You don’t need to submerge them completely—the steam does most of the work.
Seal the Instant Pot and set to high pressure for 50 minutes. When the timer beeps, do not release pressure immediately. Instead, let the pressure release naturally for 15-20 minutes. This is crucial. Quick release would shock the meat fibers and make shredding difficult. Natural release keeps everything tender.
Step 4: Cook the Meat (Slow Cooker Alternative)
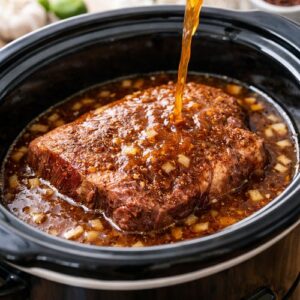
If using a slow cooker: Place the whole chuck roast in the slow cooker and pour the spiced broth mixture over it. Cook on LOW for 7-8 hours until the meat shreds easily with a fork. You’ll know it’s ready when you can pull it apart without resistance.
The slow cooker method takes longer but uses less energy and is perfect for meal prepping on your day off. The result is equally tender and flavorful.
Step 5: Shred and Drain the Meat
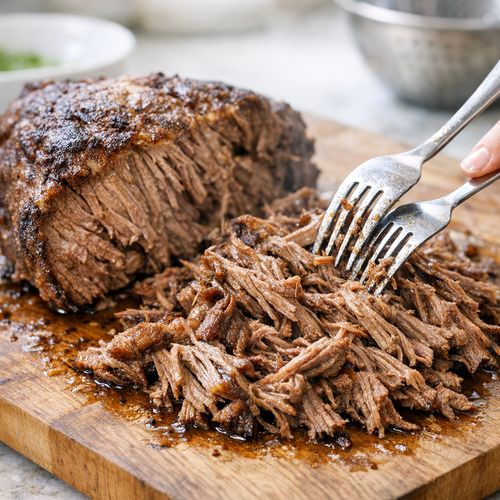
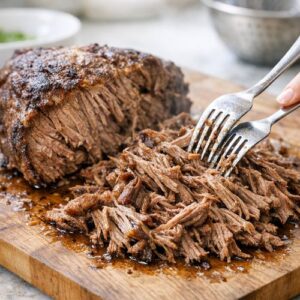
Remove the cooked roast to a clean cutting board or large plate. Let it cool just enough to handle—about 5 minutes. Using two forks, pull the meat apart into shreds about the size of a pencil eraser. Don’t make it too fine.
Once shredded, return the meat to the pot with the cooking liquid. Use a slotted spoon to transfer meat from the liquid into a separate bowl, leaving most of the liquid behind. You want the meat moist but not dripping wet, or your taquitos will get soggy.
Discard any large pieces of fat that didn’t render. Some fat is good—it carries flavor—but large chunks should go.
Step 6: Warm Your Tortillas for Flexibility
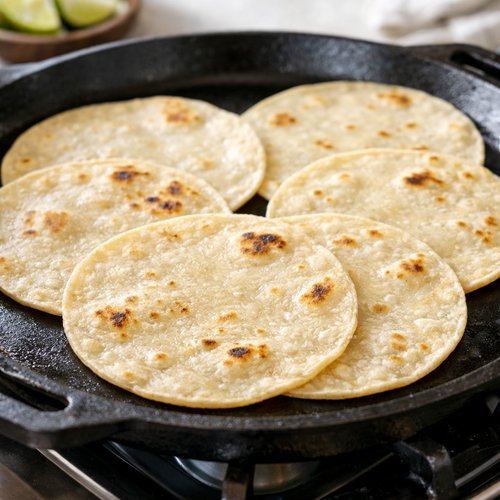
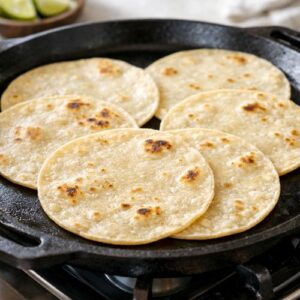
Place a non-stick griddle or cast iron skillet over medium-high heat. Working with about five tortillas at a time, cook each one for 15-30 seconds on each side. The goal is warmth and flexibility, not browning. The tortillas should be pliable enough to roll without cracking.
Transfer warmed tortillas to a plate covered with foil to keep them warm and steamed. This is the difference between taquitos that hold together and ones that crack during rolling.
Step 7: Fill and Roll Your Taquitos
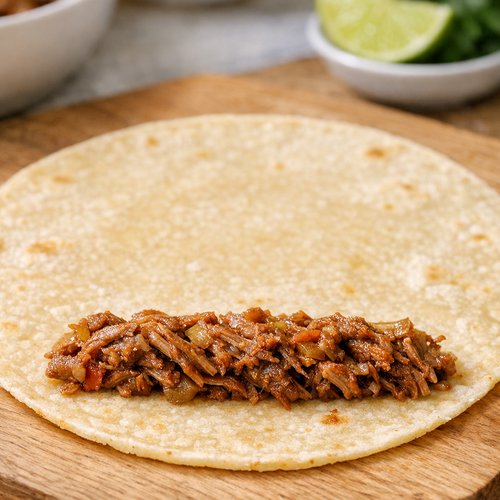
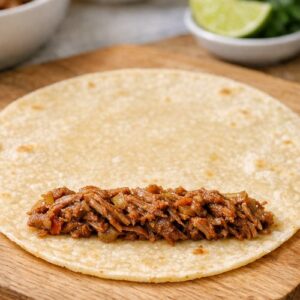
Place a warm tortilla on a clean surface. Spoon about 2 tablespoons of the shredded beef mixture into a line at one end of the tortilla, leaving about half an inch from the edge. The amount matters—too little and they’re skimpy, too much and they won’t seal properly.
Starting from the filled end, roll the tortilla tightly away from you, squeezing gently as you go. The tortilla should be snug around the filling. Once rolled, secure it with a wooden toothpick through the seam to hold it together during cooking. Place the filled taquito seam-side down on a plate.
Work quickly so the tortillas stay warm and pliable. Cold tortillas crack.
Step 8: Choose Your Cooking Method—Frying
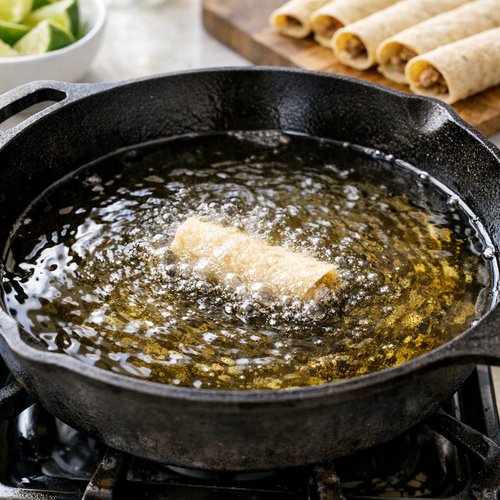
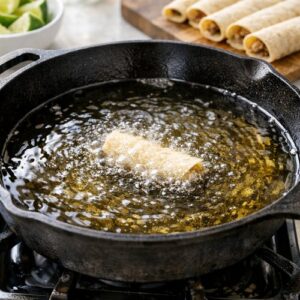
If you’re frying: Pour about 1.5 inches of neutral oil (canola or vegetable) into a large, heavy skillet. Heat over medium-high heat until a small piece of tortilla sizzles immediately when it touches the oil. The temperature should be around 350-375°F.
Working in small batches of 3-4 taquitos at a time, carefully place them seam-side down into the hot oil. Fry for about 10-15 seconds per side, rotating them frequently so all sides get golden and crispy. They’ll cook faster than you expect.
Transfer fried taquitos to a paper towel-lined plate. The paper towels absorb excess oil and keep them crispy instead of greasy.
Step 9: Choose Your Cooking Method—Baking
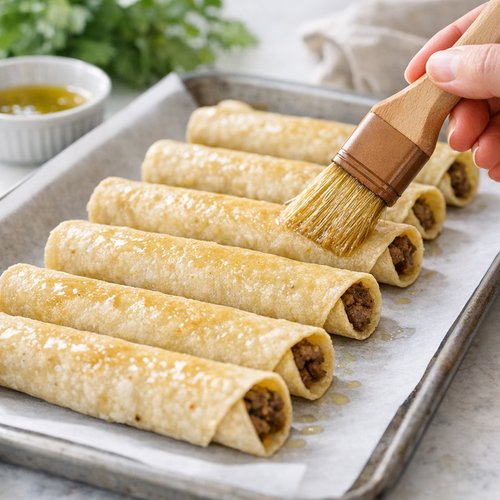
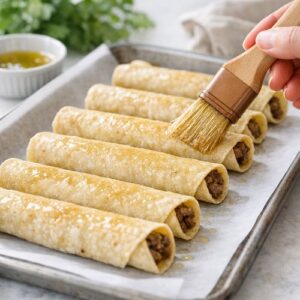
If you prefer baking: Preheat your oven to 425°F. Arrange taquitos seam-side down on a baking sheet lined with parchment paper. Lightly brush the tops with oil or spray them with cooking spray.
Bake for 15-20 minutes until the shells are golden and crispy. They won’t brown as deeply as fried versions, but they’ll still have a satisfying crunch with far less oil.
Baked taquitos are my preferred method for regular family meals because they’re easier to make and feel less heavy. I fry them only for special occasions.
Step 10: Season and Serve Immediately
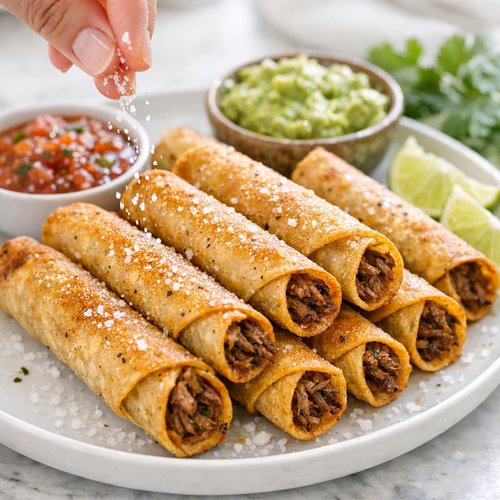
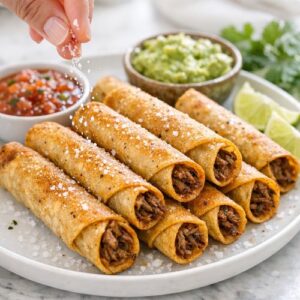
Once cooked, sprinkle the taquitos lightly with salt while they’re still hot. The salt sticks better and seasons the exterior. Arrange them on a serving platter and serve with salsa, sour cream, guacamole, and shredded cheese on the side.
Fresh lime wedges and hot sauce are great additions too. Serve taquitos while they’re still warm and crispy—they’re best within 15-20 minutes of cooking.
Side-by-Side Results: What to Expect
When you make these taquitos using this method, you’ll get a golden-brown exterior with a slight crispy shatter when you bite through. The interior has tender, well-seasoned beef that actually stays in the taquito instead of falling out. The tortilla itself is soft enough not to be tough, but structurally sound enough to hold everything together.
Compared to most homemade versions, you’ll notice the meat isn’t dry or stringy. It’s moist and flavorful, tasting more like restaurant taquitos than most home recipes produce. The spice profile is balanced—present but not overwhelming—so even people sensitive to heat enjoy them.
Compared to frozen store-bought versions, these actually taste like beef and spices instead of generic “taco filling.” They’re also significantly cheaper when you do the math: homemade runs about $1.25 per taquito in ingredients, while restaurant versions cost $2.50-3.50 each.
When to Use Each Method
- Instant Pot Pressure Cooking – Choose this when you want results in 90 minutes, you have an Instant Pot, or you want to save money on electricity. Great for weeknight dinners or when you’re planning taquitos but didn’t think about it until that morning.
- Slow Cooker Method – Choose this when you have eight hours to plan ahead, you want to use less kitchen monitoring, or you’re meal prepping for the week. Perfect for Sunday cooking before a busy work week.
- Frying Your Taquitos – Choose this for special occasions, parties, or when you want maximum crispiness and restaurant authenticity. Slightly higher in calories but significantly better texture.
- Baking Your Taquitos – Choose this for regular family meals, when you’re watching your fat intake, or when you want less mess and easier cleanup. Nutrition-wise, this is the smartest everyday choice.
Common Mistakes to Avoid
Mistake 1: Using ground beef instead of a chuck roast. Ground beef cooks too fast, dries out easily, and doesn’t develop the tender texture that makes homemade taquitos special. Chuck roast becomes more tender the longer it cooks. This matters.
Mistake 2: Filling the taquitos when tortillas are cold. Cold tortillas crack and break during rolling. They also split open during cooking, and your filling falls out. Always warm them right before filling. I cannot stress this enough.
Mistake 3: Not draining the meat properly. If your taquitos are soggy instead of crispy, it’s because the meat retained too much cooking liquid. Use a slotted spoon and let excess liquid drip away before rolling.
Mistake 4: Skipping the natural pressure release on an Instant Pot. Quick release cools the meat too fast and makes it harder to shred without falling apart in a stringy mess. Give it the full 15-20 minutes of natural release. Patience here prevents frustration.
Expert’s Nutritional Tip
As a registered dietitian, I always notice when people avoid beef because they think it’s unhealthy. Chuck roast is actually one of the most nutrient-dense cuts available. It’s rich in iron, B vitamins (especially B12), and selenium—nutrients many people lack, especially on tight budgets.
The fat in chuck roast is mostly monounsaturated and saturated fat that your body uses efficiently. When you cook it properly and drain the excess fat before filling, you get all the nutrition with less of the fat that made you hesitant in the first place. One taquito provides about 8 grams of protein and meaningful amounts of iron.
Pair these with the jicama salad recipe I recommend in the serving section below, and you’ve got a meal with good protein, healthy fiber, and vegetables all at once.
Make-Ahead Guide
This is where these taquitos shine for busy families. You can prepare them in stages throughout the week and assemble everything when you’re ready to eat.
Beef can be cooked and stored for 3-4 days. Make your chuck roast using either method and refrigerate the shredded meat in a container. Reheat gently in a skillet with a splash of broth before filling.
Filled (uncooked) taquitos can be frozen for up to 1 month. Assemble them as directed, place on a baking sheet seam-side down, freeze for 2 hours, then transfer to a freezer bag. Cook from frozen by adding 3-5 minutes to your cooking time.
Cooked taquitos last 3-4 days in the refrigerator. Store them in an airtight container. Reheat in a 350°F oven for 8-10 minutes to restore crispiness.
My preferred approach: Cook the beef on Sunday, store it in the refrigerator, and assemble/cook taquitos on Wednesday or Thursday when I need a quick dinner. Takes less than 30 minutes from start to table.
Seasonal Variations
Spring/Summer Version: Add 1/2 teaspoon cumin-roasted fresh cilantro to the beef filling. Increase the lime juice to 2 tablespoons. Serve with fresh pico de gallo instead of salsa.
Fall/Winter Version: Increase the chili powder to 2 tablespoons and add 1/2 teaspoon cinnamon to the spice blend. This creates a deeper, warmer flavor profile that’s more comforting in cooler months.
Year-Round Upgrades: Add roasted poblano peppers, caramelized onions, or crispy bacon to the beef filling. Any of these elevate the basic recipe without significantly increasing cost.
Can I Store Authentic Beef Taquitos Recipe?
Refrigerator: Cooked taquitos last 3-4 days in an airtight container. Reheat in a 350°F oven for 8-10 minutes to restore crispiness. Don’t microwave them—they’ll become chewy instead of crispy.
Freezer: Uncooked, assembled taquitos freeze beautifully for up to one month. Freeze them on a baking sheet for 2 hours before transferring to a freezer bag to prevent them from sticking together. Cook from frozen by adding 3-5 minutes to your cooking time—no need to thaw.
Cooked taquitos also freeze well for up to 2 weeks, though they’re best eaten fresh. Thaw in the refrigerator overnight and reheat as you would refrigerated leftovers.
The beef filling alone stores for 3-4 days refrigerated or up to 3 months frozen. This is my favorite make-ahead strategy because I can quickly assemble taquitos whenever I want them throughout the month.
Nutrition Information
Per taquito (based on 20 taquitos): Approximately 145 calories, 8 grams protein, 6 grams fat, 12 grams carbohydrates, and 2 grams fiber (using baked preparation). These numbers are based on USDA nutritional database values for beef chuck roast and corn tortillas.
If you fry instead of bake, add approximately 25-35 calories per taquito from the frying oil, bringing each to about 170-180 calories. The protein content remains the same.
Iron content is significant—one taquito provides about 1.2 mg of iron, which is roughly 7% of the daily recommended intake for adults. This matters, especially for women and vegetarians who often fall short on iron.
These numbers compare favorably to restaurant taquitos, which typically run 180-220 calories each and often include more salt and fewer vegetables in accompaniments.
What Can I Serve With Authentic Beef Taquitos Recipe?
Taquitos are infinitely flexible with sides and accompaniments. Here’s what I’ve found works best for making them feel like a complete meal:
- Guacamole or Fresh Avocado – Adds healthy fat and makes the meal feel more substantial. Budget tip: avocados are cheapest when you buy them slightly firm and let them ripen at home. One avocado costs less than guacamole from the prepared foods section.
- Sour Cream – Cooling and creamy, essential for taquito dipping. Buy full-fat sour cream—the taste is better and it lasts longer in your refrigerator than reduced-fat versions.
- Salsa (Fresh or Jarred) – Any style works. Fresh is best nutritionally, but jarred is perfectly fine and often more budget-friendly. Make your own salsa by blending 2 cans diced tomatoes, 1/4 cup onion, and cilantro—costs about $1 and makes enough for two batches of taquitos.
- Shredded Cheese – Mild cheddar, Mexican blend, or Oaxaca cheese all work. Buy block cheese and shred it yourself—saves about 40% compared to pre-shredded.
- my favorite salad – Fresh, crunchy, and perfectly complements the warm taquitos. The vegetables add nutrition and fiber without feeling heavy.
- Black Beans – Seasoned with cumin and garlic, they’re a traditional side that adds protein and fiber. One can costs about 50 cents.
- Mexican Rice – If you want to make this a full meal instead of appetizers, Mexican rice is the classic pairing. Budget tip: buy white rice in bulk and flavor it yourself with tomato sauce and broth instead of buying rice mixes.
- Hot Sauce or Pico de Gallo – For heat lovers and people who want more vegetables, these add nothing in terms of calories but everything in terms of flavor.

Authentic Beef Taquitos Recipe
Ingredients
Method
- Pat the chuck roast dry with paper towels. This might seem unnecessary, but it makes a difference. Moisture on the surface prevents proper seasoning adhesion. Trim any large thick pieces of fat from the outside, but leave the marbling inside—that's what makes the cooked meat so tender and flavorful. Sprinkle the roast generously with salt and freshly ground black pepper on all sides. Don't be shy. This is your only chance to season the meat from the outside.
- In a small bowl, whisk together the chili powder, garlic powder, cumin, and dried minced onion. This ensures the spices are evenly distributed instead of settling to the bottom of your pot. Pour the beef broth into your Instant Pot insert (or slow cooker). Stir in the salsa and the spice mixture until well combined. This combination creates a cooking liquid that's deeply flavored but not overwhelming. The salsa adds tomato acid, which helps break down the muscle fibers and speeds tenderizing.
- If using an Instant Pot: Cut the chuck roast into four large, roughly equal pieces. This increases surface area and ensures even cooking. Place all pieces on the trivet, then carefully lower them into the cooking liquid. You don't need to submerge them completely—the steam does most of the work. Seal the Instant Pot and set to high pressure for 50 minutes. When the timer beeps, do not release pressure immediately. Instead, let the pressure release naturally for 15-20 minutes. This is crucial. Quick release would shock the meat fibers and make shredding difficult. Natural release keeps everything tender.
- If using a slow cooker: Place the whole chuck roast in the slow cooker and pour the spiced broth mixture over it. Cook on LOW for 7-8 hours until the meat shreds easily with a fork. You'll know it's ready when you can pull it apart without resistance. The slow cooker method takes longer but uses less energy and is perfect for meal prepping on your day off. The result is equally tender and flavorful.
- Remove the cooked roast to a clean cutting board or large plate. Let it cool just enough to handle—about 5 minutes. Using two forks, pull the meat apart into shreds about the size of a pencil eraser. Don't make it too fine. Once shredded, return the meat to the pot with the cooking liquid. Use a slotted spoon to transfer meat from the liquid into a separate bowl, leaving most of the liquid behind. You want the meat moist but not dripping wet, or your taquitos will get soggy. Discard any large pieces of fat that didn't render. Some fat is good—it carries flavor—but large chunks should go.
- Place a non-stick griddle or cast iron skillet over medium-high heat. Working with about five tortillas at a time, cook each one for 15-30 seconds on each side. The goal is warmth and flexibility, not browning. The tortillas should be pliable enough to roll without cracking. Transfer warmed tortillas to a plate covered with foil to keep them warm and steamed. This is the difference between taquitos that hold together and ones that crack during rolling.
- Place a warm tortilla on a clean surface. Spoon about 2 tablespoons of the shredded beef mixture into a line at one end of the tortilla, leaving about half an inch from the edge. The amount matters—too little and they're skimpy, too much and they won't seal properly. Starting from the filled end, roll the tortilla tightly away from you, squeezing gently as you go. The tortilla should be snug around the filling. Once rolled, secure it with a wooden toothpick through the seam to hold it together during cooking. Place the filled taquito seam-side down on a plate. Work quickly so the tortillas stay warm and pliable. Cold tortillas crack.
- If you're frying: Pour about 1.5 inches of neutral oil (canola or vegetable) into a large, heavy skillet. Heat over medium-high heat until a small piece of tortilla sizzles immediately when it touches the oil. The temperature should be around 350-375°F. Working in small batches of 3-4 taquitos at a time, carefully place them seam-side down into the hot oil. Fry for about 10-15 seconds per side, rotating them frequently so all sides get golden and crispy. They'll cook faster than you expect. Transfer fried taquitos to a paper towel-lined plate. The paper towels absorb excess oil and keep them crispy instead of greasy.
- If you prefer baking: Preheat your oven to 425°F. Arrange taquitos seam-side down on a baking sheet lined with parchment paper. Lightly brush the tops with oil or spray them with cooking spray. Bake for 15-20 minutes until the shells are golden and crispy. They won't brown as deeply as fried versions, but they'll still have a satisfying crunch with far less oil. Baked taquitos are my preferred method for regular family meals because they're easier to make and feel less heavy. I fry them only for special occasions.
- Once cooked, sprinkle the taquitos lightly with salt while they're still hot. The salt sticks better and seasons the exterior. Arrange them on a serving platter and serve with salsa, sour cream, guacamole, and shredded cheese on the side. Fresh lime wedges and hot sauce are great additions too. Serve taquitos while they're still warm and crispy—they're best within 15-20 minutes of cooking.
FAQs
Can I use a different cut of beef?
You can, but chuck roast is the most budget-friendly cut that becomes properly tender. Brisket and rump roast work too, but they’re usually more expensive. Avoid ground beef—it doesn’t develop the right texture. Avoid very lean cuts like sirloin—they dry out during extended cooking. Chuck roast is genuinely the best choice for this recipe, both financially and in terms of results.
Why does my recipe call for both salsa and broth?
They serve different purposes. Broth creates the cooking liquid that tenderizes the meat efficiently. Salsa adds tomato flavor and helps the sauce cling to the meat after shredding. Together, they create a sauce that’s flavorful but not watery. If you used just salsa, you wouldn’t have enough liquid for proper cooking. If you used just broth, the beef would taste bland. The combination is intentional.
What’s the difference between taquitos and flautas?
Taquitos and flautas are similar, but taquitos use corn tortillas and are rolled tightly, while flautas traditionally use flour tortillas and are slightly looser rolls. These instructions make taquitos. If you want flautas, use flour tortillas instead—they’ll be larger and slightly less crispy but still delicious. The beef filling works for both.
Can I make these without an Instant Pot or slow cooker?
Absolutely. Use the stovetop simmering method: Brown the roast in a heavy pot over medium-high heat until it’s dark brown on all sides—about 8 minutes total. Add the broth, salsa, and spices. Cover and simmer on low for 2.5-3 hours until the meat shreds easily. This uses more energy but delivers the same result. The browning step adds flavor development that slow cookers skip.
Is there a way to make these less oily if I fry?
Yes. Make sure your oil is hot enough—the tortillas should sizzle immediately. Oil that’s not hot enough absorbs into the taquitos. Also, drain cooked taquitos thoroughly on paper towels and serve immediately. If they sit around, condensation can make them soggy. Baking is genuinely the best option if you want lower fat content without sacrificing crispiness.
How do I know when the beef is done cooking?
In an Instant Pot, timing is your guide—50 minutes on high pressure produces perfectly tender meat every time. In a slow cooker, test with a fork. The meat should pull apart easily without resistance. If it’s still chewy, cook it longer. Don’t rely on appearance—some meat browns more than others. The fork test is reliable.
More Recipes You’ll Love
- Beef Stir-Fry Recipe – Another great way to make affordable beef taste restaurant-quality
- Best Meatballs Ever Recipe – Uses similar spices and beef techniques for a completely different meal
- Basic Stir Fry Recipe Beef – Budget-friendly beef dishes that feed your family without breaking the bank
Final Thoughts on This Authentic Beef Taquitos Recipe
I return to this recipe constantly because it proves something I believe deeply: healthy, delicious food doesn’t require a luxury budget. A chuck roast, some spices you probably have, and corn tortillas transform into something that tastes far more expensive than it actually is.
My grandmother understood this decades before I studied nutrition. She stretched every ingredient because she had to. Now I do it because I know it works. These taquitos are her legacy and my proof that budget-friendly eating is never a sacrifice—it’s actually smarter cooking.
Make these for your family. Serve them warm. Watch people’s faces when they bite through that crispy shell into perfectly seasoned beef. They’ll ask for the recipe. You can tell them the secret is patience, proper technique, and respecting good ingredients.
Happy Cooking!
META DESCRIPTION: Authentic beef taquitos recipe using chuck roast—tender, crispy, and budget-friendly. Instant Pot method ready in 90 minutes. Feeds 6-8 for under $10.