
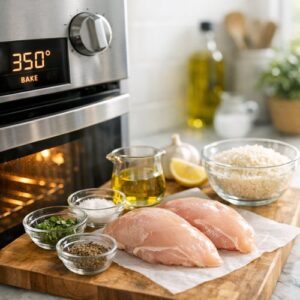
Ingredients
Method
Step 1: Prepare Your Oven and Workspace
- Turn your oven on to 350°F (180°C). As it heats up, you can do your prep work. Don't skip the preheating—this is essential so your food cooks evenly. While the oven warms, gather all your ingredients on the counter in front of you. This is called mise en place, and it's a professional technique that keeps you calm and organized. When everything is already measured and ready, the actual cooking part feels less stressful.
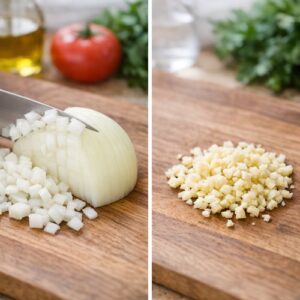
Step 2: Chop Your Onion and Mince Your Garlic
- Cut your onion in half, peel away the papery outside layer, and place the flat side down on your cutting board. This makes it way more stable and safer. Slice the onion into rough pieces—you don't need uniformity here. Smaller pieces will soften faster during that initial 15-minute bake. For garlic, smash each clove gently with the flat of your knife before mincing. This loosens the skin and makes mincing easier. Mince until pieces are roughly the size of a grain of rice. Your hands might smell garlicky—this is normal and washes away with soap and water.
Step 3: Scatter Onion and Garlic, Add Your Fat
- Grab your baking dish and scatter the chopped onion across the bottom. Don't worry about arranging it perfectly—just distribute it loosely. Sprinkle the minced garlic over the onion. Place your 2 tablespoons of butter (or olive oil) directly in the center of the dish. Put the baking dish in the preheated oven for exactly 15 minutes. This step is crucial. You're softening the onion and infusing your fat with garlic flavor. Peek in around the 12-minute mark to make sure nothing is browning too quickly. If you see bits turning dark, give it a gentle stir. Some golden color is perfect, but blackened bits will taste bitter.
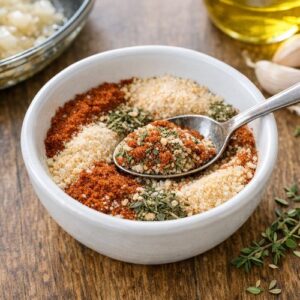
Step 4: Make Your Chicken Seasoning Blend
- While the onion and garlic soften, combine your spices in a small bowl. Mix together the paprika, dried thyme, garlic powder, onion powder, salt, and black pepper. Stir everything together with a spoon until evenly combined. This blend is your chicken rub. The beauty of mixing spices ahead of time is that they distribute evenly rather than clumping in one spot. This is why pre-made seasoning mixes cost more—you're paying for this convenience.
Step 5: Season Your Chicken
- Pat your chicken thighs dry with a paper towel. Moisture on the surface keeps seasoning from sticking properly. Take each thigh and sprinkle your spice blend generously on both sides. Use about one-quarter of your mixture per thigh. Rub it gently into the surface with your fingers. Don't be timid—these seasonings are there to flavor your meat. You want to see color on the chicken.
Step 6: Check Your Onions, Then Add Rice
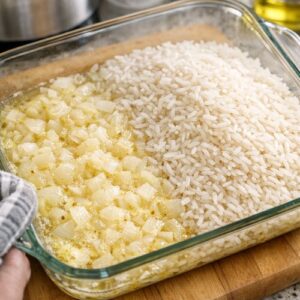
- When the 15 minutes are up, carefully remove your baking dish from the oven. The butter should be melted and the onion should look soft and slightly golden. If you see any pieces of onion that look too dark, stir them under. Pour your 1½ cups of uncooked rice into the pan. Stir everything together thoroughly. You're coating the rice in that buttery, garlicky onion mixture. This step is why the finished rice tastes incredible—every grain gets coated in flavor.
Step 7: Arrange Chicken on the Rice Bed
- Create a small space in the center of the rice and lay each chicken thigh, skin-side up, on top of the rice. Don't push them down hard—just nestle them gently into place. They don't need to be completely submerged. They're sitting on top like little islands. This arrangement is intentional. The chicken cooks gently from the steam rising up, and the skin-side-up position lets the top get slightly crispy.
Step 8: Pour Liquid Carefully Around (Not Over) the Chicken
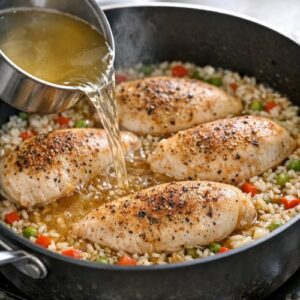
- Measure out your chicken broth and hot water. You can microwave the broth for 90 seconds if it's cold from the fridge—this helps everything cook more evenly. Pour the broth and water around the chicken, not directly over it. Pour slowly and carefully. If liquid splashes onto the top of the chicken, that's okay, but you're aiming to pour around the edges. The liquid should reach about three-quarters of the way up the rice layer.
Step 9: Cover and Bake Phase One
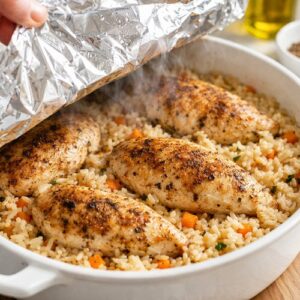
- Tear off a piece of aluminum foil large enough to cover your baking dish loosely. Press it gently over the top—you're not sealing it hermetically, just creating a loose tent. This foil traps steam inside without creating so much pressure that liquid boils violently. Bake covered for 30 minutes. Don't open the oven door during this time. The moisture is doing important work inside.
Step 10: Remove Foil and Finish Cooking
- After 30 minutes, carefully remove the foil (watch out—steam can surprise you). At this point, your liquid should be mostly absorbed. The rice will look nearly cooked. If your chicken pieces look very pale, spray the top lightly with cooking oil (this is optional but creates a nice golden finish). Return the dish to the oven, uncovered, for a final 20 minutes. The chicken will cook the rest of the way, the rice will finish absorbing any remaining moisture, and the chicken skin will get slightly golden.
Step 11: Check for Doneness
- After 20 minutes, remove the baking dish. Look for two things: The rice should have absorbed the liquid (very little liquid visible in the pan), and the chicken should be cooked through (no pink inside when you cut into the thickest part). The internal temperature should be 165°F if you have a meat thermometer, but honest conversation? Most home cooks don't have one. Instead, cut into the thickest thigh. If the juices run clear and there's no pink, you're done.
Step 12: Rest and Fluff
- Remove the baking dish from the oven and let it sit undisturbed for 5 minutes. This resting time is non-negotiable. It lets carryover cooking finish the job gently and lets the rice absorb any final bits of moisture. After 5 minutes, remove the chicken pieces to a plate, then take a fork and gently fluff the rice. Don't mash it—just separate the grains with the tines of your fork. Sprinkle with fresh parsley or thyme if you have it.
Notes
- ¾ teaspoon salt (table salt or kosher; I prefer kosher for better texture distribution)
- ½ teaspoon garlic powder (not garlic salt—you control salt separately)
- 2 tablespoons butter or olive oil (either works; use whatever you have; olive oil is slightly cheaper in bulk)
- 1½ cups uncooked white rice (regular long-grain, the least expensive rice variety; buy in bulk bins if available)
- 1 teaspoon dried thyme (find in the spice aisle; buy in bulk bins rather than small jars)
- Black pepper (freshly cracked if possible; pre-ground is fine if that's what you have)