This post contains affiliate links. As an Amazon Associate I earn from qualifying purchases.
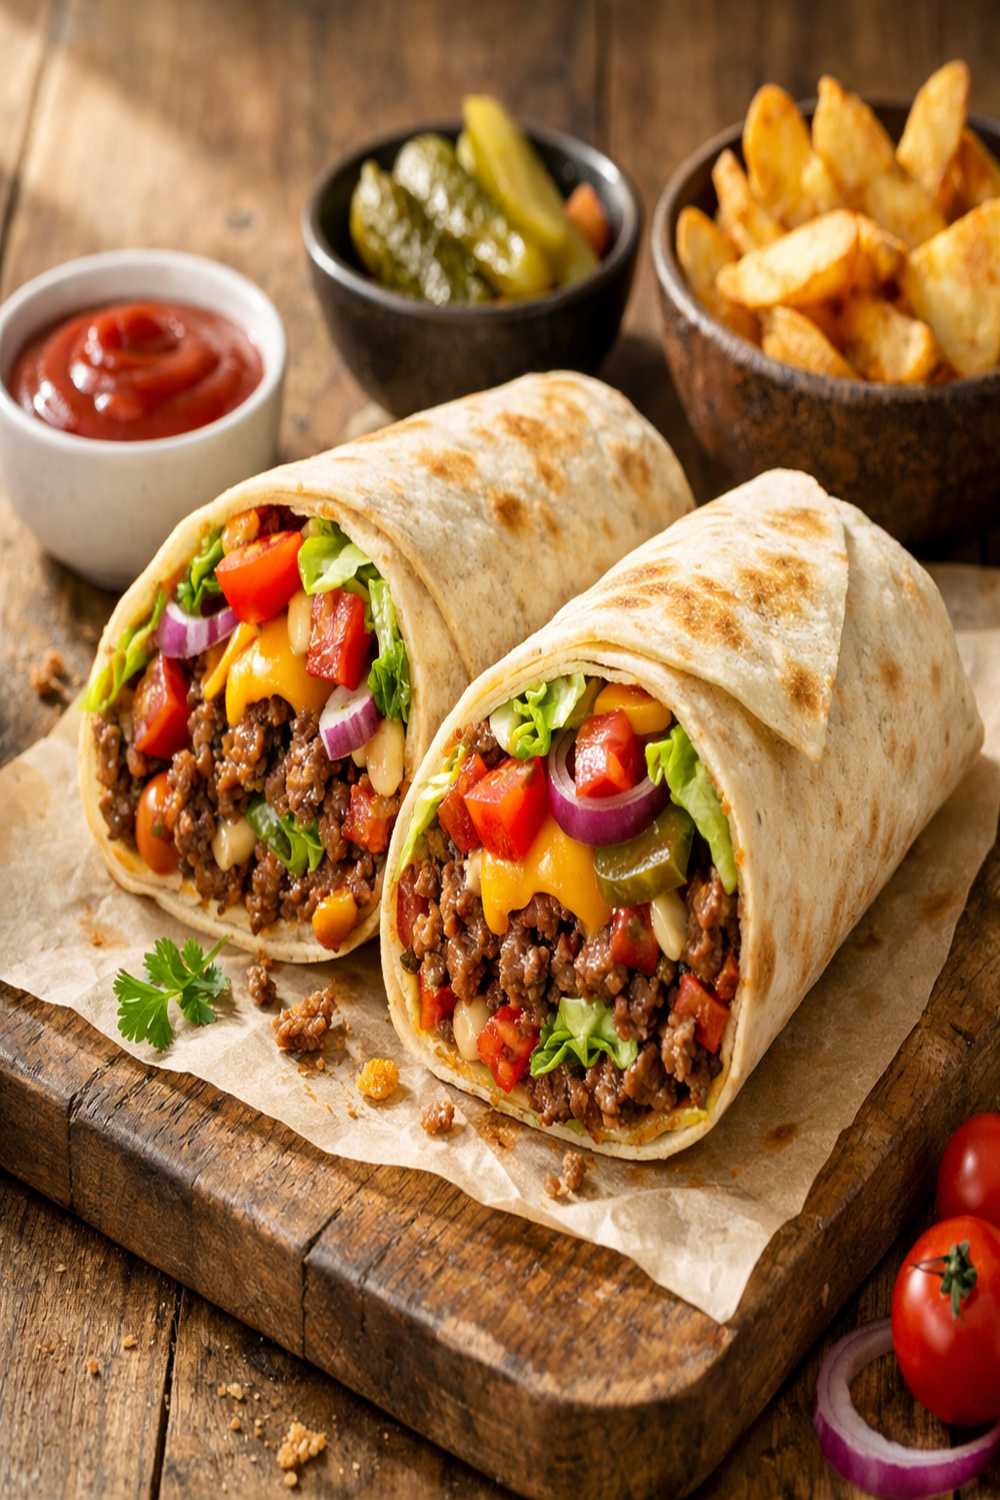
I still remember my grandmother standing at her kitchen counter, transforming simple pantry staples into something that made my whole family gather around the table. She taught me that you don’t need fancy ingredients or hours in the kitchen to create meals people actually want to eat. Today, I’m sharing one of her best-kept secrets—a burger wrap that tastes like restaurant quality but costs less than $2 per serving. Ready in just 25 minutes with one pan, this recipe has become my go-to when I need something filling, impressive, and genuinely affordable. I’ve adapted her technique through my decade of clinical nutrition work, and I can promise you’ll make this again and again. Check out my Basic Stir Fry Recipe Beef for another quick weeknight option that uses similar pantry staples.
Easy Burger Wrap Recipe in 25 Minutes (One Pan, Budget-Friendly)
This isn’t just another wrap recipe. It’s the answer to “What’s for dinner?” when you’re tired, busy, and looking at an empty wallet. I’ve made this literally hundreds of times—for my family, for clients struggling with meal planning, and for anyone who believes healthy eating shouldn’t drain your grocery budget. The beauty is in the simplicity: one skillet, honest ingredients you already have, and a result that tastes like you spent way more time and money than you actually did.
Why You’ll Love This Recipe
- Ready in 25 minutes flat – from raw ingredients to plated meal in less time than a TV episode
- Minimal cleanup required – one skillet for the filling, a grill or pan for toasting, that’s it
- Costs under $2 per serving – lean ground beef is one of the most affordable proteins when you buy it on sale and freeze in portions
- Tastes like restaurant quality – the secret is in the seasoning balance and that crispy grilled exterior
- Works for any appetite or crowd size – easily scale from one person to twelve people, just multiply the ingredients
- Packed with protein and fiber – keeps you full for hours, which means fewer snack cravings and a smaller grocery bill
What You Need
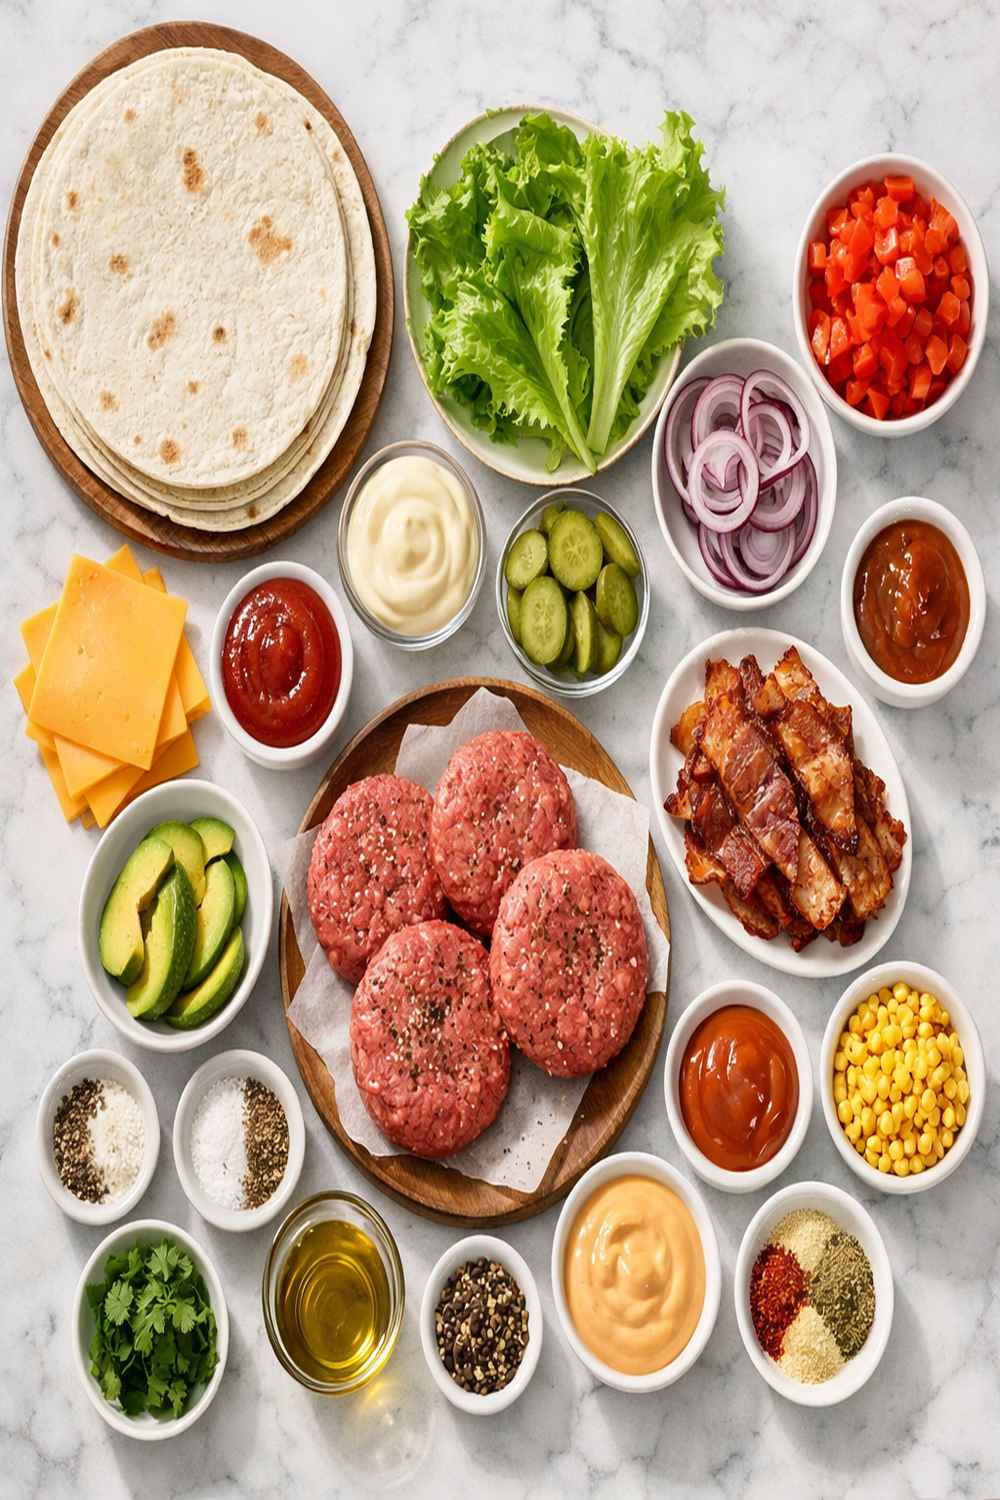
Just 11 simple ingredients, most of which are probably already hiding in your kitchen right now:
- 1 pound lean ground beef (choose 90/10 or 85/15 for the best balance of flavor and fat)
- 4 large flour tortillas (or large wraps, whatever you can find on sale)
- 1 tablespoon Worcestershire sauce (the umami-rich secret that makes everything taste better)
- 2 tablespoons ketchup (or use tomato paste mixed with a touch of vinegar to save money)
- 1 teaspoon dried minced onion (fresh onion works too, just mince it fine)
- ½ teaspoon black pepper (freshly cracked tastes best, but ground is fine)
- ¼ teaspoon salt (add more if your beef is very lean, less if you’re watching sodium)
- ¾ cup shredded cheddar cheese (buy the block and shred it yourself—saves about 40%)
- 2 cups fresh lettuce (any kind you have—iceberg, romaine, whatever’s on sale)
- 1 medium tomato (sliced thin, or use canned if fresh isn’t budget-friendly)
- ½ medium red onion (sliced thin, adds a fresh bite without extra cost)
- 1 tablespoon yellow mustard (adds tang and complexity for pennies)
How to Make Burger Wrap Recipe in 5 Steps
Here’s exactly how to turn these ingredients into four beautiful, satisfying wraps:
Step 1: Brown and Crumble the Beef
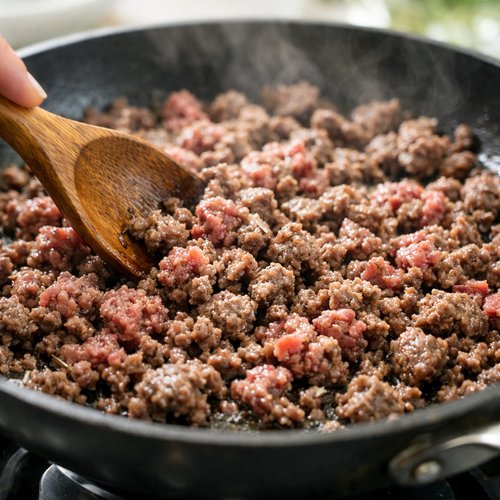
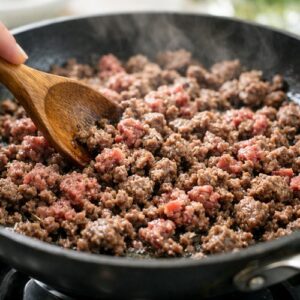
Heat your skillet over medium-high heat and add the pound of ground beef. Use a wooden spoon or spatula to break it into small crumbles as it cooks. This step takes about 5 minutes. You want no pink remaining. Once it’s cooked through, carefully tilt the pan and drain any excess grease into a small container (save it for cooking vegetables later—waste nothing).
Step 2: Build the Flavor Base
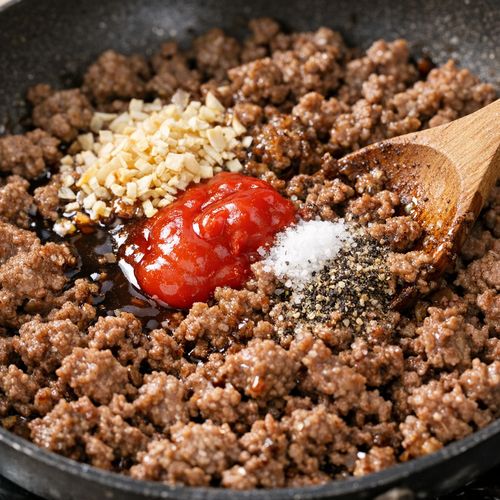
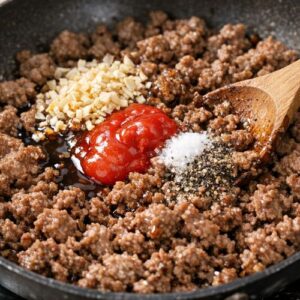
Add the Worcestershire sauce, ketchup, dried onion, salt, and pepper directly to your cooked beef. Stir everything together so the seasoning coats every bit of meat. This is where the magic happens—the flavors meld and deepen. Lower your heat to medium and let it all warm through for about 3 minutes. You’ll notice the mixture becomes glossy and smells incredible. This is your signal that you’re ready to assemble.
Step 3: Assemble on the Tortillas
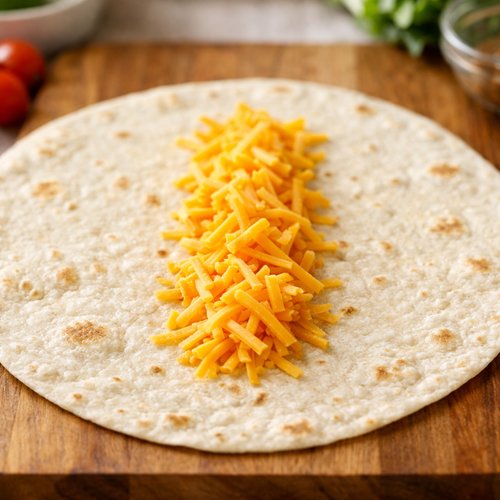
Lay one tortilla flat on your cutting board. Sprinkle about 3 tablespoons of shredded cheddar down the center, leaving room on both sides. Divide your beef mixture evenly (about ¼ of the total) and pile it right over the cheese. Drizzle a small amount of mustard on top, then add 2-3 tomato slices. Repeat with the remaining three tortillas. Don’t overfill—this makes rolling much easier.
Step 4: Roll and Grill
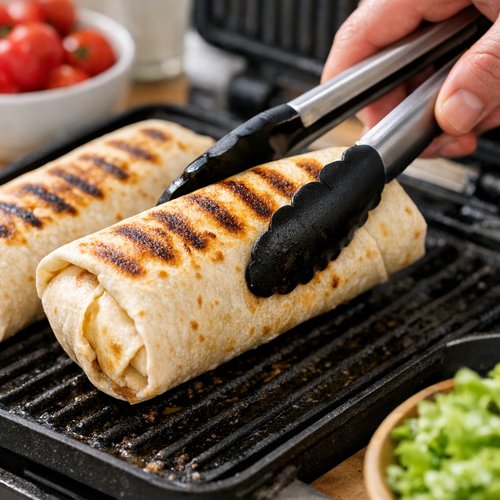
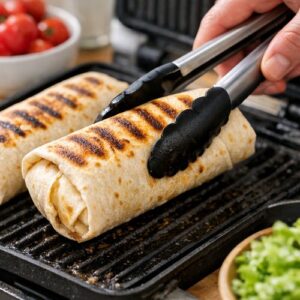
Roll each tortilla burrito-style: fold in the sides first, then roll from bottom to top, keeping it snug but not squeezed. If you have a grill (indoor or outdoor), preheat it to medium heat. Place two wraps seam-side down on the grill. Cook for 3-4 minutes on each side until you see golden-brown grill marks and the tortilla is crispy. If you don’t have a grill, use a regular skillet over medium heat and do the same thing—same results, zero fancy equipment needed.
Step 5: Finish with Fresh Toppings and Serve
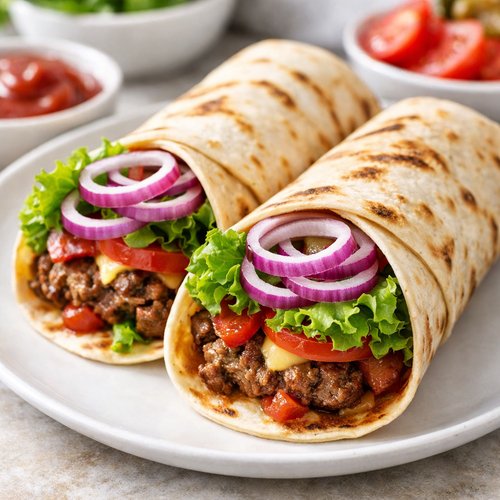
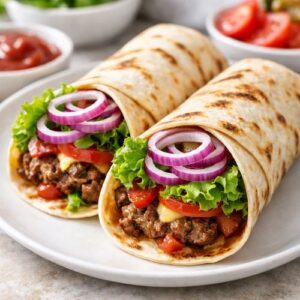
Remove the wraps carefully and place on a plate. Gently unroll each wrap just enough to tuck in a handful of fresh lettuce and red onion slices. This keeps the lettuce crisp and cool against the warm filling. Re-roll it gently, cut diagonally down the center (this creates that restaurant presentation), and serve immediately. The contrast between the crispy exterior and tender filling is exactly what makes this special.
Expert’s Nutritional Tip
As a registered dietitian, I want you to understand why this meal works so well for your body and your budget. The combination of lean ground beef (about 26 grams of protein per wrap), fiber from the vegetables, and healthy fats from the cheese creates a meal that stabilizes your blood sugar. This means you won’t experience that energy crash two hours later that sends you searching the pantry for snacks. One wrap contains roughly 380-420 calories, 26g protein, and 18g fat—perfectly balanced for a satisfying lunch or dinner. The Worcestershire sauce adds depth without adding calories, which is why I use it instead of relying solely on salt or extra ketchup.
5 Ways to Customize This Recipe
- Mexican-Style Burger Wraps – Replace Worcestershire sauce with 1 tablespoon of taco seasoning, add sliced jalapeños and a tablespoon of cilantro to the filling, use Monterey Jack cheese instead of cheddar, and add avocado slices before rolling
- BBQ Bacon Burger Wraps – Swap the ketchup for BBQ sauce (homemade or store-brand), add 3 strips of crumbled bacon to the beef mixture, and top with a fried onion string for extra crunch
- Mushroom and Swiss Version – Sauté 1 cup of sliced mushrooms separately, mix them into the beef filling, use Swiss cheese instead of cheddar, and add a touch of garlic powder
- Breakfast Burger Wraps – Cook a fried egg to place on top of each wrap before rolling, add a slice of cheese, and serve with hash browns (try my Air Fryer Potato Wedges Recipe for a crispy side)
- Plant-Based Version – Swap the ground beef for crumbled tofu or lentil-walnut mixture, keep all the seasonings exactly the same, and you’ll have a filling vegetarian option that costs even less
Make It Ahead and Meal Prep Tips
- Prep the beef filling the night before – Brown and season the meat, store it in an airtight container in the fridge, and you’ve just cut your cooking time to 10 minutes the next day. The flavors actually deepen overnight, making the next day’s version even better
- Assemble wraps but don’t grill them – Wrap each one in foil or parchment paper, refrigerate for up to 2 days, then grill when you’re ready to eat. This is perfect for batch cooking on Sunday for weeknight dinners. Just add an extra minute to the grill time since they’re cold
- Chop all vegetables the morning of – Store lettuce, tomatoes, and red onions in separate containers with paper towels to absorb moisture. They’ll stay crisp for the entire day, and assembly takes literally 5 minutes
- Brown multiple pounds of beef at once – Season and freeze individual portions (about ¼ pound each in a flat bag), and you can thaw one portion for a single wrap or four portions for a family meal. This cuts your actual cooking time to near-zero on busy nights
Quick Substitutions
- Ground beef → Ground turkey (slightly leaner, same cooking time), ground chicken (milder flavor, same texture), or ground lamb (richer taste, use less Worcestershire)
- Flour tortillas → Whole wheat wraps (adds 3g fiber per wrap, fills you up faster), corn tortillas (naturally gluten-free, but need 2 per wrap), or lettuce wraps (eliminate carbs entirely)
- Worcestershire sauce → Soy sauce (use slightly less, it’s saltier) or balsamic vinegar (adds sweetness instead of savory depth)
- Ketchup → BBQ sauce, tomato paste mixed with vinegar, or even a spoonful of sweet pickle relish
- Cheddar cheese → Any melting cheese you have: American, Monterey Jack, pepper jack (adds heat), or provolone (adds sophistication)
- Fresh tomato → Canned diced tomatoes (drained well), pickled tomatoes, or skip it entirely and add extra red onion
How to Store and Reheat
Fridge: Store ungrilled assembled wraps in an airtight container for up to 2 days. Grilled wraps stay fresh for 3 days when wrapped individually in foil. Freezer: Ungrilled wraps wrapped tightly in plastic wrap and foil will keep for up to 3 months. Reheat: From refrigerated, place wrapped wraps back on the grill for 2-3 minutes per side. From frozen, thaw overnight in the fridge first, then grill. In a pinch, you can wrap a chilled grilled wrap in a damp paper towel and microwave for 45 seconds, though the texture won’t be quite as crispy.
Nutrition at a Glance
Per serving (one wrap): 380 calories, 26g protein, 18g fat, 28g carbohydrates, 3g fiber, 520mg sodium. According to USDA nutritional guidelines, this meal provides over 50% of your daily protein needs and pairs beautifully with vegetables for a complete, balanced dinner. The fiber content supports healthy digestion, and the protein-to-carb ratio keeps energy stable for hours.
Serve It With
These wraps stand on their own, but I always pair them with something fresh and crispy to balance the richness. Air Fryer Carrots add a slightly sweet, crunchy contrast. For a heavier meal, serve alongside my Air Fryer Potato Wedges Recipe. A simple side salad with vinaigrette costs almost nothing and rounds out the meal beautifully. For drinks, ice-cold lemonade or unsweetened iced tea complement the savory flavors perfectly without adding to your food cost.
- Crispy roasted carrots – toss with a bit of oil and roast at 425°F for 20 minutes while your wraps cook
- Coleslaw – shredded cabbage, a splash of vinegar, and a touch of sugar or honey, ready in 5 minutes
- Fruit on the side – apple slices, orange segments, or grapes provide brightness and natural sweetness
- Steamed green beans – toss with a touch of butter and garlic, cost-effective and nutritious

Burger Wrap Recipe
Ingredients
Method
- Heat your skillet over medium-high heat and add the pound of ground beef. Use a wooden spoon or spatula to break it into small crumbles as it cooks. This step takes about 5 minutes. You want no pink remaining. Once it's cooked through, carefully tilt the pan and drain any excess grease into a small container (save it for cooking vegetables later—waste nothing).
- Add the Worcestershire sauce, ketchup, dried onion, salt, and pepper directly to your cooked beef. Stir everything together so the seasoning coats every bit of meat. This is where the magic happens—the flavors meld and deepen. Lower your heat to medium and let it all warm through for about 3 minutes. You'll notice the mixture becomes glossy and smells incredible. This is your signal that you're ready to assemble.
- Lay one tortilla flat on your cutting board. Sprinkle about 3 tablespoons of shredded cheddar down the center, leaving room on both sides. Divide your beef mixture evenly (about ¼ of the total) and pile it right over the cheese. Drizzle a small amount of mustard on top, then add 2-3 tomato slices. Repeat with the remaining three tortillas. Don't overfill—this makes rolling much easier.
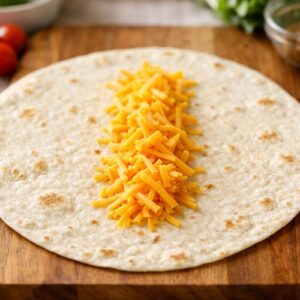
- Roll each tortilla burrito-style: fold in the sides first, then roll from bottom to top, keeping it snug but not squeezed. If you have a grill (indoor or outdoor), preheat it to medium heat. Place two wraps seam-side down on the grill. Cook for 3-4 minutes on each side until you see golden-brown grill marks and the tortilla is crispy. If you don't have a grill, use a regular skillet over medium heat and do the same thing—same results, zero fancy equipment needed.
- Remove the wraps carefully and place on a plate. Gently unroll each wrap just enough to tuck in a handful of fresh lettuce and red onion slices. This keeps the lettuce crisp and cool against the warm filling. Re-roll it gently, cut diagonally down the center (this creates that restaurant presentation), and serve immediately. The contrast between the crispy exterior and tender filling is exactly what makes this special.
Notes
FAQs
Can I make these wraps without a grill?
Absolutely. Use a regular skillet over medium heat. The wraps will still get crispy and golden-brown, just without the aesthetic grill marks. The taste is identical.
What’s the best way to keep the tortillas from falling apart?
Don’t overstuff them. Divide your filling into four equal portions and resist the urge to add more. A slightly fuller wrap actually holds together better when grilled than an overstuffed one.
Can I prep these for a week of lunches?
Yes, but prep them ungrilled. Make all four wraps on Sunday, wrap each individually in foil, refrigerate, and grill them fresh each morning or evening. They taste best within 2 days, but stay safe for 3 days in the fridge.
Is there a cheaper way to make this without sacrificing quality?
Buy ground beef when it goes on sale (usually before holidays or weekends) and freeze it flat in 1-pound portions. Watch for tortilla sales and stock up. Shred your own cheese from blocks instead of buying pre-shredded. These three moves alone can cut your cost per wrap from $2 to $1.25.
What if someone in my family doesn’t like one of the toppings?
This is the magic of wraps—everyone customizes before rolling. Set out the beef filling and let each person add their own lettuce, tomato, and onion. It becomes interactive, fun, and means nobody’s wasting food they won’t eat.
Common Mistakes to Avoid
- Overcooking the ground beef – The moment it turns from pink to brown, stop. Overcooking makes it tough and dry. Cook it just until there’s no pink, drain, and move on. You’re cooking it again on the grill anyway
- Using pre-shredded cheese – I know it’s convenient, but it contains anti-caking agents that prevent it from melting smoothly. Block cheese costs less per ounce anyway. A box grater takes 2 minutes
- Skipping the grill step – Yes, you can eat the wraps cold or microwaved, but grilling is what transforms them from “okay” to “when are you making these again?” That crispy exterior is non-negotiable
- Not seasoning enough – The filling needs flavor. Don’t be shy with the Worcestershire and salt. Taste as you go and adjust. This is where your skill as a cook makes the biggest difference
Seasonal Variations
- Spring Version – Add fresh asparagus spears grilled alongside the wraps, swap red onion for green onions, add a sprinkle of fresh dill to the filling
- Summer Version – Use peak-season tomatoes, add grilled zucchini or yellow squash as a side, incorporate fresh basil into the wraps
- Fall Version – Add crispy bacon, include caramelized onions in the filling, use sharp aged cheddar instead of mild
- Winter Version – Add sautéed mushrooms to the beef mixture, use hearty greens like kale instead of lettuce, include crispy fried onions for texture
More Quick Recipes You’ll Love
- Chili Cheese Beef n Mac – another one-pot ground beef dinner that costs under $2 per serving
- my oven-baked chicken – when you want lean protein without ground meat
- my oven-baked chicken – set it and forget it for an easy, flavorful dinner
- Basic Stir Fry Recipe Beef – another versatile beef recipe that comes together in minutes
Here’s what I want you to know: healthy eating doesn’t require a second mortgage or a culinary degree. My grandmother knew this, I’ve confirmed it through years of clinical practice, and this burger wrap recipe proves it in every single bite. You have everything you need right now to feed your family well and keep your grocery budget intact. Make these tonight. Double the recipe and freeze half. Tell me how your family reacts. Most importantly, believe that you deserve delicious food that doesn’t drain your wallet. You absolutely do. Happy Cooking!