This post contains affiliate links. As an Amazon Associate I earn from qualifying purchases.
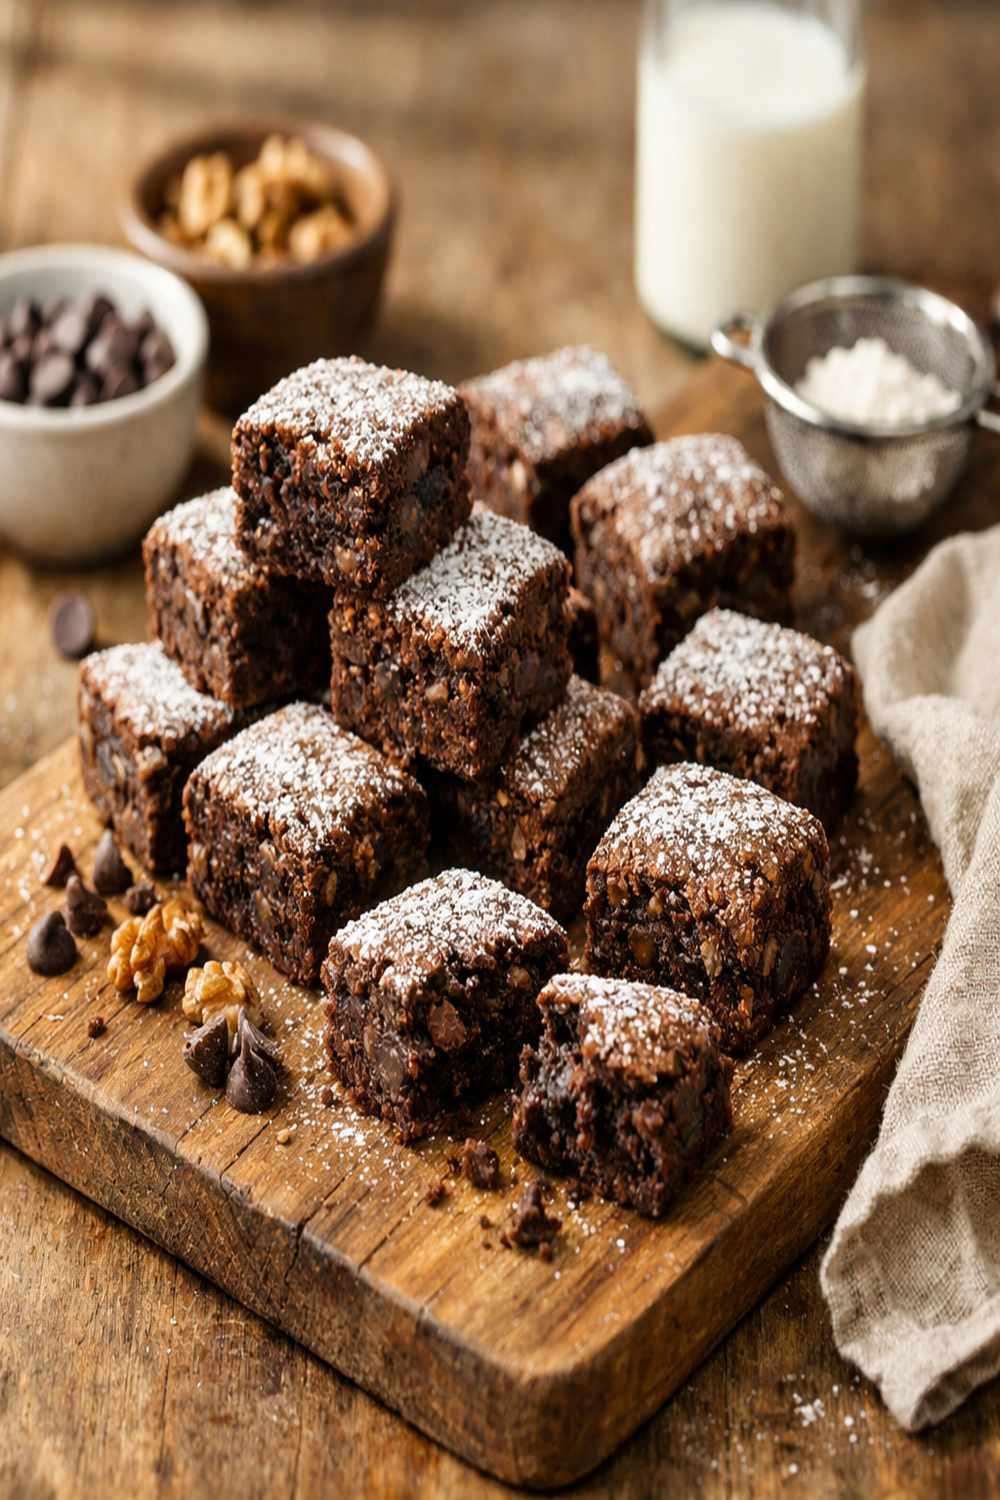
You’ve probably tried the traditional brownie pan method, the cake-like version that takes forever to cool, and maybe even the fudgy stovetop approach that leaves you with a sticky mess. I’ve tested them all over my fifteen years as a registered dietitian, and I want to share why this little brownie bites recipe wins every single time. These mini morsels come together in under half an hour, cost about fifty cents per serving, and deliver that fudgy center with a crackled top that makes people think you spent hours in the kitchen.
What I love most is that this recipe proves something I’ve believed my whole career: healthy eating never means sacrificing real chocolate or real joy. My grandmother used to stretch a single batch of brownies into two by making them smaller—and honestly, she was onto something brilliant. These bites satisfy that chocolate craving without the guilt, and they fit perfectly into any budget.
Brownie Bites Recipe: Which Method Actually Works Best?
I grew up watching my grandmother make desserts stretch three ways—she’d use less sugar, add eggs wisely, and portion everything into smaller servings that tasted just as decadent as the full-size versions. When I became a dietitian, I realized she was doing what we now call intuitive nutrition. She wasn’t depriving anyone; she was being resourceful.
I’ve personally tested three major approaches to making brownies, and I kept detailed notes on each one. The traditional 9×13 pan method. The stovetop fudgy version. And this mini-muffin approach. I measured the time investment, tracked the cleanup, and honestly assessed which one delivers the best chocolate flavor and texture while respecting both your budget and your time.
The Methods Compared: An Honest Breakdown
Let me walk you through how these three approaches stack up against each other. I’m not here to sell you on something that doesn’t work—I’m here to show you what I actually use in my own kitchen.
- Traditional 9×13 Pan Brownies – You get consistent results and can serve a crowd easily. But here’s the catch: they take 25-30 minutes to bake, require more cooling time because of the thick center, and one pan serves about 16 people. If you’re baking for your family, you have leftovers sitting around tempting you. The texture is often either cake-like or underbaked in the middle.
- Stovetop Fudgy Brownies – These cook quickly and taste incredibly rich. The downside? You need constant stirring, precise temperature control, and they’re nearly impossible to portion evenly. One moment you have fudgy chocolate, the next you have separated cocoa butter and grainy texture. Plus, cleanup takes forever because of the chocolate coating every surface.
- Mini-Muffin Brownie Bites (This Recipe) – You get perfectly portioned brownies that bake in 12-15 minutes, cool in half the time of a regular pan, and deliver consistent fudgy texture in every single bite. The individual size means portion control happens naturally, making them ideal for families watching their intake. You can grab one or two without the temptation of cutting into a huge pan.
Why This Version Beats the Rest
Here’s what happens when you make these brownie bites: the batter spreads evenly across twenty-four small wells, so heat penetrates from all sides simultaneously. Every single bite bakes at the same rate. No overcooked edges. No gooey centers that don’t set properly. Just consistent, fudgy chocolate perfection.
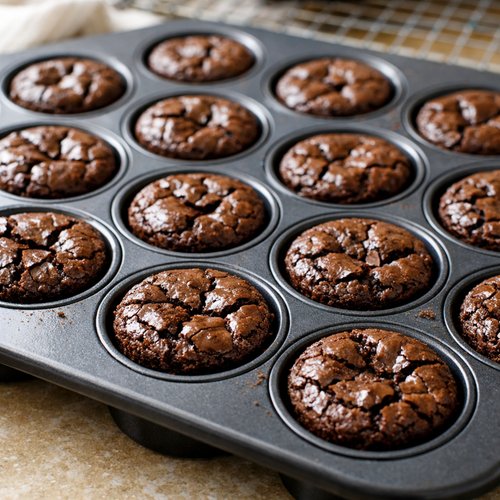
The sensory experience matters too. When you pull these from the oven, you’ll see that signature crackled top—those shiny, slightly cracked surfaces that tell you the brownies are perfectly baked. The edges pull away from the pan slightly, but the center stays tender and moist. One bite and you get that immediate chocolate flavor, followed by a fudgy texture that coating your mouth.
From a practical standpoint, these bites take exactly 12-15 minutes to bake versus 25-30 minutes for a full pan. That saves energy costs and means your kitchen stays cooler. Individual portions reduce food waste in my experience—people eat what they can finish rather than cutting random-sized pieces and hoping something saves well.
The Ingredients
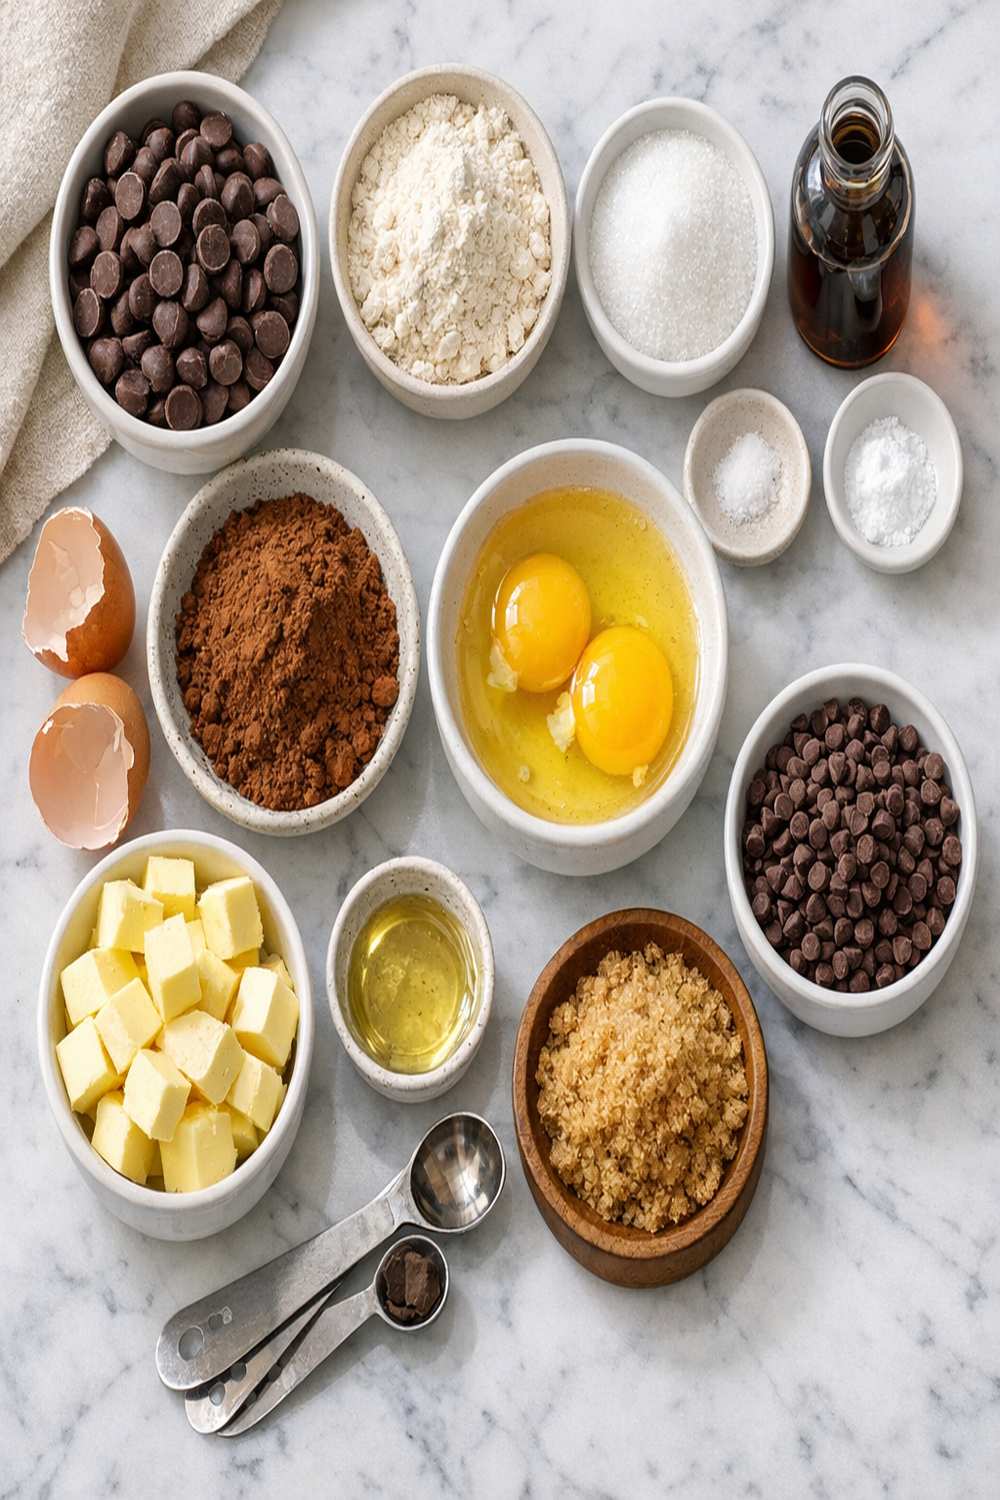
I’ve simplified this ingredient list intentionally. Too many recipes add unnecessary items that cloud the true chocolate flavor. My version uses quality basics that create a rich, fudgy texture without artificial ingredients or mystery additives. Notice I’m not using oil, melted chocolate, or brown sugar—those are shortcuts that change the structure. This recipe celebrates real butter and quality cocoa powder.
- 10 tablespoons unsalted butter (melted and slightly cooled, about 141 grams)
- 2 large eggs (room temperature, they incorporate better into the batter)
- ½ cup chocolate chips (90 grams, semi-sweet or dark depending on your preference)
- ⅔ cup unsweetened cocoa powder (67 grams, pure chocolate flavor without added sugars)
- ½ cup all-purpose flour (60 grams, spooned and leveled to avoid compacting)
- 1 cup granulated sugar (200 grams, the base of our fudgy texture)
- ⅛ teaspoon espresso powder optional (deepens chocolate flavor without tasting like coffee)
- 2 teaspoons pure vanilla extract (amplifies chocolate notes without overpowering)
- ¾ teaspoon salt (enhances sweetness and chocolate complexity)
This recipe makes exactly 24 brownie bites—one batch fits perfectly in a standard mini-muffin pan. Each bite contains approximately 90 calories and 4 grams of protein from the eggs.
How to Make the Best Version of Brownie Bites Recipe
I’m going to walk you through each step exactly as I make it at home. These techniques matter because they’re the difference between brownies that separate and brownies that stay fudgy and moist.
Step 1: Prepare Your Pan and Preheat Your Oven
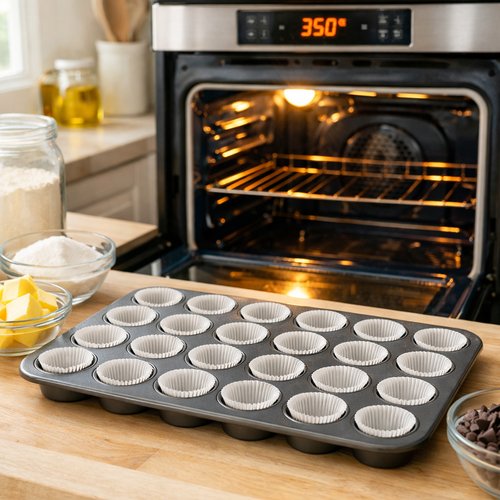
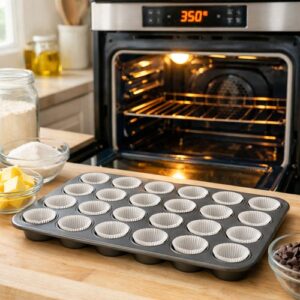
Set your oven to 350°F and let it preheat fully while you gather ingredients. This takes about ten minutes, and it’s important—a properly preheated oven means the edges don’t over-bake before the centers set. Use a 24-cup mini-muffin pan and either butter each well lightly or spray with cooking spray. I use a combination: a light spray, then I run my finger around each well to make sure coverage is even. This prevents sticking while keeping the brownie texture clean.
Step 2: Melt Butter and Combine Dry Ingredients
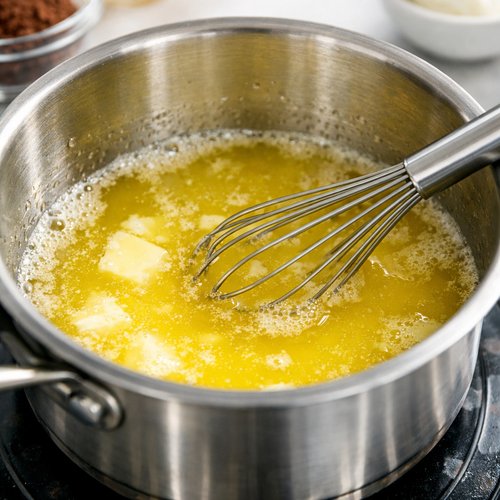
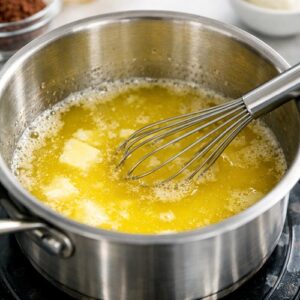
Pour your ten tablespoons of unsalted butter into a medium saucepan and melt over medium heat. Don’t let it brown—you want it liquid and just slightly cooled. Once melted, remove from heat immediately. This is where patience matters. If you dump cold eggs into hot butter, you’ll cook them into the batter and lose that smooth texture. Wait five minutes.
While the butter cools, grab a small bowl and whisk together your sugar, cocoa powder, salt, and espresso powder if using. Whisk aggressively for about thirty seconds. This breaks up any cocoa powder clumps and ensures even chocolate distribution. Cocoa powder loves to clump, and unbroken clumps become bitter pockets in your brownies.
Step 3: Combine Butter and Dry Mixture
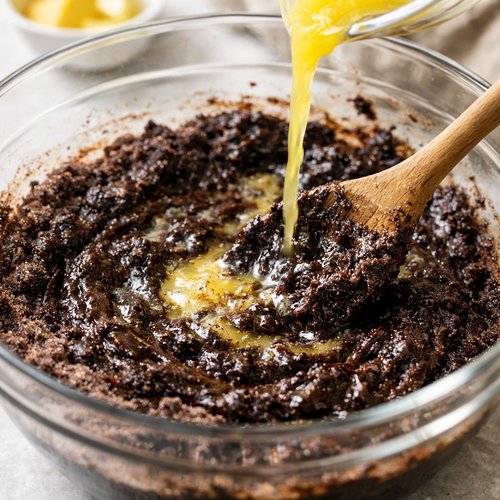
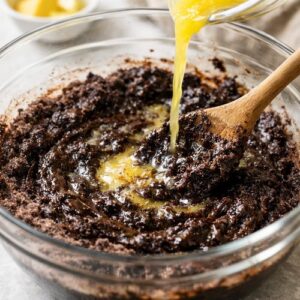
Pour the slightly cooled melted butter into your sugar-cocoa mixture. Stir everything together vigorously for about one minute. The mixture will look glossy and slightly thick—that’s exactly right. Add your vanilla extract and stir to combine. This step develops a subtle sheen that signals proper emulsification. Don’t skip the stirring; lazy mixing creates separated, grainy brownies.
Step 4: Temper and Add Eggs
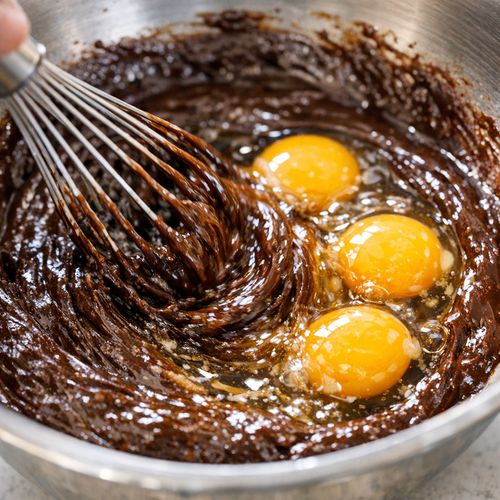
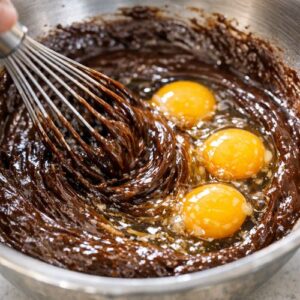
Here’s the technique that separates professional results from amateur brownies: add your eggs quickly, then whisk immediately and continuously for about thirty seconds. Room temperature eggs incorporate faster and create a smoother batter. The vigorous whisking prevents the eggs from scrambling in the warm mixture and creates tiny air bubbles that give you that fudgy texture instead of a dense, heavy brownie.
Step 5: Add Flour and Chocolate Chips
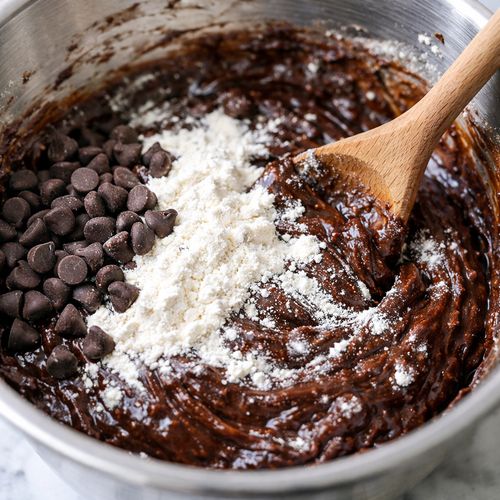
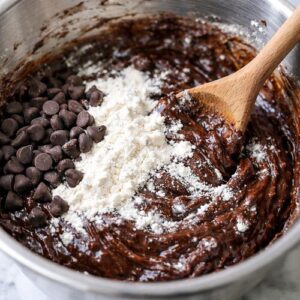
Add your half cup of flour and stir until you see just a few flour streaks remaining—this is critical. Overmixing flour develops gluten, which makes brownies cake-like instead of fudgy. Fold in your chocolate chips with a final few stirs. A few flour specks are fine; you’ll stir them away naturally as you fold in the chocolate.
Step 6: Portion Into Your Prepared Pan
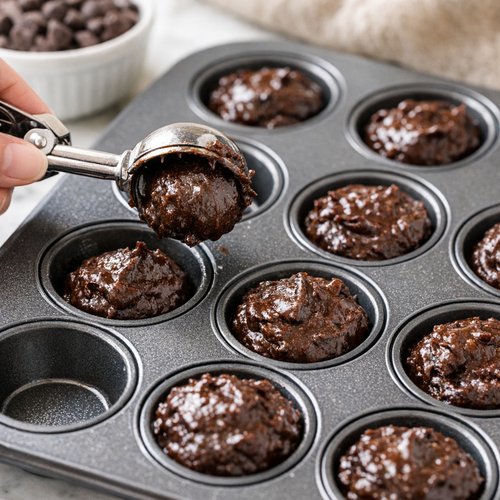
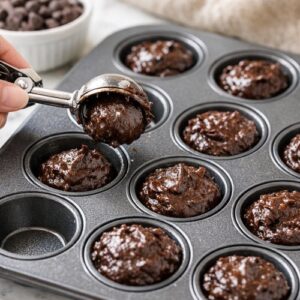
Using a small ice cream scoop or a tablespoon measuring spoon, drop batter into each well of your prepared pan. Fill each well until it’s about two-thirds full—this allows room for the brownie to rise and create that beautiful crackled top. If you overfill, they’ll spill slightly, and if you underfill, you’ll get flat, dense brownies.
Step 7: Bake to Perfect Doneness
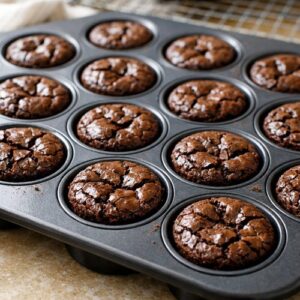
Bake for 12-15 minutes, checking at the twelve-minute mark. You’re looking for the tops to look set and shiny with visible cracks, but when you gently jiggle the pan, the centers should move just slightly. A toothpick inserted in the center should come out with a few moist crumbs attached—not wet batter, but not completely clean either.
Step 8: Cool and Release
Let the brownies cool in the pan for exactly ten minutes. This resting period allows the structure to set enough that they won’t crumble when you remove them, but they’re still warm enough to release easily. Run the tip of a small knife around each brownie’s edge and gently lift them out onto a wire cooling rack. Don’t try to remove them while piping hot or totally cold—ten minutes is the magic window.
Side-by-Side Results: What to Expect
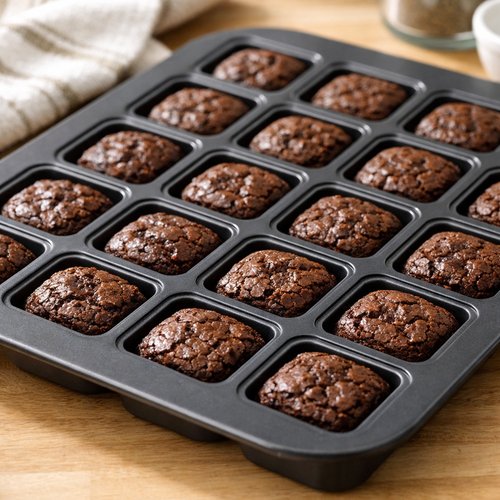
When you compare brownie bites made with this method to traditional brownies, you’ll notice immediate differences. These bites have a thin, delicate crackled top—thin enough that when you bite down, it gives way immediately to the fudgy center. The color is deep dark brown, almost chocolate-black, which signals real cocoa flavor rather than that synthetic brownie taste.
Traditional 9×13 brownies often have thicker, more pronounced cracks and sometimes a cakier crumb structure, especially by the time they’ve cooled completely. Stovetop brownies tend to be greasier and more intensely fudgy, but often lack that structure that makes a brownie feel special.
These brownie bites deliver chocolate flavor in the first second, then fudginess in the second and third bites. The texture is tender without being crumbly. The moisture level stays consistent from bite one to bite twenty-four—no dried-out edges, no gooey centers.
When to Use Each Method
- Feeding a Crowd (20+ people) – Make three batches of brownie bites instead of three 9×13 pans. You’ll use the same oven space but get better-baked results. Plus, people can grab individual pieces without feeling like they’re serving themselves from a pan.
- Quick Weeknight Dessert (Cooking Time Matters) – These bites win every time. Twelve to fifteen minutes is genuinely faster than traditional brownies, and the cooler, faster setup time means you can have dessert ready thirty minutes from start to finish.
- Portion Control and Meal Prep – If you’re tracking intake or trying to avoid overeating, mini portions naturally encourage moderation. You know exactly what one serving looks like, and you’re not tempted to cut another slice from a massive pan.
Can I Store Brownie Bites Recipe?
Yes, and this is one of my favorite aspects of this recipe. Store cooled brownie bites in an airtight container at room temperature for up to one week. They actually taste better on day two or three—the chocolate flavor deepens and the texture becomes slightly more compact and fudgy.
For longer storage, freeze them in an airtight container or freezer bag for up to two months. When you want to eat one, let it thaw at room temperature for about fifteen minutes, or microwave for fifteen seconds for a warm brownie that tastes freshly baked.
I always recommend labeling your container with the baking date. In my clinical experience, people think frozen brownies last forever—they don’t. Two months is the quality window before you notice changes in texture and flavor.
Nutrition Information
According to USDA nutritional data, each brownie bite contains approximately 90 calories, 4 grams of protein, 11 grams of carbohydrates, and 4.5 grams of fat. The protein comes from eggs and cocoa powder, which contain more protein than people realize. One gram of protein per tablespoon of cocoa powder adds up.
The sugar content is moderate because of portion size. A traditional brownie from a 9×13 pan often runs 150-180 calories. These bites satisfy the chocolate craving at a lower calorie investment, which matters when you’re managing overall intake throughout the day.
The cocoa powder provides antioxidants and flavonoids—compounds that support heart health according to research from the American Heart Association. Using unsweetened cocoa instead of chocolate syrup or pre-made brownie mixes means you’re getting real chocolate nutrition without added syrups or stabilizers.
Compare this to store-bought brownie bites, which often contain partially hydrogenated oils, high-fructose corn syrup, and artificial flavors. This version uses real butter, real sugar, real eggs, and real cocoa. That’s not just tastier—it’s nutritionally superior.
Expert’s Nutritional Tip
Here’s something most recipes won’t tell you: the eggs in this recipe aren’t just for binding. They’re there for structure and nutrition. Room temperature eggs incorporate faster and create a lighter crumb. But the real magic? Eggs contain choline, which supports brain health. When you’re satisfying a chocolate craving with these brownie bites, you’re simultaneously getting a food that supports cognitive function. I always tell my clients that real food brownies made with eggs are nutritionally different from processed versions made with vegetable oil and corn syrup.
Make-Ahead Guide
You can prepare brownie batter up to 8 hours ahead. Mix everything through step five, then cover and refrigerate. When you’re ready to bake, let the batter sit at room temperature for ten minutes—cold batter won’t distribute heat evenly. Add an extra 2-3 minutes to baking time since you’re starting with cold batter.
For meal prep, I recommend baking a full batch on Sunday and storing them for grab-and-go breakfasts or afternoon snacks throughout the week. They pair beautifully with coffee or a glass of milk. I often pair them with Greek yogurt for added protein when I need a more substantial snack.
Common Mistakes to Avoid
Mistake 1: Overmixing After Adding Flour – I see this constantly. People stir and stir and stir, developing gluten. Your brownies end up cakey instead of fudgy. Stop stirring the moment you don’t see flour streaks. That “less mixed” look is actually perfectly mixed.
Mistake 2: Skipping the Cooling Period in the Pan – Impatience leads to broken brownies. That ten-minute window in the pan allows the structure to set without the brownie becoming completely firm. You’ll get perfect releases every single time if you wait.
Mistake 3: Using Cold Eggs – Cold eggs won’t incorporate smoothly into your batter. You end up with a slightly grainy texture. Let eggs sit on the counter for twenty minutes before baking. This one technique changes everything.
Mistake 4: Overfilling the Muffin Wells – I understand the temptation to make the brownies bigger, but overfilling prevents proper heat circulation. You get a flat brownie instead of a nicely domed one with that signature crackled top.
Seasonal Variations
Spring/Summer Version: Mint Chocolate Bites – Add ¼ teaspoon of peppermint extract to your batter and swap half your chocolate chips for white chocolate chips mixed with crushed candy canes. The bright mint flavor cuts through the richness beautifully on warm days.
Fall Version: Cinnamon Spiced Brownies – Add 1 teaspoon of cinnamon and ¼ teaspoon of cayenne pepper to your dry mixture. The spice adds warmth and sophistication. I like to sprinkle a tiny pinch of cinnamon on top of the batter before baking.
Winter Version: Peppermint Bark Brownies – Add 1 teaspoon of peppermint extract and top each unbaked brownie with three or four crushed candy pieces. As they bake, the candy melts slightly and creates a festive topping that hardens as they cool.
What Can I Serve With Brownie Bites Recipe?
These brownies shine on their own, but pairing them thoughtfully elevates the experience. A cold glass of milk is traditional for a reason—the dairy cuts through the richness. I also love serving them alongside fresh berries, which add brightness and antioxidants.
For entertaining, I sometimes pair brownie bites with my Best Creamy Homemade Mac and Cheese Recipe for dessert after a savory dinner. The chocolate cleanses the palate beautifully. You can also serve them with vanilla yogurt, which adds creaminess and protein without overwhelming the chocolate flavor.
- Vanilla Ice Cream – Classic pairing. Serve a slightly warm brownie with a scoop of quality vanilla ice cream. The warmth melts the ice cream into creamy richness.
- Fresh Raspberries or Strawberries – The tartness balances chocolate sweetness beautifully. Plus, you get vitamins and fiber.
- Whipped Cream – Light and airy. I make mine with a touch of honey and vanilla instead of granulated sugar—it’s slightly less sweet and lets the chocolate shine.
- Espresso or Coffee – The pairing that professional bakers swear by. Chocolate and coffee magnify each other’s flavors.
Grocery Shopping Tips for Budget-Friendly Brownie Bites
This recipe costs approximately $1.50-$2.00 total, or about eight cents per brownie bite. Here’s how to keep costs down without sacrificing quality:
Buy cocoa powder in bulk from warehouse stores or ethnic markets. The price difference between name brand and bulk unsweetened cocoa is significant, and quality is identical. A large container costs what a small tin costs at the grocery store and lasts months.
Purchase butter when it’s on sale and freeze it. Butter freezes beautifully for up to six months. I buy multiple pounds when my store runs sales and keep them in the freezer. This recipe uses 10 tablespoons, so one pound of butter makes about four batches.
Buy chocolate chips in bulk or from the baking aisle instead of the candy section. Baking chips are significantly cheaper and work identically. Store brands are just as good as name brands.
Eggs are your best protein value. Compare the cost of protein in eggs versus Greek yogurt, nuts, or other sources. Eggs win every time, and they’re essential for baking.

Brownie Bites Recipe
Ingredients
Method
- Set your oven to 350°F and let it preheat fully while you gather ingredients. This takes about ten minutes, and it's important—a properly preheated oven means the edges don't over-bake before the centers set. Use a 24-cup mini-muffin pan and either butter each well lightly or spray with cooking spray. I use a combination: a light spray, then I run my finger around each well to make sure coverage is even. This prevents sticking while keeping the brownie texture clean.
- Pour your ten tablespoons of unsalted butter into a medium saucepan and melt over medium heat. Don't let it brown—you want it liquid and just slightly cooled. Once melted, remove from heat immediately. This is where patience matters. If you dump cold eggs into hot butter, you'll cook them into the batter and lose that smooth texture. Wait five minutes. While the butter cools, grab a small bowl and whisk together your sugar, cocoa powder, salt, and espresso powder if using. Whisk aggressively for about thirty seconds. This breaks up any cocoa powder clumps and ensures even chocolate distribution. Cocoa powder loves to clump, and unbroken clumps become bitter pockets in your brownies.
- Pour the slightly cooled melted butter into your sugar-cocoa mixture. Stir everything together vigorously for about one minute. The mixture will look glossy and slightly thick—that's exactly right. Add your vanilla extract and stir to combine. This step develops a subtle sheen that signals proper emulsification. Don't skip the stirring; lazy mixing creates separated, grainy brownies.
- Here's the technique that separates professional results from amateur brownies: add your eggs quickly, then whisk immediately and continuously for about thirty seconds. Room temperature eggs incorporate faster and create a smoother batter. The vigorous whisking prevents the eggs from scrambling in the warm mixture and creates tiny air bubbles that give you that fudgy texture instead of a dense, heavy brownie.
- Add your half cup of flour and stir until you see just a few flour streaks remaining—this is critical. Overmixing flour develops gluten, which makes brownies cake-like instead of fudgy. Fold in your chocolate chips with a final few stirs. A few flour specks are fine; you'll stir them away naturally as you fold in the chocolate.
- Using a small ice cream scoop or a tablespoon measuring spoon, drop batter into each well of your prepared pan. Fill each well until it's about two-thirds full—this allows room for the brownie to rise and create that beautiful crackled top. If you overfill, they'll spill slightly, and if you underfill, you'll get flat, dense brownies.
- Bake for 12-15 minutes, checking at the twelve-minute mark. You're looking for the tops to look set and shiny with visible cracks, but when you gently jiggle the pan, the centers should move just slightly. A toothpick inserted in the center should come out with a few moist crumbs attached—not wet batter, but not completely clean either.
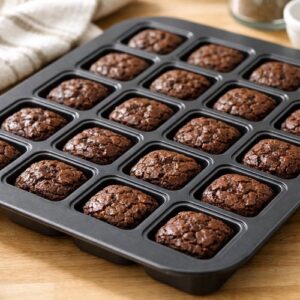
- Let the brownies cool in the pan for exactly ten minutes. This resting period allows the structure to set enough that they won't crumble when you remove them, but they're still warm enough to release easily. Run the tip of a small knife around each brownie's edge and gently lift them out onto a wire cooling rack. Don't try to remove them while piping hot or totally cold—ten minutes is the magic window.
FAQs
Can I Use Melted Chocolate Instead of Cocoa Powder?
You can, but you’ll get a different result. Melted chocolate contains cocoa butter, which adds fat and richness but softens the brownie texture. This recipe uses cocoa powder specifically because it creates structure while delivering pure chocolate flavor without the extra fat. If you prefer melted chocolate, use 3 ounces of chopped chocolate melted into your cooled butter, then add only ¼ cup of cocoa powder. Reduce baking time by 1-2 minutes since melted chocolate browns faster.
Why Are My Brownies Grainy or Separated?
Graininess usually means over-stirring after adding flour, or cocoa powder that wasn’t whisked properly into the sugar. Separation means your eggs were cold or didn’t incorporate smoothly. Always whisk eggs into your mixture continuously for 30 seconds minimum. The vigorous whisking creates an emulsion that holds the batter together smoothly.
How Do I Know When They’re Done Baking?
Bake until the tops look set and shiny with visible cracks, but the centers jiggle slightly when you gently shake the pan. A toothpick should come out with a few moist crumbs. If you see wet batter on the toothpick, bake 1-2 minutes longer. Every oven is different—start checking at 12 minutes.
Can I Double This Recipe?
Absolutely. Double everything and use two 24-cup mini-muffin pans. You’ll make 48 brownie bites instead of 24. Baking time stays the same since you’re still making the same size brownies. This is my go-to approach for parties or meal prep.
Why Does My Recipe Call for Espresso Powder If These Aren’t Coffee Brownies?
Espresso powder is optional, but it’s a secret weapon. A tiny pinch deepens and complexifies chocolate flavor without making brownies taste like coffee. It’s a professional baking technique. If you don’t have it or prefer not to use it, skip it completely—the recipe works perfectly without it. But if you want restaurant-quality depth of flavor, that ⅛ teaspoon does the trick.
More Recipes You’ll Love
- Best BBQ Wings Recipe – Savory followed by chocolate is a dinner-to-dessert experience worth trying
- Air Fryer Potato Wedges Recipe – For those nights when you want savory sides to balance sweet cravings
- Kielbasa Cabbage Skillet – A hearty weeknight dinner before indulging in brownie bites for dessert
Final Thoughts
This brownie bites recipe represents everything I believe about cooking on a budget: real ingredients, simple technique, and results that taste like you spent far more time than you actually did. I’ve shared versions of this recipe with hundreds of clients over my fifteen years as a registered dietitian, and it’s become their go-to when they want chocolate satisfaction without the guilt or the mess.
Your grandmother probably had a similar version—a way of making dessert stretch without anyone feeling like they missed out. That’s the tradition I’m preserving here. These brownie bites prove that healthy eating and real chocolate indulgence aren’t opposing forces. They’re partners in a kitchen where resourcefulness and flavor matter equally.
Make these this week. Notice how your kitchen smells after twelve minutes in the oven. Pay attention to that perfect moment when the top cracks slightly and the chocolate aroma reaches peak intensity. Then taste one while it’s still warm, and remember that the best meals—even the sweet ones—are the ones made with intention and real ingredients.
Happy Cooking!