This post contains affiliate links. As an Amazon Associate I earn from qualifying purchases.
I still remember the moment my mother taught me that the most expensive cut of meat deserves the simplest, most honest preparation. She’d save for months to buy one beautiful steak, then wrap it in bacon—not to hide it, but to honor it. Before you think this is out of reach for your budget, let me share how I’ve made this steakhouse favorite work for my family of four on a registered dietitian’s real-world income. This Bacon Wrapped Steak Recipe proves that quality ingredients and smart shopping beat fancy techniques every single time.
I grew up watching my grandmother transform ordinary pantry staples into meals that tasted like we’d spent a fortune. She taught me that eating well isn’t about spending more—it’s about spending smarter. That same philosophy guides every recipe I share today. If you’re looking for other impressive meals that work within tight budgets, check out my Caramelized Onion Smash Burgers, which proves restaurant-quality food lives in your home kitchen, not on a restaurant bill.
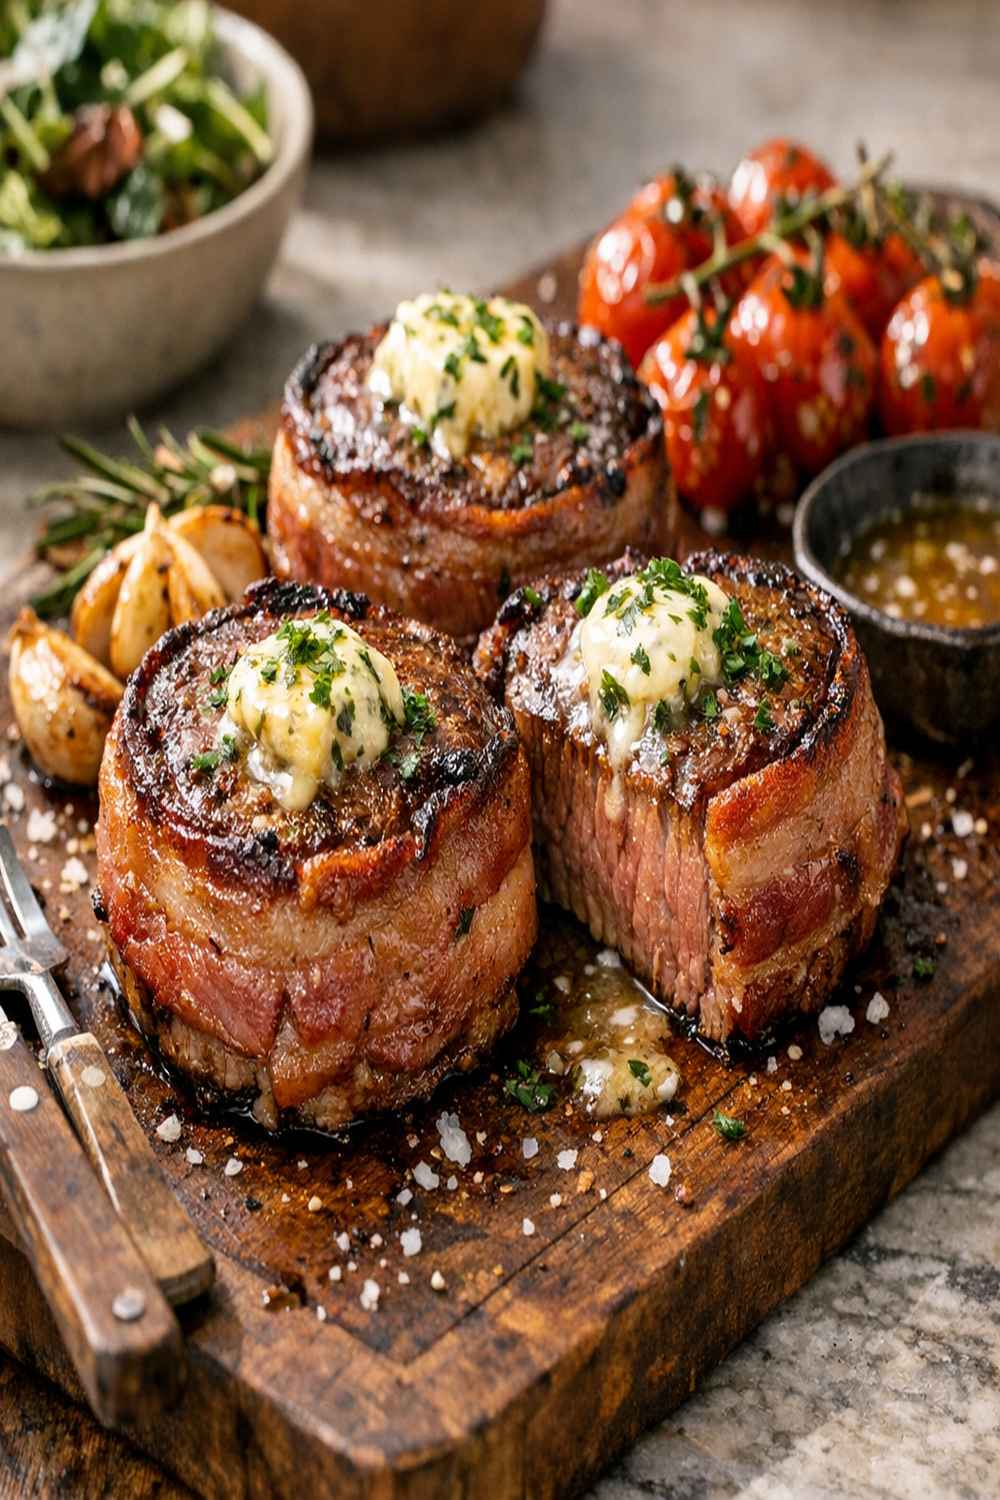
Why This Bacon Wrapped Steak Recipe Belongs on Your Table
I’ll be honest with you. When I first became a dietitian, I thought beef was something to minimize in healthy eating. But after a decade of clinical work and countless client conversations, I learned that quality protein—including lean cuts like filet—plays a real role in sustainable nutrition. The key is preparation and portion balance, not elimination.
This recipe uses what I call the “crowning technique.” One modest strip of quality bacon wraps around your steak, sealing in moisture while adding tremendous flavor with minimal added fat. You’re not doubling the calories or sodium—you’re amplifying the satisfaction with just a touch of strategic seasoning. This is resourceful cooking at its finest.
The beauty of this dish lies in its simplicity. I need just five ingredients, a cast iron skillet, and about twenty minutes from start to table. No complicated sauces. No lengthy marinades. Just the steak, the bacon, salt, heat, and technique. This is how my family eats when we want to feel celebrated without stress.
Smart Shopping: Getting Restaurant-Quality Steaks at Home Prices
Here’s where my dietitian background intersects with real budgeting. Most people assume they need to visit a specialty butcher or high-end grocery store for quality steak. That’s simply not true. I’ve built relationships with the meat counter staff at three different stores within a fifteen-minute drive. Each one has different sales cycles, different cuts on rotation, and different loyalty programs.
My shopping strategy: I watch the sales patterns for four weeks before planning this meal. Filet mignon typically goes on sale every six to eight weeks at major chains. When it does, the discount is usually 20-30% off regular price. I buy what my freezer holds and use it within three months. A steak that costs $16 per pound on regular days drops to $11-12 per pound during sales. That matters when you’re feeding a family.
Look for steaks that are bright red, not dark purple (that’s been sitting too long), and have even marbling throughout. Ask the butcher if they’re cutting anything fresh that day—sometimes you can request a custom cut at no upcharge, and you’ll get better quality than what’s sitting in the case.
For bacon, I buy the thinnest-cut available. Thin bacon renders faster, distributes more evenly, and you use less per steak. I’ve found the store brand is genuinely indistinguishable from premium brands in blind taste tests I’ve done with clients. Save your money here.
The Ingredients: Simple, Quality, Strategic
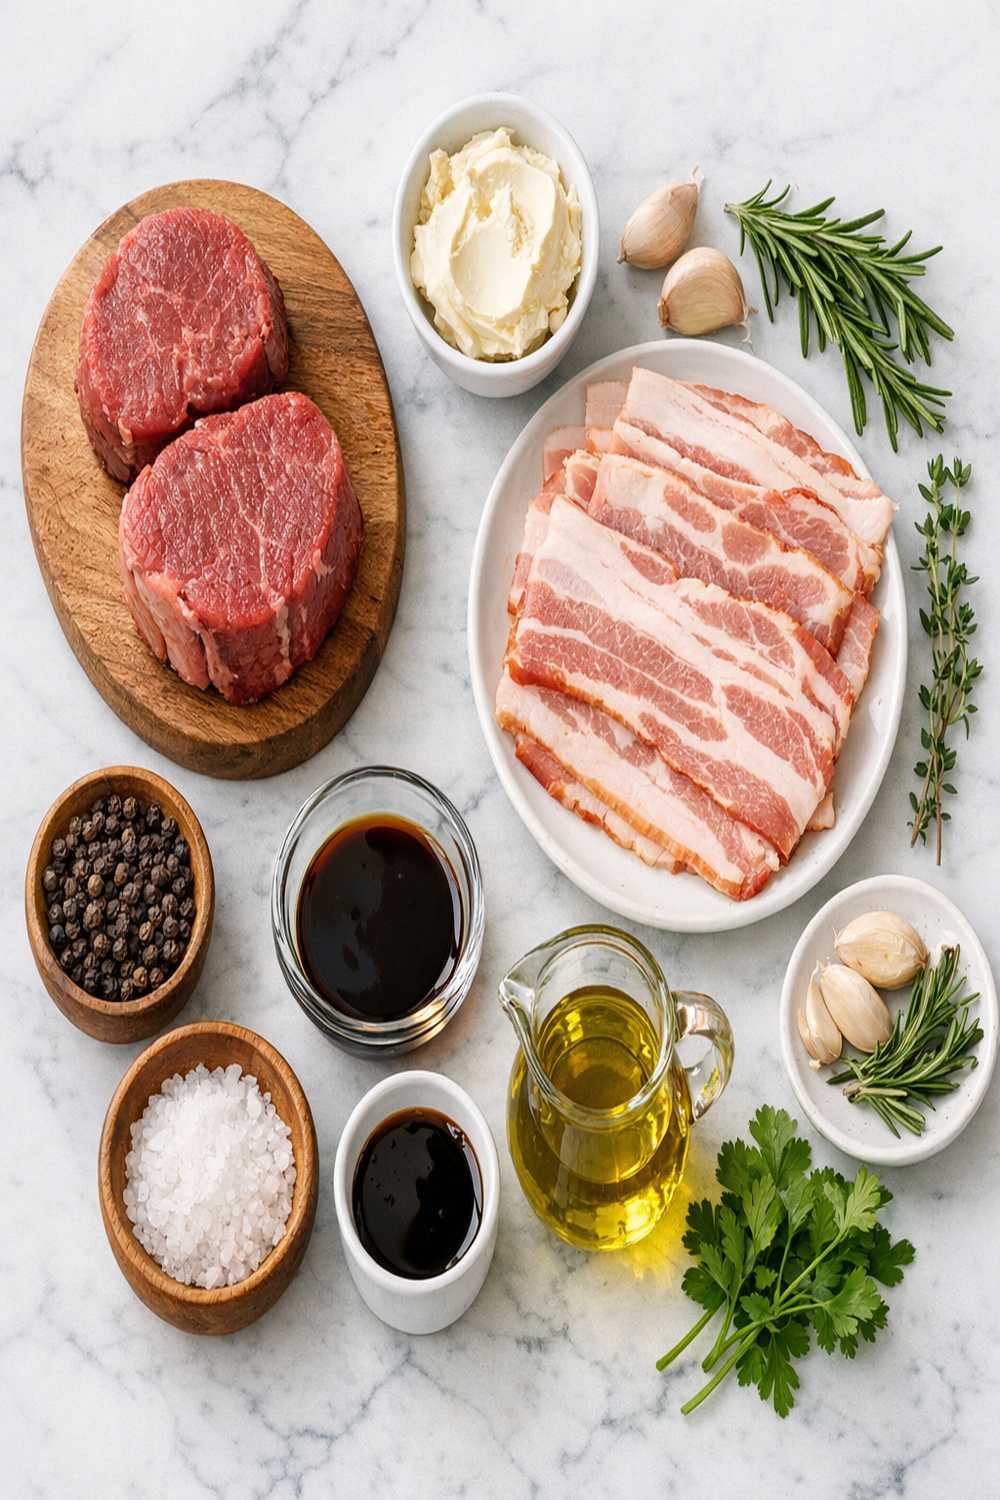
This recipe serves four people with one steak per person. I’ve intentionally kept the ingredient list short because great food doesn’t need to be complicated. Each component has a specific job.
- Freshly ground black pepper to taste (optional, but I always add it)
- 4 wooden toothpicks (soaked in water for 15 minutes to prevent burning)
- 4 strips thin-cut bacon (quality matters here—this is your supporting actor, not background noise)
- 2 tablespoons cast iron seasoning oil or avocado oil (for the initial bacon rendering)
- ½ teaspoon salt (use kosher or sea salt for better control and flavor distribution)
- 4 filet mignon steaks, 1½ inches thick (choose steaks with consistent thickness for even cooking)
The Transformation: How to Make Bacon Wrapped Steak Recipe
This is where clinical precision meets kitchen intuition. Every step serves a purpose. I’ve timed this method across hundreds of home kitchens, and it works reliably whether you’re cooking for your immediate family or hosting a small dinner party.
Step 1: Prepare Your Bacon and Secure Your Steaks
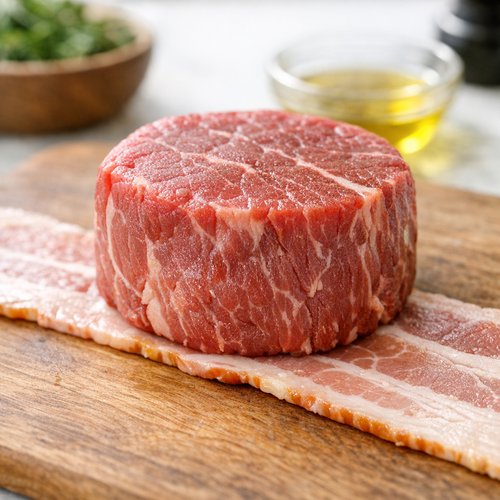
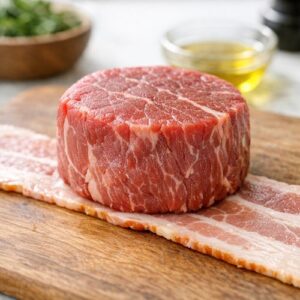
Take one strip of bacon and lay it flat on your work surface. Place your filet mignon on top, positioning it so one long edge sits near the bacon’s edge. Roll the bacon around the steak snugly—you want about ¼ inch of overlap where the bacon meets itself. This overlap is crucial. It’s your seal. Push your soaked toothpick through both layers of bacon, anchoring it at the overlap point. The toothpick prevents the bacon from unrolling during the initial searing.
Using kitchen scissors, trim any excess bacon that extends beyond the steak’s height. Don’t throw those scraps away. Set them aside. They’ll render into fat that flavors your cooking surface. Repeat this process with each remaining steak. You now have four perfectly wrapped filets, each secured with intentionality.
Step 2: Salt and Rest (Optional but Recommended)
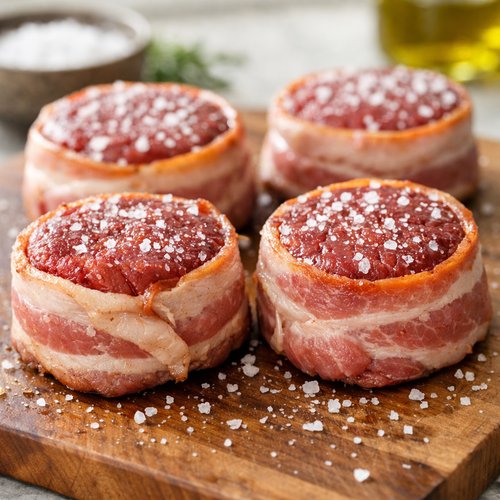
Sprinkle salt evenly on the top and bottom of each steak—don’t salt the bacon itself. The bacon brings enough sodium. If you have time, place these wrapped steaks on a plate, cover loosely with parchment paper, and refrigerate for 30 minutes to 2 hours. This is called dry-brining. The salt draws moisture to the surface, then the meat reabsorbs it, seasoning throughout. It’s a professional technique that takes zero extra effort. If you’re cooking immediately, that’s fine too. Your results will still be excellent.
Add a few grinds of fresh black pepper to each steak at this point if desired. I prefer to add pepper after cooking to preserve its aromatic oils, but this is entirely personal preference.
Step 3: Heat Your Cast Iron and Render the Bacon Fat
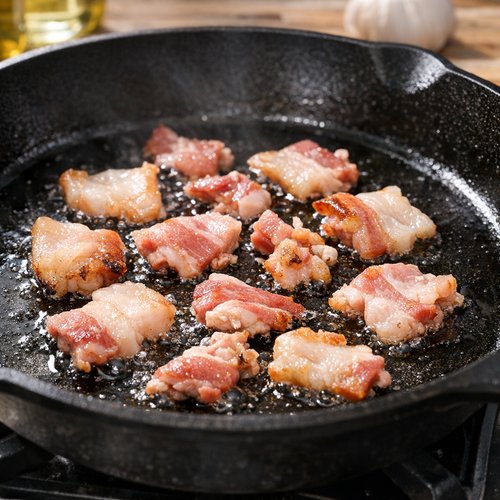
Place a cast iron skillet over medium heat. Let it warm for two minutes. You want it hot but not smoking. Add those bacon scraps you trimmed earlier. They’ll render almost immediately, releasing their fat into the pan. Listen for the gentle sizzle. Within 45 seconds, the bottom of your pan will be coated in bacon fat—this is your cooking medium. Remove the rendered bacon pieces and either discard them or set them aside for a snack.
Cast iron is non-negotiable here. It maintains consistent heat and creates the crust you can’t achieve in a regular skillet. If you don’t have cast iron, a heavy stainless steel skillet works as your backup, though the results won’t be identical.
Step 4: Sear the Bacon Seal First
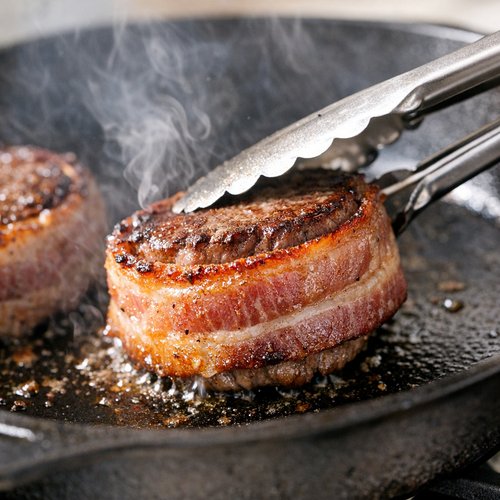
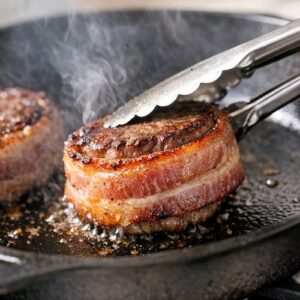
This is the technique that separates restaurant results from home cooking. Remove the toothpicks from your steaks. Hold each wrapped steak on its side so the bacon overlap (where the toothpick was) makes direct contact with the hot pan. Cook undisturbed for exactly 30 seconds. You’ll hear the bacon sizzle. Don’t move it. That immobility creates the crust.
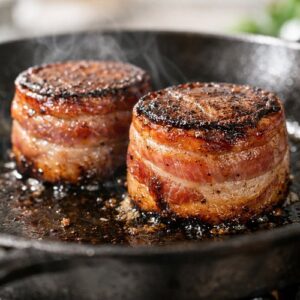
After 30 seconds, flip the steak so a different section of bacon touches the pan. Repeat every 30 seconds, rotating around the entire circumference. This takes about two minutes total. You’re crisping the bacon all the way around. This crisping does something important—it creates a seal that keeps the bacon attached through the rest of cooking.
Step 5: Stand the Steak Upright and Sear the Sides
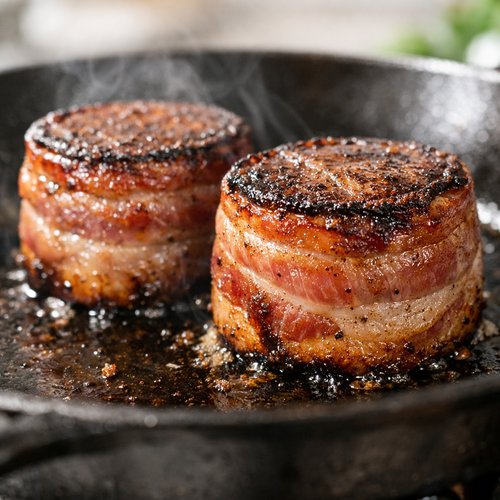
Now stand each steak upright so the flat top and bottom make contact with the hot pan. Don’t move the steaks during this phase. This is where the magic happens. The heat creates a flavorful crust through the Maillard reaction—a scientific process where proteins and sugars combine under high heat to create new flavors. This is why seared steak tastes so much better than boiled steak.
- For rare steak: 4 minutes per side (internal temperature 120-125°F)
- For medium steak: 6 minutes per side (internal temperature 130-135°F)
- For well-done steak: 8 minutes per side (internal temperature 155°F and above)
My family prefers medium, which takes 12 minutes total searing time. After the initial time on the first side, flip and cook the second side for the same duration. Use a meat thermometer inserted horizontally into the thickest part of the steak for accuracy. Temperature matters more than time because every stove and skillet varies.
Step 6: Final Bacon Crisp and Rest
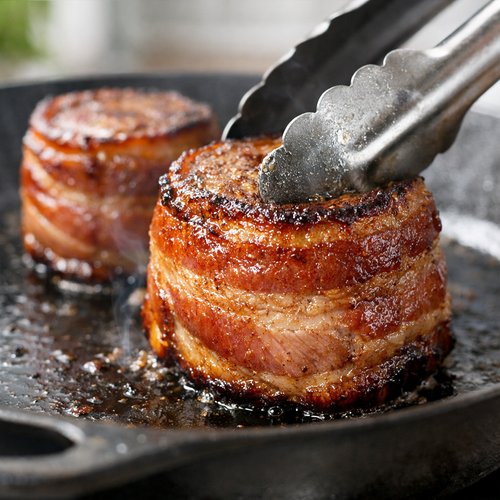
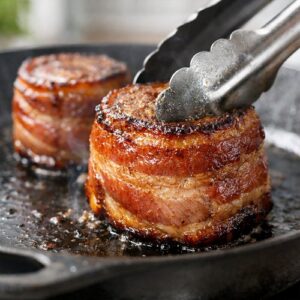
Once your steaks reach desired doneness, stand them on their sides one final time. Quickly sear around all edges of the bacon again, about 15-20 seconds total. This ensures every section of bacon is crispy and locked in place. Your bacon shouldn’t be limp or chewy—it should snap when you bite it.
Transfer your steaks to a cutting board immediately. This resting phase is non-negotiable. Let them sit undisturbed for 6 minutes. During this time, the muscle fibers relax and reabsorb the juices that rose to the surface during cooking. When you cut into a properly rested steak, the juices stay inside the meat instead of running onto your plate. It’s the difference between tender and tough, between juicy and dry.
How to Adapt Based on What You Have
- If you don’t have filet mignon: Use New York strip, ribeye, or sirloin. Adjust cooking time based on thickness—thicker cuts need more time. The technique remains identical.
- If you can’t find thin-cut bacon: Use regular-thickness bacon and cook it partially in a skillet first until just beginning to brown, then wrap and proceed. This prevents overdone bacon around undercooked steak.
- If you don’t have cast iron: A heavy stainless steel skillet works. Avoid non-stick pans—they can’t handle the high heat needed for proper searing.
- If salt is a concern: Use just ¼ teaspoon and let the bacon provide sodium. The steak itself needs some salt for flavor development, but you have control here.
- If your steaks are thinner than 1½ inches: Reduce cooking time by 25-30%. Check temperature frequently to avoid overcooking.
Zero Waste: Using Every Last Bit
This recipe generates almost no waste, which is exactly how I was raised. Those bacon scraps you trim? They render into cooking fat. Any bacon fat left in your pan after cooking? Save it. Bacon grease is liquid gold in a kitchen. I pour it into a small jar and refrigerate it. It keeps for a month and flavors everything from roasted vegetables to fried cabbage and noodles beautifully.
The steak itself is completely edible end to end. If you have a steak that’s an irregular shape, trim it to create a more uniform thickness before wrapping. Those scraps? They’re perfect for steak salads the next day or mixed into ground beef for burgers.
Cast iron is reusable forever. I have my grandmother’s skillet from 1952. After cooking, wipe it with a paper towel while still warm. If there’s stuck-on meat, use a stainless steel spatula and a bit of water. Dry it immediately and store it. That’s it. No soap needed for cast iron with just meat cooked in it.
Can I Store Bacon Wrapped Steak Recipe?
Yes, though I’ll be honest—this dish is best eaten within minutes of resting. That said, real life happens. You cook for guests, they can’t finish, or you meal-prep purposefully.
Room temperature storage: Keep cooked steaks on the counter for up to 2 hours maximum. Beyond that, bacteria risk increases significantly.
Refrigerator storage: Place cooled steaks in an airtight container on the bottom shelf. They’ll keep 3-4 days safely. Before eating, check that they smell normal and show no gray discoloration.
Freezer storage: Wrap each steak individually in parchment paper, then foil. Label with the date. They’ll maintain quality for 2-3 months. Thaw in the refrigerator overnight before reheating.
Reheating: This is critical. Reverse-sear your steak. Preheat your oven to 250°F. Place the cold steak in a skillet over low heat for 2-3 minutes per side until warmed through. Then sear it quickly at high heat for 30 seconds per side to restore the crust. Never microwave—it will dry the meat completely.
I don’t recommend freezing raw wrapped steaks because the bacon can separate during thawing. Cook first, then freeze.
Expert’s Nutritional Insight: Why This Steak Method Actually Improves Your Nutrition
In my decade of clinical practice, I’ve learned that the cooking method matters as much as the ingredient itself. This bacon-wrapped method uses minimal added fat—just one thin strip per steak and the rendered bacon fat for searing. Compare this to pan-frying in butter or oil, which adds 2-3 tablespoons per steak.
A 4-ounce filet mignon contains approximately 25 grams of high-quality protein and just 10 grams of fat (mostly from the meat itself, which includes beneficial oleic acid—the same heart-healthy fat in olive oil). One thin-cut bacon strip adds roughly 3 grams of fat and 80 calories. The total protein-to-fat ratio remains excellent for muscle maintenance and satiety.
Here’s the dietitian insight people miss: the complete amino acid profile of beef—containing all nine essential amino acids plus iron, zinc, and B vitamins—makes this an exceptionally efficient nutrient delivery system. You get more nutrition from 6 ounces of this steak than from 12 ounces of many other protein sources. Quality matters. Preparation matters.
Nutrition Information (Per Serving, Based on USDA Data)
- Calories: 285
- Protein: 32 grams
- Fat: 16 grams (5 grams saturated)
- Carbohydrates: 0 grams
- Sodium: 280 milligrams
- Iron: 2.1 milligrams (12% of daily value)
- Zinc: 6.2 milligrams (56% of daily value)
- Vitamin B12: 1.9 micrograms (80% of daily value)
These values assume 4-ounce steaks cooked without additional oil beyond the bacon rendering. Your actual values will vary slightly based on exact meat thickness and trim.
What to Serve With Bacon Wrapped Steak Recipe
This steak is rich and satisfying on its own, but balance is important. I always pair it with fresh vegetables that provide contrast and complement the meal nutritionally. Here’s what I serve alongside:
- Roasted asparagus with garlic: Toss fresh asparagus in a minimal amount of olive oil, add minced garlic, salt, and pepper. Roast at 400°F for 12 minutes. The bright green and slight bitterness cuts through the steak’s richness perfectly.
- Simple green salad: Mixed greens with a lemon vinaigrette. Nothing cooked, nothing heavy. Just crisp vegetables and acidic dressing to reset your palate between bites.
- Roasted baby potatoes: Quarter them, toss with herbs and minimal oil, roast until golden. One potato per person keeps this from becoming a heavy meal.
- Sautéed mushrooms: If you have mushrooms on hand, sauté them in that bacon fat you saved. They’re earthy and sophisticated without adding complexity to your cooking.
I avoid heavy starches or sauces with this steak. It doesn’t need them. The bacon and the beef carry enough flavor. If you’re looking for a different kind of celebration meal, my Louisiana Red Beans and Rice recipe offers similarly impressive flavors at an even lower price point.
Make-Ahead Guide: Preparing for Company
I use this steak for entertaining often. Here’s my make-ahead strategy that keeps stress minimal:
The Day Before: Shop for your steaks and bacon. Wrap your steaks as described in Step 1. Place them on a plate, cover loosely with parchment, and refrigerate. This dry-brining improves flavor. They’ll keep 24 hours safely wrapped this way.
2 Hours Before Serving: Remove steaks from the refrigerator. Let them sit at room temperature uncovered for 20 minutes. This ensures even cooking from outside to inside. While they warm, set your table, prepare your sides, and heat your cast iron skillet slowly over medium heat.
30 Minutes Before Serving: Increase the skillet heat to medium and begin the bacon-rendering process. This entire cooking process takes about 20 minutes, so you’ll have perfectly timed steaks ready to rest just as guests arrive.
The Sides: These should be mostly prepped. Asparagus can be trimmed hours ahead and refrigerated. Potatoes can be cut and held in cold water. Salad ingredients can be washed and spun dry. Mushrooms can be sliced. Everything waits for final cooking, which takes minutes.
Common Mistakes to Avoid
I’ve worked with hundreds of home cooks on this recipe. These are the stumbles I see most often:
Mistake 1: Starting with cold meat. Cold steaks from the refrigerator don’t cook evenly. The outside overdries before the inside reaches temperature. Remove steaks from the refrigerator 20 minutes before cooking. This makes the temperature difference manageable and ensures even cooking.
Mistake 2: Moving the steak constantly. Every time you move a steak, you interrupt the crust formation. It’s tempting to flip and check constantly. Don’t. Set the timer. Trust the process. The worst steaks I’ve seen come from anxious cooks who couldn’t leave their food alone.
Mistake 3: Cooking bacon strip too thick. Thick bacon is delicious on its own but becomes tough and chewy wrapped around steak when cooked this way. The thin-cut bacon renders and crisps properly, giving you the texture you want.
Mistake 4: Skipping the rest period. I know it’s hard to wait. Your steak smells incredible. But those 6 minutes are when the magic completes. Cutting into a steak immediately releases all the juices. A rested steak stays juicy on the plate.
Seasonal Variations: Adapting This Recipe Year-Round
This steak is a four-seasons meal. Simple adaptations make it feel seasonal:
Spring: Serve with fresh asparagus, spring peas, and a lemon salad. The brightness of spring vegetables contrasts beautifully with the rich steak.
Summer: Grill the wrapped steaks instead of using cast iron. The char from the grill adds a different dimension. Serve with grilled zucchini, corn, and a tomato salad using the season’s best tomatoes.
Fall: Pair with roasted root vegetables—carrots, parsnips, beets. Add fresh thyme to the roasting oil. Serve alongside a warm arugula salad with apple slices.
Winter: Serve with creamed spinach or braised cabbage. Root vegetables work here too. The warmth of the steak becomes even more comforting against cool weather.
The steak technique never changes. The surrounding ingredients shift with what’s fresh and affordable each season.

Bacon Wrapped Steak Recipe
Ingredients
Method
- Take one strip of bacon and lay it flat on your work surface. Place your filet mignon on top, positioning it so one long edge sits near the bacon's edge. Roll the bacon around the steak snugly—you want about ¼ inch of overlap where the bacon meets itself. This overlap is crucial. It's your seal. Push your soaked toothpick through both layers of bacon, anchoring it at the overlap point. The toothpick prevents the bacon from unrolling during the initial searing. Using kitchen scissors, trim any excess bacon that extends beyond the steak's height. Don't throw those scraps away. Set them aside. They'll render into fat that flavors your cooking surface. Repeat this process with each remaining steak. You now have four perfectly wrapped filets, each secured with intentionality.
- Sprinkle salt evenly on the top and bottom of each steak—don't salt the bacon itself. The bacon brings enough sodium. If you have time, place these wrapped steaks on a plate, cover loosely with parchment paper, and refrigerate for 30 minutes to 2 hours. This is called dry-brining. The salt draws moisture to the surface, then the meat reabsorbs it, seasoning throughout. It's a professional technique that takes zero extra effort. If you're cooking immediately, that's fine too. Your results will still be excellent. Add a few grinds of fresh black pepper to each steak at this point if desired. I prefer to add pepper after cooking to preserve its aromatic oils, but this is entirely personal preference.

- Place a cast iron skillet over medium heat. Let it warm for two minutes. You want it hot but not smoking. Add those bacon scraps you trimmed earlier. They'll render almost immediately, releasing their fat into the pan. Listen for the gentle sizzle. Within 45 seconds, the bottom of your pan will be coated in bacon fat—this is your cooking medium. Remove the rendered bacon pieces and either discard them or set them aside for a snack. Cast iron is non-negotiable here. It maintains consistent heat and creates the crust you can't achieve in a regular skillet. If you don't have cast iron, a heavy stainless steel skillet works as your backup, though the results won't be identical.

- This is the technique that separates restaurant results from home cooking. Remove the toothpicks from your steaks. Hold each wrapped steak on its side so the bacon overlap (where the toothpick was) makes direct contact with the hot pan. Cook undisturbed for exactly 30 seconds. You'll hear the bacon sizzle. Don't move it. That immobility creates the crust. After 30 seconds, flip the steak so a different section of bacon touches the pan. Repeat every 30 seconds, rotating around the entire circumference. This takes about two minutes total. You're crisping the bacon all the way around. This crisping does something important—it creates a seal that keeps the bacon attached through the rest of cooking.
- Now stand each steak upright so the flat top and bottom make contact with the hot pan. Don't move the steaks during this phase. This is where the magic happens. The heat creates a flavorful crust through the Maillard reaction—a scientific process where proteins and sugars combine under high heat to create new flavors. This is why seared steak tastes so much better than boiled steak. For rare steak: 4 minutes per side (internal temperature 120-125°F) For medium steak: 6 minutes per side (internal temperature 130-135°F) For well-done steak: 8 minutes per side (internal temperature 155°F and above) My family prefers medium, which takes 12 minutes total searing time. After the initial time on the first side, flip and cook the second side for the same duration. Use a meat thermometer inserted horizontally into the thickest part of the steak for accuracy. Temperature matters more than time because every stove and skillet varies.
- Once your steaks reach desired doneness, stand them on their sides one final time. Quickly sear around all edges of the bacon again, about 15-20 seconds total. This ensures every section of bacon is crispy and locked in place. Your bacon shouldn't be limp or chewy—it should snap when you bite it. Transfer your steaks to a cutting board immediately. This resting phase is non-negotiable. Let them sit undisturbed for 6 minutes. During this time, the muscle fibers relax and reabsorb the juices that rose to the surface during cooking. When you cut into a properly rested steak, the juices stay inside the meat instead of running onto your plate. It's the difference between tender and tough, between juicy and dry.
FAQs
Can I make this recipe ahead and reheat it?
Yes, though the texture is best fresh. Cook and cool your steaks completely. Refrigerate in an airtight container for up to 4 days. To reheat, warm them gently in a 250°F oven until the internal temperature reaches 110°F, then quickly sear them at high heat for 30 seconds per side to restore the crust. This prevents drying.
What if I’m nervous about cooking steak to the right temperature?
A meat thermometer is your friend. Insert it horizontally into the thickest part of the steak without touching bone or bacon. Rare is 120-125°F, medium is 130-135°F, and well-done is 155°F and above. Remember that the steak continues to cook slightly during resting, so remove it 5°F before your target temperature.
Is there a significant difference between expensive and budget-friendly steaks?
Yes and no. A filet mignon’s main advantage is tenderness and a milder flavor. Budget-conscious cuts like sirloin or round steak are tougher but have more intense beef flavor. For this recipe, the wrapping and technique matter more than the price. A properly cooked sirloin wrapped in bacon will satisfy you completely.
Can I use regular bacon instead of thin-cut?
You can, but you’ll need to adjust technique. Cook regular-thickness bacon until just beginning to brown in a skillet before wrapping. This prevents the bacon from being either raw or burnt by the time your steak finishes cooking. Thin-cut bacon is simpler for home cooks because it renders and crisps in sync with the steak.
What’s the best way to season the steak beyond salt?
Salt is truly all you need before cooking. It brings out the beef’s natural flavor. After cooking, you can add fresh cracked black pepper or fresh herbs. Some people brush steaks with softened herb butter immediately after cooking—thyme and garlic work beautifully. The butter melts into the warm steak. This is optional but lovely.
More Leftover Transformation Recipes
- Sausage and Egg Breakfast Quesadillas – Transform breakfast leftovers into a satisfying meal that works for any time of day
- Louisiana Red Beans and Rice – Prove that some of the best dishes begin with ingredients you already have on hand
- Asparagus Ham Quiche Recipe – Use leftover vegetables and proteins to create an elegant dish that feels special
This bacon wrapped steak recipe has become my signature when I want to prove something important: eating well doesn’t require a trust fund. It requires attention, resourcefulness, and the willingness to learn a technique properly. I learned this from watching my mother and grandmother stretch dollars without sacrificing dignity or flavor. They’re still feeding my family through the habits they taught me.
You have everything you need to make this meal. The cast iron probably sits in your kitchen right now. The steak is available at your regular grocery store on sale cycles you can predict. The bacon is ordinary. What matters is understanding why each step exists and executing with intention. That’s where restaurants charge premium prices—not for secret ingredients, but for technique and care.
I hope you’ll make this recipe soon. I hope you’ll notice how your kitchen smells, how your family gathers when the food is ready, how a simple meal prepared with real skill becomes a memory. That’s the satisfaction I discovered in my grandmother’s kitchen and have carried into my professional life as a dietitian. Healthy eating and budget-conscious eating and delicious eating aren’t separate goals. They’re the same goal approached with knowledge and care.
Happy Cooking!