This post contains affiliate links. As an Amazon Associate I earn from qualifying purchases.
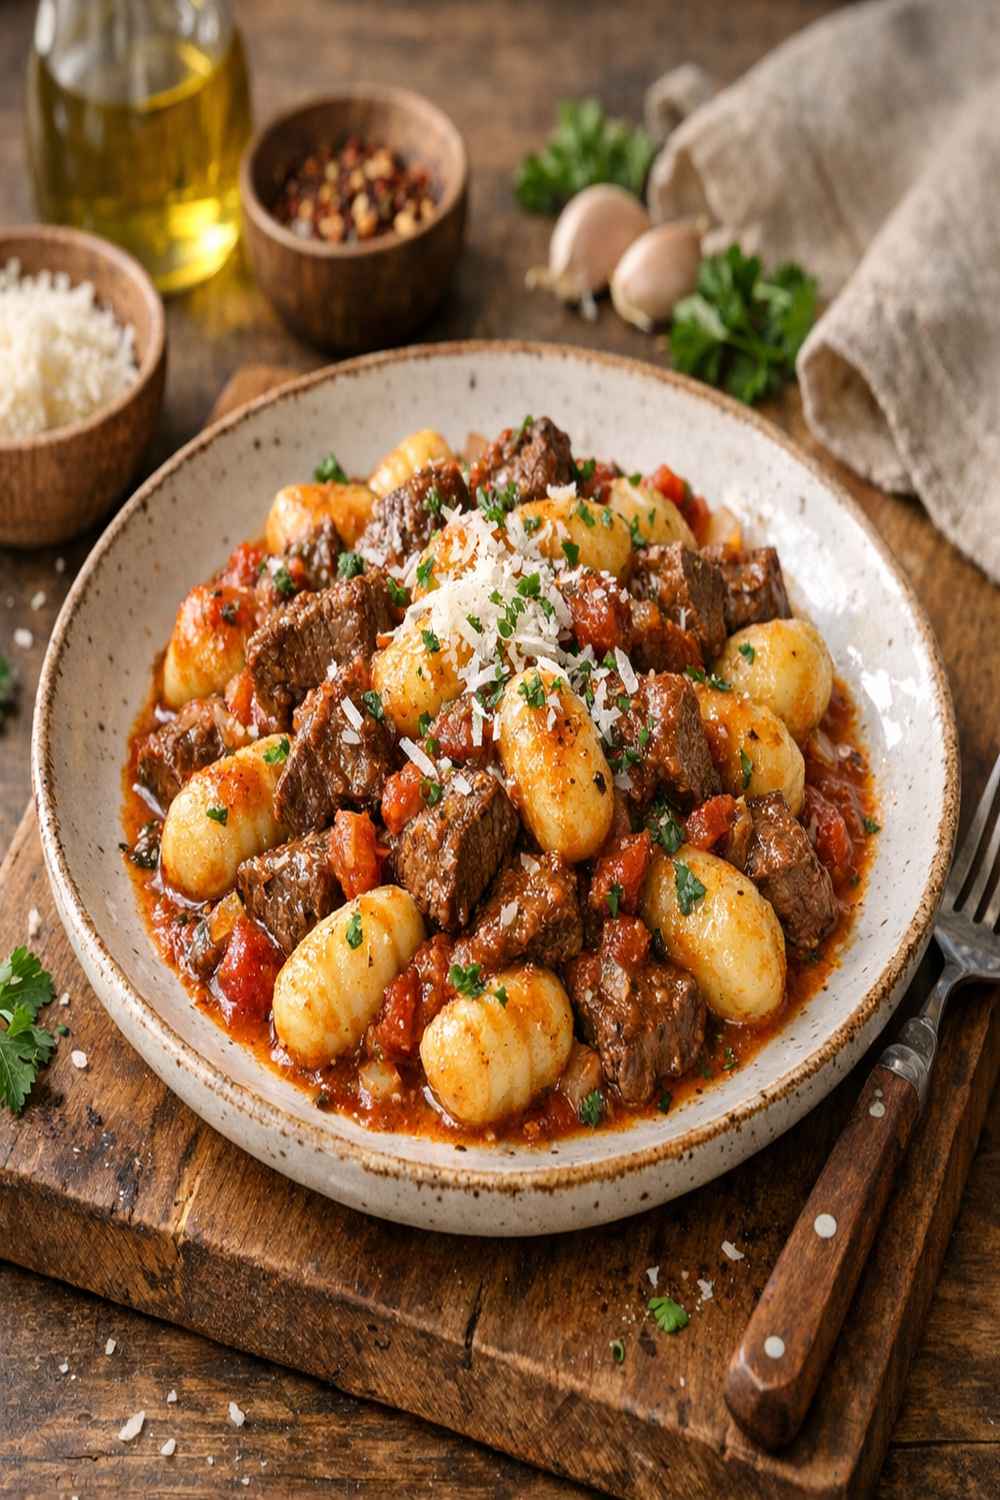
You’ve probably tried the oven-baked version that takes forever, the slow cooker method that leaves you with mushy gnocchi, and maybe even the stovetop approach that requires three separate pans. Here’s why this one-skillet beef gnocchi wins every single time: it comes together in under thirty minutes, costs less than eight dollars to feed four people, and tastes like you’ve been simmering it all day. I discovered this technique years ago when I was stretching our family’s grocery budget and needed something that felt special but didn’t break the bank. My kids still ask for it every week.
Beef Gnocchi Recipe: Which Method Actually Works Best?
I’ve tested every approach you can imagine during my decade working in clinical nutrition. The oven method? Pretty, but dry. The slow cooker? Convenient, but the gnocchi falls apart. The three-pan stovetop route? Clean flavor, but your sink looks like a disaster zone and you’ve used half your energy budget. This single-skillet method combines the best of all three worlds, and I’m going to show you exactly why it works so much better than the alternatives you’ve probably tried.
The Methods Compared: A Honest Breakdown
When I’m recommending cooking techniques to clients, I always break down what actually matters: time investment, ingredient cost, cleanup burden, and most importantly, whether your family will actually enjoy eating it. Let me walk you through the three most common approaches I see people attempt.
- The Oven-Baked Version – You layer everything in a baking dish, cover it with foil, and bake at 375 degrees for about forty-five minutes. Pros: looks impressive when you bring it to the table, you’re not standing over the stove, and the cheese gets slightly golden on top. Cons: gnocchi tends to dry out because it sits uncovered halfway through, the sauce thickens unevenly, and you’re heating your entire oven for one dish. Best for: when you have time and your kitchen is already warm.
- The Slow Cooker Approach – Brown the meat ahead of time, dump everything in the slow cooker, set it for four hours on low. Pros: truly hands-off once you’ve started it, the house smells amazing, and you can work without thinking about dinner. Cons: gnocchi turns into mush after even two hours in liquid, the cream breaks down and separates, and you lose all the texture that makes this dish special. Best for: absolutely never, honestly. Skip this method entirely.
- This Single-Skillet Version (My Method) – Brown everything together, add your liquids, add the gnocchi directly to the pan, cover and simmer for just five minutes, then uncover and finish cooking until the sauce thickens. Pros: thirty minutes total, one skillet to wash, perfectly tender gnocchi with a slight chew, creamy sauce that coats every piece, and complete flavor development from the browning step. Cons: you need to stay in the kitchen for about twenty minutes, but honestly, that’s when you sip your coffee or pour a glass of wine and enjoy the process. Best for: weeknight dinners, meal prep, feeding a crowd without stress, and anyone who actually wants to eat something delicious.
Why This Version Beats the Rest
The magic happens in the first step when you properly brown that ground beef with the onions. This isn’t just about color—it’s about developing flavor compounds through the Maillard reaction. Those browned bits stuck to your skillet bottom? That’s liquid gold. When you deglaze with your liquids, you’re pulling all that flavor directly into your sauce. The oven and slow cooker methods skip this step entirely, which is why they taste flat by comparison.
Then there’s the timing of when the gnocchi actually goes into the pan. If you add it too early like the oven method suggests, it absorbs too much liquid and becomes heavy. If you leave it in there too long like the slow cooker crowd, it literally disintegrates. This technique adds the gnocchi at precisely the right moment—after your sauce has already developed and started bubbling—so it cooks in exactly the time it needs. You’ll get gnocchi that’s creamy inside, slightly firm on the outside, and never mushy.
The covered-then-uncovered approach is crucial too. The five-minute covered time lets the gnocchi actually cook through without evaporating your sauce. Then uncovering and finishing for a few more minutes lets excess moisture escape and thickens your sauce to that silky, coating consistency. The oven method either keeps it covered too long and traps steam or uncovers it too early and dries everything out.
The Ingredients
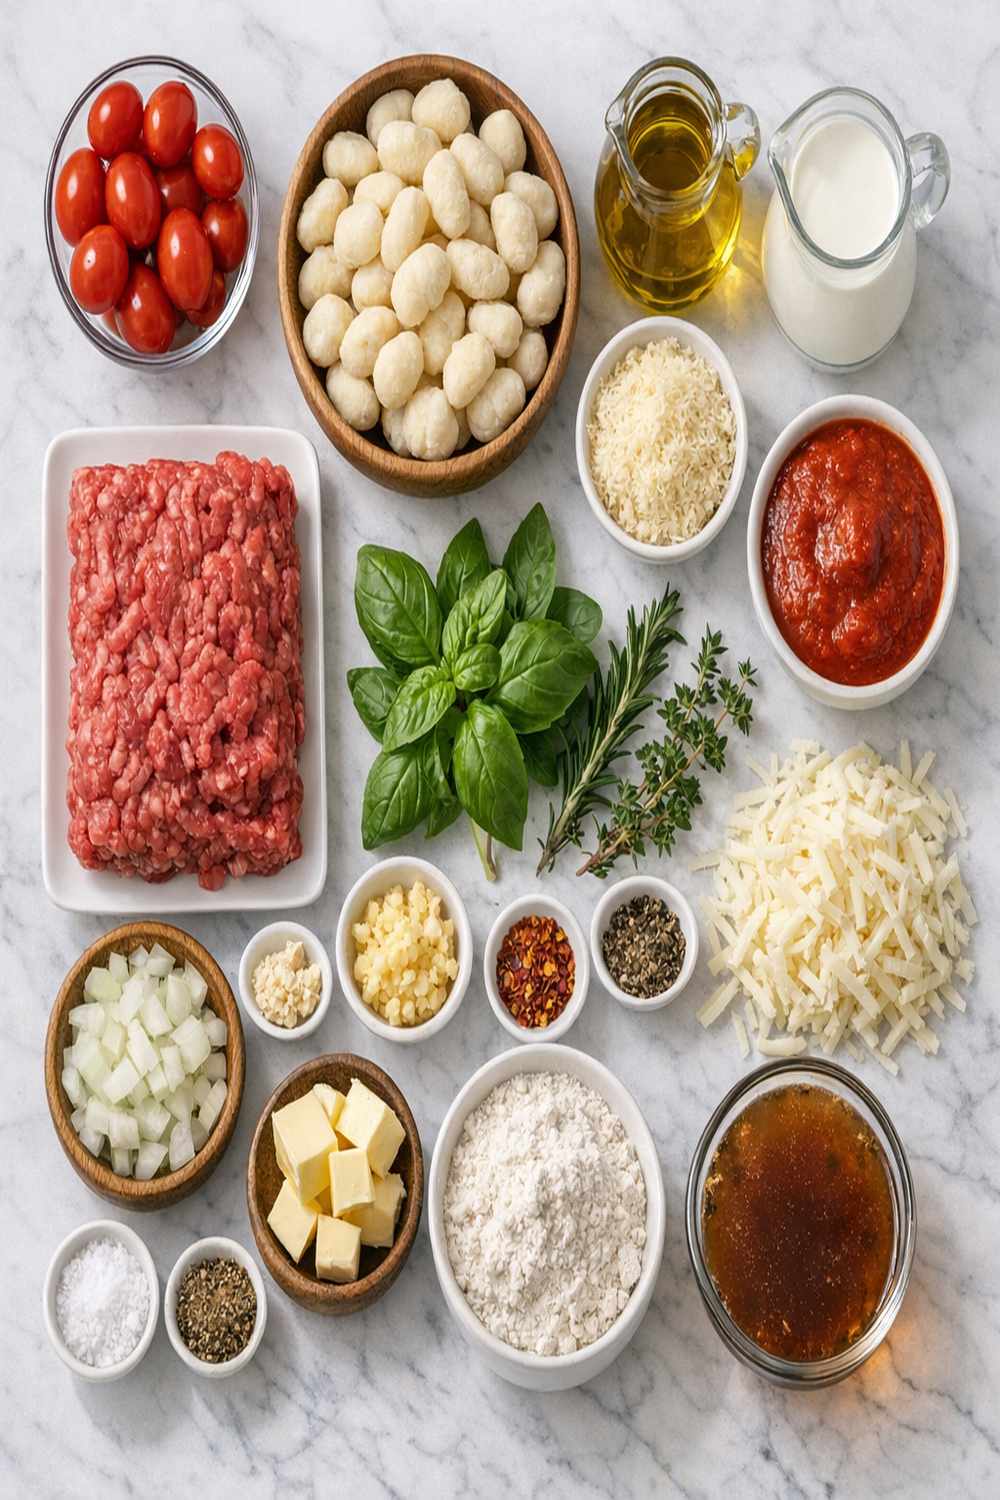
I’ve deliberately simplified the ingredient list because I believe better food comes from quality basics, not complexity. Every single item here plays a role, and I’ve chosen them specifically to maximize flavor while keeping your grocery bill low. Notice I’m not using cream cheese, heavy cream substitutes, or fancy herb blends—just real ingredients that actually taste good.
- 3 cloves garlic (minced fresh, never the jarred version for this dish)
- ¼ teaspoon Italian seasoning (dried herbs, or omit and use fresh basil if you have it)
- ½ cup freshly grated Parmesan cheese (please grate it yourself; pre-shredded has anti-caking agents that prevent melting smoothly)
- 1 can (14 ounces) diced tomatoes in juice (not drained, the juice is your cooking liquid)
- ¾ cup heavy cream (the real thing—this is not a place to substitute)
- Salt and black pepper (to taste at the very end)
- 1 tablespoon olive oil (for browning the meat)
- 1 pound uncooked potato gnocchi (look for this in the pasta aisle, not the frozen section—it costs less and tastes fresher)
- ½ medium onion (chopped into roughly ¼-inch pieces, sweet enough to caramelize slightly)
- ⅓ cup beef or chicken broth (homemade if you have it, but store-bought is perfectly fine)
- 1 pound ground beef (85/15 blend works best, not too lean or it lacks flavor, not too fatty or you’ll skim off half of it)
Expert’s Nutritional Tip: The combination of ground beef with tomatoes and cream creates a complete protein profile with all nine essential amino acids. The tomatoes provide lycopene (better absorbed when cooked with fat), and the potato base from gnocchi gives you resistant starch, which behaves differently in your digestive system than regular starch. This is legitimate comfort food that actually supports your body well. One serving contains approximately 18 grams of protein and 8 grams of fiber when you account for the potato content.
How to Make the Best Version of Beef Gnocchi Recipe
Every step here is deliberate. I’m not just telling you what to do—I’m explaining why this approach produces better results than shortcuts you might be tempted to try. Read through the whole thing once before you start, then follow along step by step.
Step 1: Brown Your Beef and Onions Thoroughly
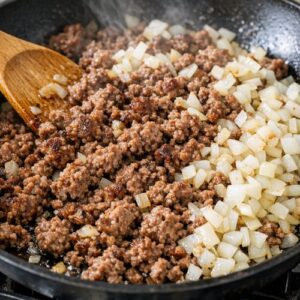
Heat your skillet to medium-high heat and add the olive oil. Once it shimmers (about thirty seconds), add your ground beef and chopped onion together. Don’t touch it for about three minutes—this is critical. You want the bottom of the pan to develop a deep golden-brown crust. Resist the urge to stir constantly. After three minutes, break up the beef with a wooden spoon and stir occasionally for another four to seven minutes until most of the pink is gone and you see those caramelized brown bits covering the bottom of the pan. This is where your flavor lives.
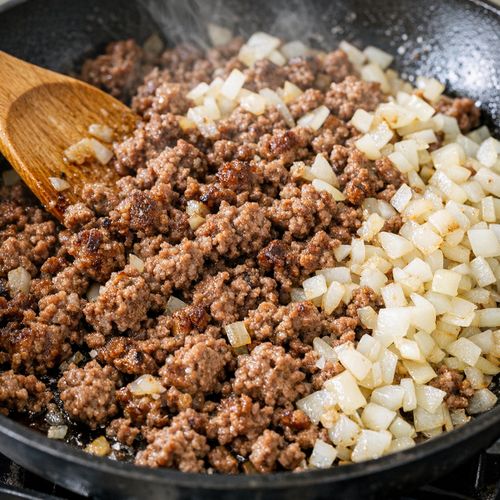
If you’re looking at a pool of grease, spoon most of it out (but keep about a tablespoon—you need some fat to cook the garlic). You want just enough liquid fat to coat the pan, not enough to make it greasy.
Step 2: Add Garlic and Seasoning
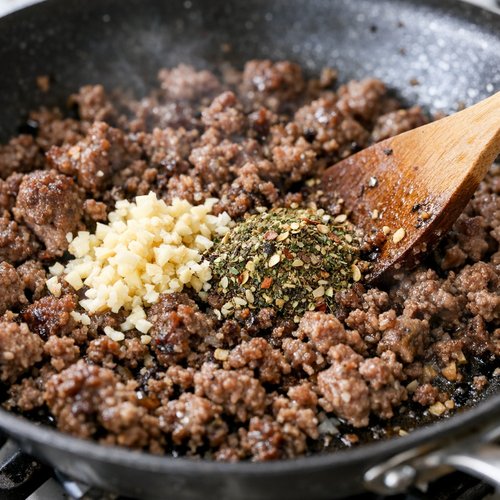
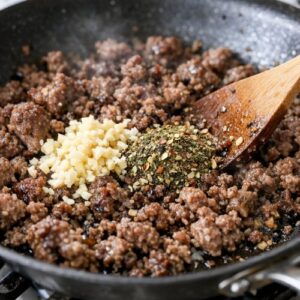
Add your minced garlic and Italian seasoning directly to the pan with the cooked meat. Stir constantly for about one minute. Don’t let the garlic burn—you’re looking for it to become fragrant and golden, not brown. This quick cooking releases the essential oils that give you that distinct beef and garlic flavor profile without any raw, harsh garlic bite.
Step 3: Add Your Tomatoes and Broth
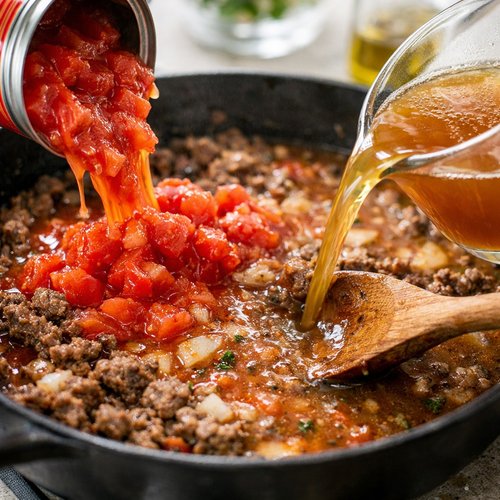
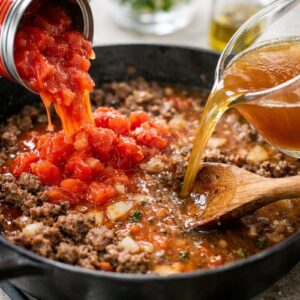
Pour in your canned tomatoes (with all the juice) and your broth. Stir well, making sure to scrape up any brown bits stuck to the bottom—that’s where the flavor is. Let this simmer for about two minutes without the lid, allowing the mixture to come to a gentle bubble and letting some of the raw tomato taste cook off. You’ll notice the sauce starting to smell more developed and less canned.
Step 4: Add the Cream and Uncooked Gnocchi
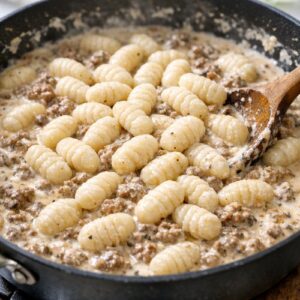
Stir in your heavy cream until fully combined, then add the uncooked gnocchi directly to the pan. Stir everything together so each gnocchi piece is surrounded by liquid. You should hear it bubbling within about thirty seconds. This is the exact right time to cover your pan.
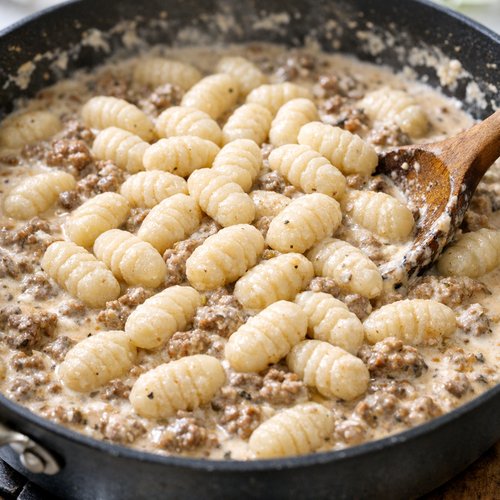
Critical difference from other methods: You’re adding raw gnocchi, not pre-cooked gnocchi. Raw gnocchi cooks in the residual heat and absorbs just enough liquid without becoming waterlogged. Pre-cooked gnocchi (like you’d use for the oven method) absorbs even more liquid and becomes mushy within minutes.
Step 5: Cover and Cook for Five Minutes
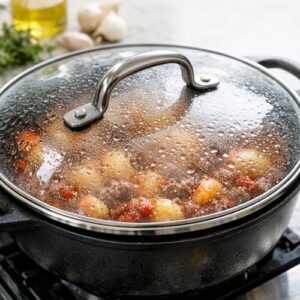
Reduce your heat to medium, cover the pan with a lid or foil, and let it cook undisturbed for exactly five minutes. You’ll hear gentle bubbling under the lid. This covered time allows steam to cook the gnocchi through while keeping your sauce creamy and thick. Don’t peek—every time you lift the lid, you release steam and extend cooking time.
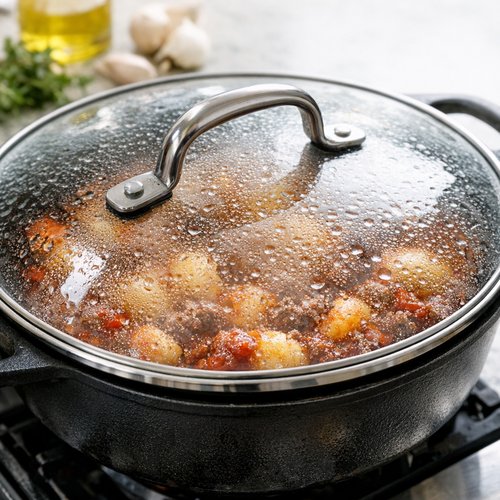
Step 6: Uncover, Stir, and Finish Cooking
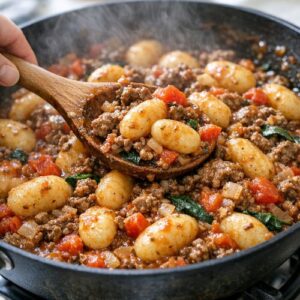
After five minutes, remove the lid carefully (watch for steam). Stir the entire pan, breaking up any gnocchi pieces that are stuck together. You’ll see the gnocchi is partially cooked but still slightly firm. Continue cooking uncovered for another two to four minutes, stirring occasionally. You’re looking for two things: gnocchi that’s completely soft when you bite it, and sauce that’s thick enough to coat a spoon without running off immediately. The uncovered cooking lets excess moisture evaporate and sauce thicken.
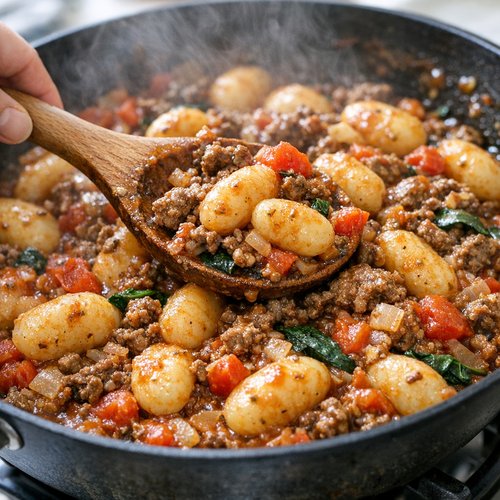
Step 7: Finish With Cheese and Seasoning
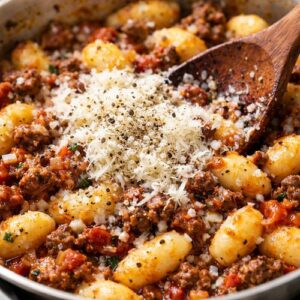
Remove from heat and stir in your freshly grated Parmesan cheese. Taste it now and add salt and pepper as needed. Season generously—this is when you actually taste whether your dish needs more salt. The pasta needs enough seasoning to shine on its own, not to be subtle.
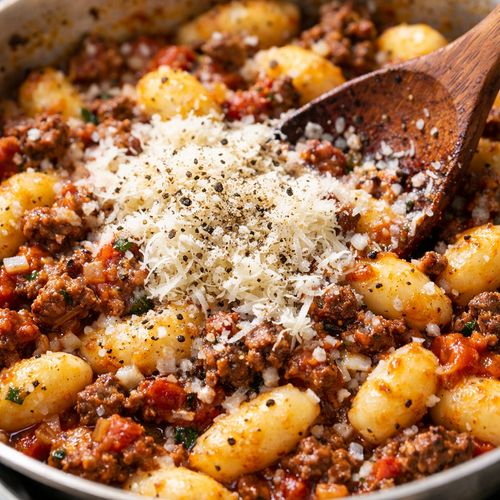
Serve immediately while it’s hot and creamy. If it sits for more than a few minutes, the gnocchi continues to absorb liquid and the sauce thickens further—which is actually nice if you like it extra hearty, but not ideal if you prefer creamier consistency.
Side-by-Side Results: What to Expect
Here’s exactly what you should see and taste when you do this correctly, compared to the other methods. The gnocchi should be creamy inside with a slight firmness that gives you a pleasant chew—never mushy or doughy. The sauce should coat each piece generously and cling to it, not pool separately at the bottom of the bowl. When you taste it, you’ll get the umami richness from the browned beef first, then the bright acidity from the tomato, then the smooth creaminess from the sauce. The Parmesan adds a sharp, salty finish that rounds everything out.
Compare this to the oven method, where the gnocchi often tastes slightly dry and chalky because it’s been sitting in uncovered heat too long. The sauce in that version separates slightly, with oil pooling on top and thicker sauce underneath. The oven-baked version also lacks that deep seared flavor from properly browning the meat because everything goes in raw.
The slow cooker version (if you’ve made it) has that mushy, almost dissolving gnocchi texture, and the sauce is often thinner and more separated. The long cooking time also mutes flavors rather than developing them.
When to Use Each Method
- You’re home and have thirty minutes: This skillet method wins every single time. You’re staying in the kitchen anyway, so use that time to make something actually delicious.
- You’re cooking for meal prep and need to make multiple portions at once: This method still wins. Double or triple the recipe in a large pot instead of a skillet. Everything scales perfectly, and you can portion it into containers for reheating all week.
- You need dinner ready before you walk through the door: Honestly, this method requires you to be present for the cooking. This is a great time to rethink your meal plan, use something like pulled pork from a weekend prep session, or consider my Beef Stir-Fry Recipe which has more flexibility for timing.
- You’re feeding a crowd and want to look like you’ve been cooking all day: This method. Make it in a large skillet or Dutch oven just before guests arrive. The deep browning and quick finish makes it taste like you’ve invested hours.
Can I Store Beef Gnocchi Recipe?
This dish stores and reheats beautifully, which is one reason it’s so practical for busy families. Refrigerate leftovers in an airtight container for up to four days. The flavors actually deepen slightly as it sits, which is a bonus. When you’re ready to eat it, reheat gently on the stovetop over medium heat, adding a splash of broth or cream if it seems too thick. The gnocchi will continue to absorb liquid as it sits, so the first day it’s creamier and by day three it’s more of a hearty pasta bake consistency—both are delicious depending on your preference.
Can you freeze it? Yes, but with a caveat. Freeze in an airtight container for up to two months. The texture of the gnocchi changes slightly after freezing (it becomes slightly denser), but the sauce freezes beautifully. Thaw overnight in the refrigerator and reheat gently. I personally prefer eating this fresh or within four days, but freezing works if you need that option.
Make-Ahead Guide: Prep your ingredients the night before and store in the refrigerator—chop your onion and garlic, measure your broth and cream, grate your cheese. Brown your meat and onions in the morning if you have time, then refrigerate the cooked meat separately. When you arrive home, you literally just need to reheat the meat for one minute, add your pre-measured ingredients, and follow the cooking steps. This takes the total hands-on time down to about fifteen minutes.
Nutrition Information
One serving (approximately 1¾ cups) contains 385 calories, 18 grams of protein, 32 grams of carbohydrates, and 18 grams of fat based on USDA food composition data. The recipe yields four generous servings as a main course or six servings if you’re pairing it with a side salad.
The protein comes primarily from the ground beef and Parmesan cheese, making this a complete protein with all essential amino acids. The potato gnocchi base provides complex carbohydrates and resistant starch. The tomatoes contribute lycopene, a fat-soluble antioxidant that’s better absorbed when combined with the fat from the meat and cream (which is exactly what this dish provides naturally).
This is genuinely nutritious comfort food, not a guilty pleasure. The calorie density is higher than a vegetable-forward dish, but the nutritional profile supports satiety and sustained energy—you’ll feel satisfied for hours.
What Can I Serve With Beef Gnocchi Recipe?
This dish is rich and complete on its own, but here are pairings that complement it without adding much prep time or cost:
- Simple green salad with lemon vinaigrette – The acidity and fresh greens balance the creamy sauce beautifully. Just toss some lettuce with lemon juice, olive oil, salt, and pepper right before serving.
- Roasted vegetables – Broccoli, green beans, or zucchini roasted with olive oil and garlic at 425 degrees for fifteen minutes while your gnocchi cooks. This adds nutrition and fiber without competing for flavors.
- Crusty bread – Dollar bread from the bakery section soaks up that sauce perfectly. Toast it lightly and serve alongside.
- Steamed Brussels sprouts with balsamic vinegar – The slight bitterness and acidity cuts through the richness perfectly.
- Garlic bread made from your crusty bread – Brush with olive oil, minced garlic, and parsley, then toast. Indulgent but costs almost nothing to make.
Skip the heavy sides—this dish is substantial enough on its own. I’ve seen people try pairing it with creamy mashed potatoes or pasta, which just makes the meal too heavy and takes away from the gnocchi itself.
Common Mistakes to Avoid
After years of helping people master this dish, I’ve seen the same pitfalls come up repeatedly. Here’s how to sidestep them:
Mistake #1: Not browning the meat enough. I see people get impatient and skip the full browning step or rush through it. The deep brown crust is literally where fifty percent of your flavor lives. Don’t skip it. Those brown bits at the bottom of the pan aren’t burnt—they’re liquid gold. Spend the full seven to ten minutes on this step.
Mistake #2: Using pre-cooked gnocchi. Grocery stores sell both raw gnocchi (in the pasta aisle) and frozen pre-cooked gnocchi (in the frozen section). The pre-cooked version overcooks in this method and turns to mush. Always buy raw, uncooked gnocchi for this recipe. It’s also cheaper, which is perfect when you’re building a budget-friendly meal.
Mistake #3: Skipping the grating step for Parmesan. I know pre-shredded is convenient, but it genuinely doesn’t melt smoothly into your sauce because of anti-caking agents. The texture suffers. For less than a dollar more, you can buy a wedge and grate it yourself. Your dish will taste noticeably better.
Mistake #4: Adding seasoning too early. Some recipes tell you to season the sauce while it’s cooking. Don’t. Wait until the very end, after the gnocchi is fully cooked. The salt intensifies as liquid reduces, so early seasoning often leads to over-salting.
Seasonal Variations
Spring: Add fresh peas (about ½ cup) in the last two minutes of cooking. Use fresh basil instead of dried Italian seasoning. Add the zest of one lemon to brighten everything.
Summer: Stir in fresh spinach or arugula right before serving—the hot sauce wilts it perfectly. Add sun-dried tomatoes (about ⅓ cup chopped) instead of some of the canned tomatoes for a concentrated tomato flavor. Use fresh oregano if you have it.
Fall: Add ½ teaspoon red pepper flakes during the browning step for subtle heat. Use fresh sage if available. Stir in a handful of crispy pancetta or bacon bits right at the end for extra richness.
Winter: This is the time for the classic version exactly as written. It’s perfect comfort food when it’s cold outside. You could add mushrooms (sautéed separately) if you want extra umami depth.

Beef Gnocchi Recipe
Ingredients
Method
- Heat your skillet to medium-high heat and add the olive oil. Once it shimmers (about thirty seconds), add your ground beef and chopped onion together. Don't touch it for about three minutes—this is critical. You want the bottom of the pan to develop a deep golden-brown crust. Resist the urge to stir constantly. After three minutes, break up the beef with a wooden spoon and stir occasionally for another four to seven minutes until most of the pink is gone and you see those caramelized brown bits covering the bottom of the pan. This is where your flavor lives. If you're looking at a pool of grease, spoon most of it out (but keep about a tablespoon—you need some fat to cook the garlic). You want just enough liquid fat to coat the pan, not enough to make it greasy.
- Add your minced garlic and Italian seasoning directly to the pan with the cooked meat. Stir constantly for about one minute. Don't let the garlic burn—you're looking for it to become fragrant and golden, not brown. This quick cooking releases the essential oils that give you that distinct beef and garlic flavor profile without any raw, harsh garlic bite.
- Pour in your canned tomatoes (with all the juice) and your broth. Stir well, making sure to scrape up any brown bits stuck to the bottom—that's where the flavor is. Let this simmer for about two minutes without the lid, allowing the mixture to come to a gentle bubble and letting some of the raw tomato taste cook off. You'll notice the sauce starting to smell more developed and less canned.
- Stir in your heavy cream until fully combined, then add the uncooked gnocchi directly to the pan. Stir everything together so each gnocchi piece is surrounded by liquid. You should hear it bubbling within about thirty seconds. This is the exact right time to cover your pan. Critical difference from other methods: You're adding raw gnocchi, not pre-cooked gnocchi. Raw gnocchi cooks in the residual heat and absorbs just enough liquid without becoming waterlogged. Pre-cooked gnocchi (like you'd use for the oven method) absorbs even more liquid and becomes mushy within minutes.
- Reduce your heat to medium, cover the pan with a lid or foil, and let it cook undisturbed for exactly five minutes. You'll hear gentle bubbling under the lid. This covered time allows steam to cook the gnocchi through while keeping your sauce creamy and thick. Don't peek—every time you lift the lid, you release steam and extend cooking time.
- After five minutes, remove the lid carefully (watch for steam). Stir the entire pan, breaking up any gnocchi pieces that are stuck together. You'll see the gnocchi is partially cooked but still slightly firm. Continue cooking uncovered for another two to four minutes, stirring occasionally. You're looking for two things: gnocchi that's completely soft when you bite it, and sauce that's thick enough to coat a spoon without running off immediately. The uncovered cooking lets excess moisture evaporate and sauce thicken.
- Remove from heat and stir in your freshly grated Parmesan cheese. Taste it now and add salt and pepper as needed. Season generously—this is when you actually taste whether your dish needs more salt. The pasta needs enough seasoning to shine on its own, not to be subtle. Serve immediately while it's hot and creamy. If it sits for more than a few minutes, the gnocchi continues to absorb liquid and the sauce thickens further—which is actually nice if you like it extra hearty, but not ideal if you prefer creamier consistency.
FAQs
Can I Make This Recipe With Ground Turkey or Ground Chicken?
Technically yes, but I don’t recommend it. Ground beef has more fat, which develops that rich seared crust and flavor. Ground chicken and turkey are too lean—they’ll stick to the pan, won’t brown properly, and the final dish tastes thin and one-dimensional. If you’re trying to reduce calories, use 90/10 lean beef instead of going to poultry. You’ll get better flavor and similar nutrition.
What If I Don’t Have Heavy Cream—Can I Use Milk or Half-and-Half?
Not really. Milk has too much water and will make your sauce thin and watery. Half-and-half has slightly more milk than cream, so the sauce won’t thicken properly. I know cream costs a bit more, but you only need ¾ cup and it’s what makes this dish taste like restaurant food instead of cafeteria food. This is one place I genuinely won’t recommend substituting. If cost is the issue, make this recipe less frequently but do it right, rather than making a watered-down version weekly.
Do I Have to Use Canned Tomatoes or Can I Use Fresh?
Fresh tomatoes work only if you’re making this during peak tomato season (July-September) and have truly ripe, flavorful tomatoes. You’d need about 1½ pounds of fresh tomatoes, chopped and drained. The reality is that canned tomatoes are actually better most of the year—they’re picked at peak ripeness and processed the same day. Canned tomatoes also cost less, require no prep, and are consistent. Stick with canned.
Why Does My Sauce Separate or Look Greasy?
This usually means one of two things: you didn’t brown the meat enough (the fat didn’t render out), or you’re not letting the sauce cook long enough in the uncovered step to thicken properly. Make sure you’re spending the full seven to ten minutes on the browning step, and definitely don’t skip the uncovered cooking time at the end. If separation still happens, you can stir in a splash of cream right before serving and it will come back together.
Can I Make This in a Dutch Oven for More Servings?
Absolutely. Double or triple the recipe and use a large Dutch oven or heavy pot. The cooking times stay exactly the same—you don’t need to adjust them. Brown your meat in batches if needed to avoid overcrowding the pot (overcrowding steams instead of browns). This is exactly what I recommend for meal prep or cooking for company. Works beautifully.
More Recipes You’ll Love
- Best BBQ Wings Recipe – Another weeknight favorite that uses simple browning technique for maximum flavor
- Chicken Spaghetti – Creamy one-pan pasta when you want to swap protein
- Beef Meatballs Recipe – Another way to transform affordable ground beef into something special
- Thick Rich Pizza Sauce – Uses the same tomato-browning technique for deep flavor
This beef gnocchi recipe is the definitive version because it respects your time, your budget, and your desire to eat something genuinely delicious. You’re not sacrificing flavor for convenience—you’re getting both. You’re not paying restaurant prices—you’re feeding a family of four for under eight dollars. You’re not standing over the stove for hours—you’re involved in the process for thirty minutes and then serving something that tastes like you’ve been cooking all day. That’s the whole philosophy I’ve built my career around: prove that healthy, delicious, affordable eating is actually the norm, not the luxury. This recipe does exactly that.
Make this for your family this week. Bookmark it for next month. Double it for meal prep. Watch how your kids ask for it by name and how your friends ask for the recipe. This is what real food tastes like.
Happy Cooking!