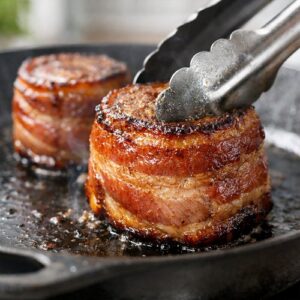

Ingredients
Method
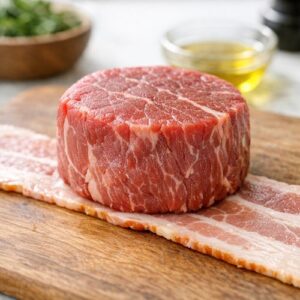
Step 1: Prepare Your Bacon and Secure Your Steaks
- Take one strip of bacon and lay it flat on your work surface. Place your filet mignon on top, positioning it so one long edge sits near the bacon's edge. Roll the bacon around the steak snugly—you want about ¼ inch of overlap where the bacon meets itself. This overlap is crucial. It's your seal. Push your soaked toothpick through both layers of bacon, anchoring it at the overlap point. The toothpick prevents the bacon from unrolling during the initial searing. Using kitchen scissors, trim any excess bacon that extends beyond the steak's height. Don't throw those scraps away. Set them aside. They'll render into fat that flavors your cooking surface. Repeat this process with each remaining steak. You now have four perfectly wrapped filets, each secured with intentionality.
Step 2: Salt and Rest (Optional but Recommended)
- Sprinkle salt evenly on the top and bottom of each steak—don't salt the bacon itself. The bacon brings enough sodium. If you have time, place these wrapped steaks on a plate, cover loosely with parchment paper, and refrigerate for 30 minutes to 2 hours. This is called dry-brining. The salt draws moisture to the surface, then the meat reabsorbs it, seasoning throughout. It's a professional technique that takes zero extra effort. If you're cooking immediately, that's fine too. Your results will still be excellent. Add a few grinds of fresh black pepper to each steak at this point if desired. I prefer to add pepper after cooking to preserve its aromatic oils, but this is entirely personal preference.

Step 3: Heat Your Cast Iron and Render the Bacon Fat
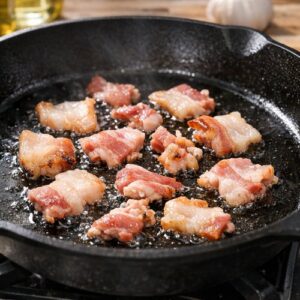
- Place a cast iron skillet over medium heat. Let it warm for two minutes. You want it hot but not smoking. Add those bacon scraps you trimmed earlier. They'll render almost immediately, releasing their fat into the pan. Listen for the gentle sizzle. Within 45 seconds, the bottom of your pan will be coated in bacon fat—this is your cooking medium. Remove the rendered bacon pieces and either discard them or set them aside for a snack. Cast iron is non-negotiable here. It maintains consistent heat and creates the crust you can't achieve in a regular skillet. If you don't have cast iron, a heavy stainless steel skillet works as your backup, though the results won't be identical.
Step 4: Sear the Bacon Seal First
- This is the technique that separates restaurant results from home cooking. Remove the toothpicks from your steaks. Hold each wrapped steak on its side so the bacon overlap (where the toothpick was) makes direct contact with the hot pan. Cook undisturbed for exactly 30 seconds. You'll hear the bacon sizzle. Don't move it. That immobility creates the crust. After 30 seconds, flip the steak so a different section of bacon touches the pan. Repeat every 30 seconds, rotating around the entire circumference. This takes about two minutes total. You're crisping the bacon all the way around. This crisping does something important—it creates a seal that keeps the bacon attached through the rest of cooking.
Step 5: Stand the Steak Upright and Sear the Sides
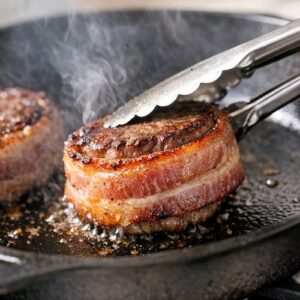
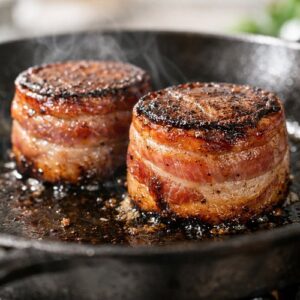
- Now stand each steak upright so the flat top and bottom make contact with the hot pan. Don't move the steaks during this phase. This is where the magic happens. The heat creates a flavorful crust through the Maillard reaction—a scientific process where proteins and sugars combine under high heat to create new flavors. This is why seared steak tastes so much better than boiled steak. For rare steak: 4 minutes per side (internal temperature 120-125°F) For medium steak: 6 minutes per side (internal temperature 130-135°F) For well-done steak: 8 minutes per side (internal temperature 155°F and above) My family prefers medium, which takes 12 minutes total searing time. After the initial time on the first side, flip and cook the second side for the same duration. Use a meat thermometer inserted horizontally into the thickest part of the steak for accuracy. Temperature matters more than time because every stove and skillet varies.
Step 6: Final Bacon Crisp and Rest
- Once your steaks reach desired doneness, stand them on their sides one final time. Quickly sear around all edges of the bacon again, about 15-20 seconds total. This ensures every section of bacon is crispy and locked in place. Your bacon shouldn't be limp or chewy—it should snap when you bite it. Transfer your steaks to a cutting board immediately. This resting phase is non-negotiable. Let them sit undisturbed for 6 minutes. During this time, the muscle fibers relax and reabsorb the juices that rose to the surface during cooking. When you cut into a properly rested steak, the juices stay inside the meat instead of running onto your plate. It's the difference between tender and tough, between juicy and dry.