This post contains affiliate links. As an Amazon Associate I earn from qualifying purchases.
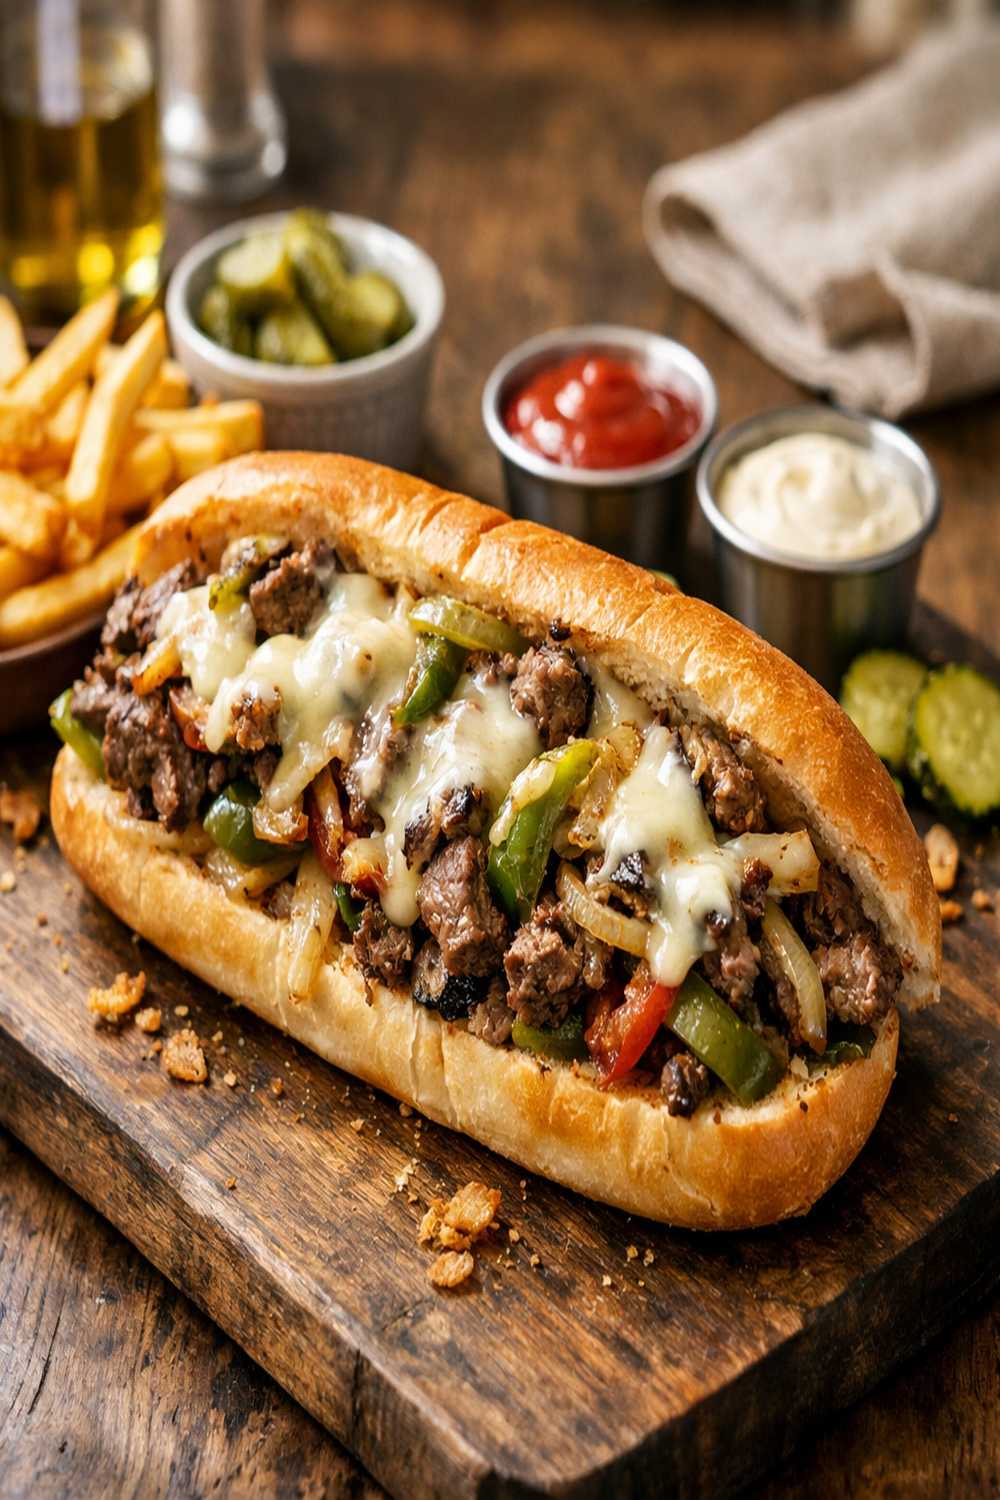
If you’ve always wanted to make a homemade cheesesteak but felt intimidated by the restaurant reputation or thought you needed special equipment, I’m here to tell you that you absolutely can do this. I’ve spent a decade working with families in Indiana who stretch their grocery dollars without sacrificing the flavors they love, and cheesesteaks are proof that restaurant-quality meals live right in your kitchen. This recipe teaches you searing meat properly, caramelizing onions, and melting cheese at the perfect moment—skills that transfer to dozens of other dishes once you master them here. Like my Easy Chicken Philly Cheesesteak Recipe, this version focuses on technique over fancy ingredients. You’ve got this.
How to Make a Homemade Cheesesteak for the First Time (You’ve Got This)
I’ll never forget the first time I tried to make a cheesesteak at home. I was newly married, living on my husband’s graduate student salary, and determined to recreate the sandwich we’d split on our first date in Philadelphia. I sliced the meat too thick, rushed the onions, and ended up with a rubbery mess. But instead of giving up, I called my grandmother. She reminded me that good cooking isn’t about following rules perfectly—it’s about understanding what each ingredient needs.
That conversation changed how I approach teaching food. A cheesesteak isn’t complicated. It just needs your attention at the right moments. The beef needs high heat and a flat surface. The onions need patience. The cheese needs just enough warmth to melt without overcooking the meat. Once you understand those three things, you’re already 90% of the way there.
What to Expect Before You Start
Let me set realistic expectations so you know exactly what you’re walking into. This recipe takes about 25 to 30 minutes from start to finish, with most of that time being active cooking. This isn’t a set-and-forget dish—you’re hands-on, which actually makes it easier to control the outcome. The difficulty level is beginner to intermediate. You’re managing a hot pan and a few timing elements, but nothing demands culinary school training. The good news? Every single step builds your confidence for future cooking.
- Knife skills matter, but not perfection. Slicing your beef thinly is the most important technical moment, but if your slices aren’t perfectly uniform, you’ll still end up with delicious food. Slightly thicker pieces just need an extra 30 seconds on the pan. This isn’t a disaster.
- Cooking times vary by heat and pan size. Your stove might run hotter or cooler than mine. I’ll give you visual cues at every step so you know when something is actually done, not just “when the recipe says so.”
- Caramelized onions require patience, not babysitting. Many home cooks skip this step or rush it because they think it’s too involved. It’s not. You just need to resist the urge to stir constantly. Let them sit. That’s the secret.
Equipment You’ll Need (And What You Can Skip)
The beauty of a cheesesteak is that it demands almost no special equipment. If you have a stovetop and a skillet, you’re ready. I’ll break down exactly what matters and what’s nice-to-have, because I know not everyone has a kitchen full of gadgets, and honestly, you don’t need them.
- One large skillet or flat-top griddle (10 to 12 inches). This is your workhorse. Cast iron works beautifully because it distributes heat evenly and gets very hot. A stainless steel pan works too. Non-stick is fine, though less ideal for getting that perfect beef sear. If you only have a small pan, just cook the onions and beef in two batches rather than feeling pressured to upgrade.
- A sharp knife (8-inch chef’s knife or similar). This makes slicing beef and dicing onions faster and safer. A dull knife requires more pressure and is more likely to slip. If your knife isn’t sharp, ask a friend to borrow theirs, or take yours to a local knife sharpening service—it costs under $5 and makes a real difference.
- A serrated bread knife. You need this to slice your hoagie rolls without crushing them. If you don’t have one, a sharp regular knife works in a pinch, but serrated is genuinely worth having on hand for all bread work.
- A small bowl and a rubber spatula. These are for mixing your garlic butter and scraping the cheesy beef into the rolls. If you don’t have a rubber spatula, a sturdy wooden spoon or regular spatula works fine.
- A cutting board. Essential. Wood or plastic both work.
- Optional: a meat slicer. If you own a deli-style meat slicer, it makes prep faster and ensures perfectly uniform beef slices. But it’s not necessary. A sharp knife gets you 95% of the way there, and the remaining 5% doesn’t affect the final dish.
The Ingredients—A Beginner’s Shopping Guide
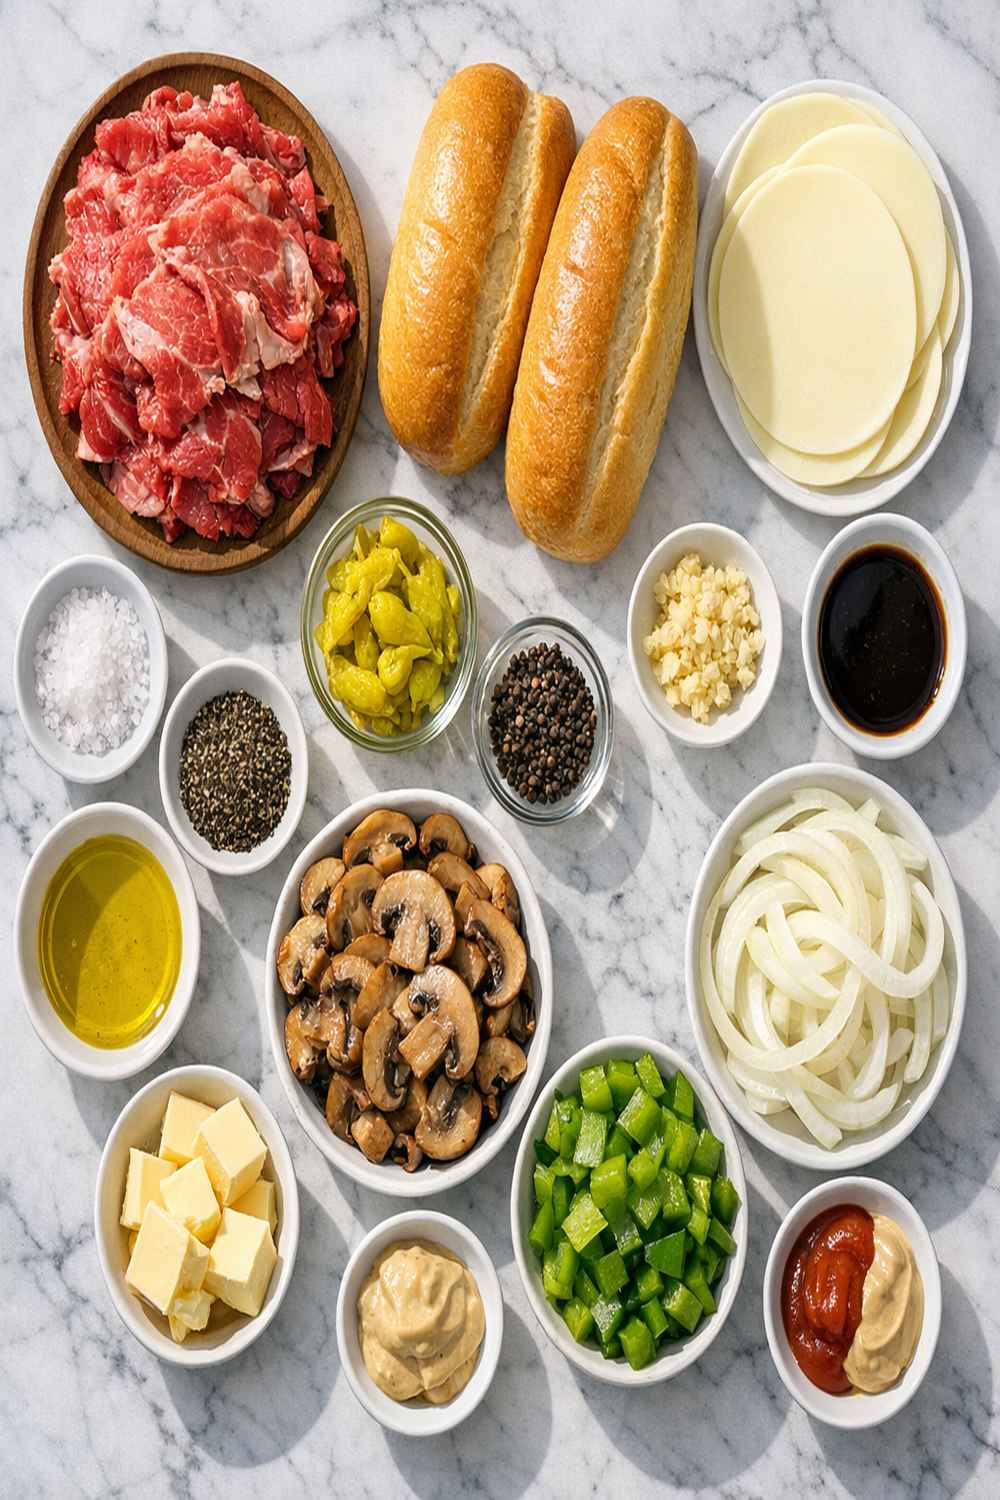
I want you to feel confident walking into the grocery store and finding everything on this list. I’ve included exactly where to find each ingredient, what to look for, and how to save money without sacrificing quality. Cheesesteaks live or die on ingredient quality, so let’s get this right.
For the Meat and Cheese
- 1 pound ribeye steak (ask the butcher to trim the fat cap and slice it thin, or buy a whole steak and slice it yourself at home)
- 8 slices provolone cheese (buy mild provolone from the deli counter, not aged or smoked—it melts more smoothly)
For the Sandwich Assembly
- 4 hoagie rolls (also called sub rolls or Italian rolls; buy from the bakery section the same day you’re cooking, not pre-packaged if possible)
- 2 tablespoons unsalted butter (softened to room temperature)
- 1 garlic clove (fresh, not jarred or powdered)
- 2 to 4 tablespoons mayonnaise (use full-fat, not light—it tastes better and spreads easier)
- 1 large sweet onion (Vidalia or yellow onions work; look for firm onions with no soft spots)
For Cooking and Seasoning
- ½ teaspoon black pepper (freshly cracked if possible; pre-ground works)
- ½ teaspoon sea salt (fine sea salt, not kosher salt, which is bulkier and harder to measure)
- 2 tablespoons neutral cooking oil (vegetable, canola, or light olive oil—avoid extra virgin olive oil here because high heat will damage its flavor)
Where to Find Everything (And How to Save)
The beef. Go to your grocery store’s butcher counter, not the pre-packaged meat section. Tell the butcher exactly what you need: “One pound of ribeye, trimmed of excess fat, sliced thin.” They’ll do it while you wait. If they won’t slice it, buy a whole steak (about 1.5 pounds) and slice it yourself at home using the knife technique I’ll teach you in Step 2. Ribeye is pricier than some cuts, but the marbling—those little fat lines—creates incredible flavor. It’s worth the investment for this dish.
The provolone. Buy from the deli counter, not the pre-packaged cheese section. Ask for “mild provolone, sliced thin.” Pre-packaged cheese often has anti-caking agents that prevent smooth melting. Fresh-sliced provolone from the counter melts like silk. If your store doesn’t have provolone, American cheese works (and is actually cheaper), though it’s less traditional.
The hoagie rolls. Visit the bakery section of your grocery store. Freshly baked rolls make an enormous difference. If you can’t find hoagie rolls, use sub rolls or Italian rolls—they’re the same thing. Buy them the day you’re cooking. If you have to buy them early, keep them in the freezer and thaw at room temperature before using.
The onion. A large sweet onion is ideal because it caramelizes beautifully and adds natural sweetness. Vidalia onions are worth seeking out if your store carries them, but a regular yellow onion works fine. Avoid red onions—they have a different flavor profile and won’t caramelize the same way.
Saving money without sacrificing quality. This sandwich is built on expensive ingredients by design. Ribeye and fresh cheese aren’t budget cuts. But here’s where I save: I buy my beef from a grocery store that has weekly sales (usually 20% to 30% off select meats). I plan this meal for those sale weeks. I buy the large, less-popular sweet onions because they’re often marked down. And I make the full four sandwiches at once so the cost per sandwich feels more manageable. You could also make this with sirloin steak instead of ribeye, which is 30% cheaper and still delicious.
Step-by-Step: Your First Cheesesteak
Here we go. I’m giving you ultra-detailed instructions for every single step because I know what it’s like to cook something new and feel unsure. Every action is explained. Every visual cue is called out. You’re going to nail this.
Step 1: Prep Your Rolls and Make Garlic Butter
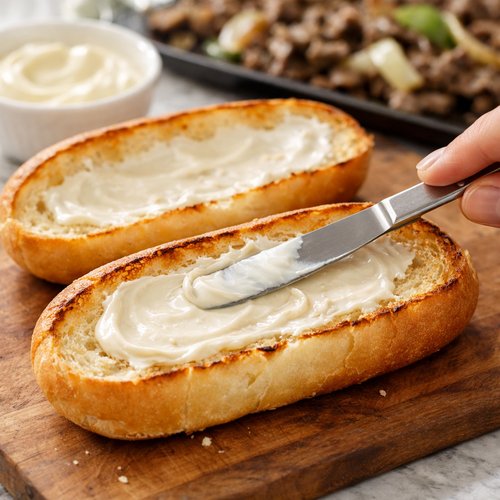
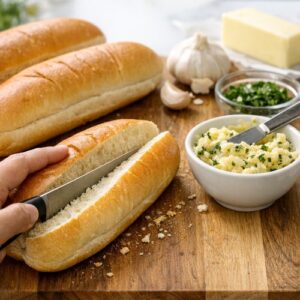
This is the easiest step, but it’s crucial because you need your rolls ready before the meat is cooked. Use a serrated knife to slice each hoagie roll three-quarters of the way through. You’re creating a hinge—the roll stays connected on one side, but opens fully like a book. If you cut all the way through, the bottom half falls away and becomes messy. The three-quarter cut keeps everything together.
Now make your garlic butter. Press one fresh garlic clove into a small bowl. If you don’t have a garlic press, mince the garlic as finely as you can with your knife. Add your 2 tablespoons of softened butter. Stir until the garlic is completely mixed in. This takes about 30 seconds. You want a uniform golden spread, not garlic chunks floating around.
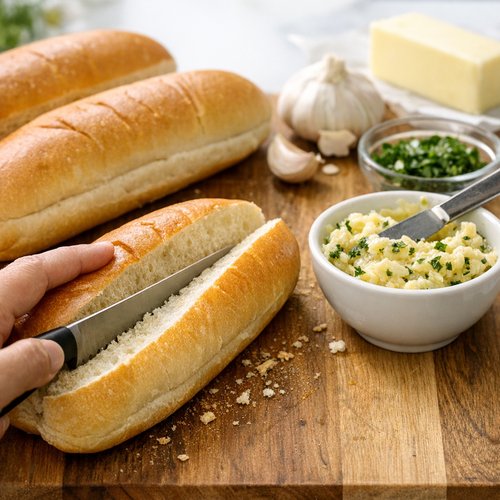
Spread this garlic butter onto the inside of each roll. Use about half a tablespoon per roll. Don’t be shy—you want a thin layer covering all the cut surfaces. This will toast beautifully and add incredible flavor.
Step 2: Toast Your Rolls
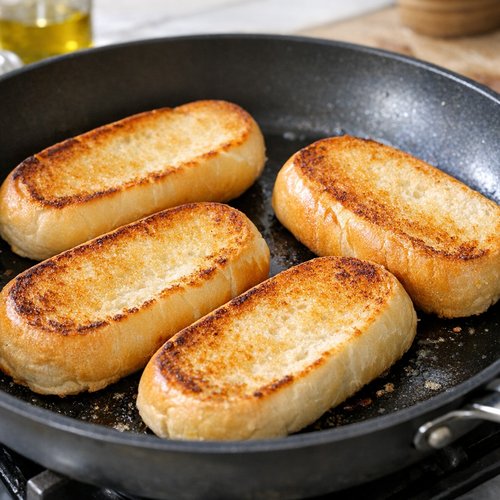
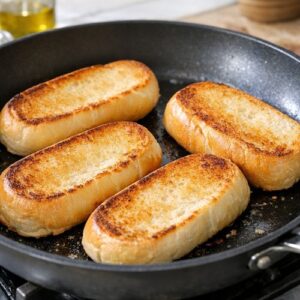
Heat your skillet over medium heat for about 2 minutes until it’s warm (not screaming hot). Place all four rolls in the skillet, cut-side down. You’re toasting the buttered insides until they’re golden brown and crispy. This usually takes 3 to 5 minutes depending on your heat. You’ll know they’re done when the butter is absorbed and the bread is golden, with maybe a tiny bit of char.
Don’t walk away. This step is fast, and burned bread is bitter and ruined. Stay close and watch. When they look perfect, transfer them to a clean plate and set aside. They’ll stay warm for several minutes.
Step 3: Prepare Your Beef and Onions
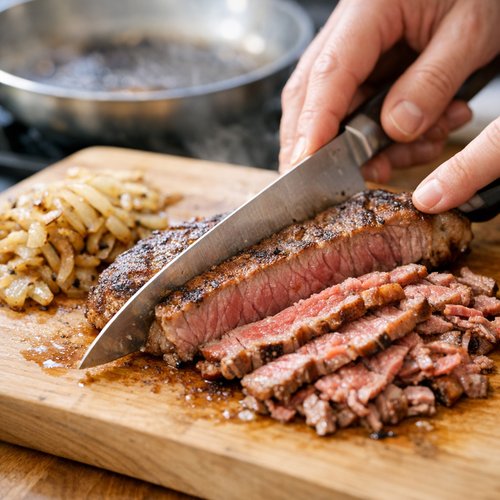
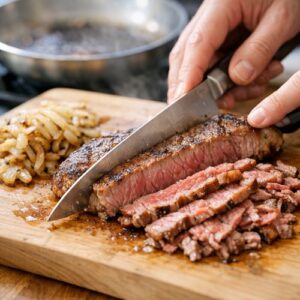
If your butcher didn’t slice your beef, do it now while your pan is still warm. Place your ribeye on a cutting board. Using a sharp knife, slice the beef across the grain (perpendicular to the muscle fibers) into pieces about the thickness of a coin—roughly ⅛ inch. The thinner your slices, the faster they’ll cook and the more tender they’ll be. If your pieces are slightly uneven, that’s okay. Some will be thicker and need 30 extra seconds; some will be thin and cook faster. They all end up delicious.
Dice your large sweet onion into ½-inch pieces. It doesn’t need to be perfect. Onions will shrink and soften, so exact size matters less here than with the beef. Just aim for roughly equal pieces so they cook evenly.
Step 4: Caramelize Your Onions (The Secret Step)
This is where patience separates good cheesesteaks from great ones. Add 1 tablespoon of cooking oil to your skillet over medium heat. Wait about 1 minute for it to heat.
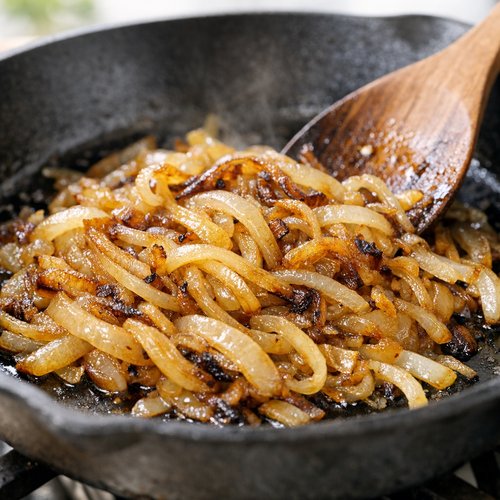
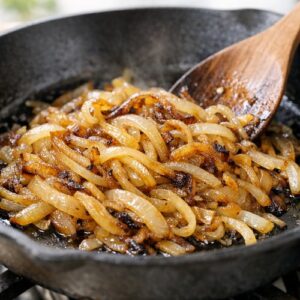
Add your diced onions to the hot oil. You’ll hear a sizzle. This is right. Don’t stir constantly. This is the most important instruction in this entire recipe. Stir occasionally—maybe every 2 minutes—but mostly let the onions sit still. When onions sit undisturbed on hot oil, they develop a brown crust on the bottom. This crust is where the flavor lives. If you stir constantly, you never get this crust.
After about 8 to 10 minutes, your onions should be soft, golden, and deeply caramelized. You’re looking for onions that have turned from white to medium brown. Some darker brown spots are beautiful. The kitchen should smell amazing—sweet, rich, and almost nutty. Sprinkle very lightly with salt. This draws out moisture and helps the caramelization process. Cook another minute or two if needed.
Transfer your caramelized onions to a clean bowl. Set aside. This is a component you’ll use in the final assembly.
Step 5: Sear Your Beef (The Crucial Moment)
This is the step that determines whether your beef is tender or tough. Here’s what matters: high heat, thin meat, and not moving it around too much.
Increase your skillet heat to high. Wait 2 minutes for it to get very hot. Add 1 tablespoon of fresh cooking oil. The oil should shimmer immediately and spread easily across the pan. If it doesn’t, your pan isn’t hot enough yet.
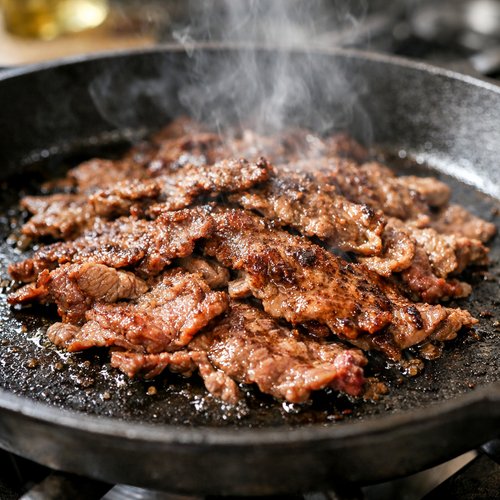
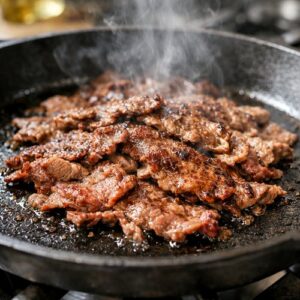
Spread your thinly sliced beef across the pan in a single layer. You want to cover most of the pan, but don’t overlap the slices on top of each other. Let the beef sit undisturbed for about 2 to 3 minutes. This is called a sear, and it creates a brown crust on one side. Don’t poke it, don’t flip it, just let it work.
After 2 to 3 minutes, flip each piece. The bottom should be brown and caramelized. If it’s still gray, give it another minute. Once flipped, immediately sprinkle with your ½ teaspoon of salt and ½ teaspoon of black pepper. The beef will continue cooking for another 1 to 2 minutes on this side. You’re aiming for beef that’s cooked through but still tender—no gray or pink should remain.
Stir gently. Break up any pieces sticking together, and mix everything so the seasoning distributes evenly. Cook for another 30 seconds to 1 minute, then stir in your reserved caramelized onions. Toss gently until everything is combined.
Step 6: Add Cheese and Let It Melt (Timing Is Everything)
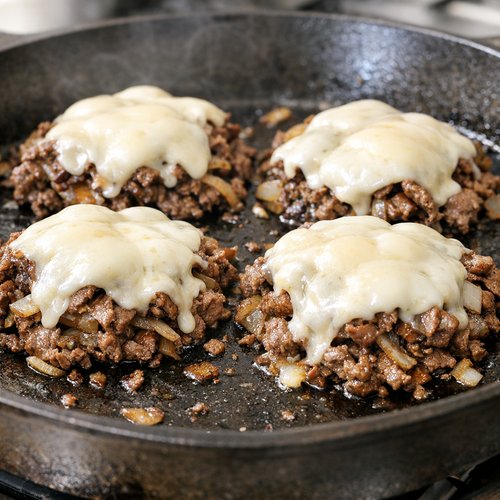
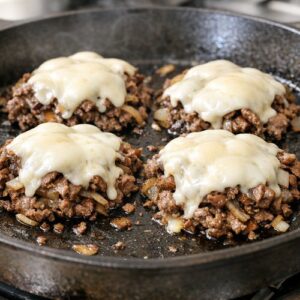
Divide your beef and onion mixture into four even portions in the pan. You can do this by pushing the mixture into four rough sections, or by scooping it into four piles. Don’t worry about precision—roughly equal is fine.
Top each portion with two slices of provolone cheese. Lay the cheese flat over the beef. Immediately turn off the heat. This is critical. The residual heat from the pan will melt the cheese perfectly without overcooking the beef. If you leave the heat on, the beef will dry out while waiting for cheese to melt.
Wait 30 to 60 seconds. Watch the cheese. When it’s soft and starting to pool, it’s ready. You’re not waiting for it to be fully melted into a puddle—just soft enough to stay together when you move it.
Step 7: Assemble Your Sandwiches
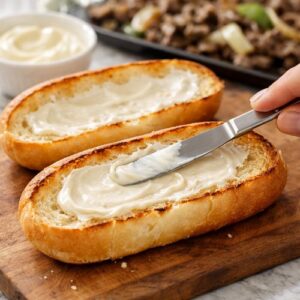
Spread a thin layer of mayonnaise on the toasted inside of each roll. About ½ to 1 tablespoon per roll. Not too much—mayo is rich, and a thin layer is all you need.
Here comes the fun part, and it requires focus but no special skill. Working with one portion at a time, pick up a toasted roll and position it over one beef portion. The open, mayonnaise-side of the roll should face down toward the beef. Using a spatula, gently push the beef and cheese from the pan onto the bread, then flip the whole thing onto a plate. The roll becomes the top of your sandwich, and everything stays together.
Repeat for all four sandwiches. Serve warm immediately. The cheese will still be melting, the bread will still be warm, and everything tastes perfect.
How to Tell If You Did It Right
You’re looking for specific visual, tactile, and taste cues at each stage. Here’s exactly what success looks like so you can trust your instincts.
- Toasted rolls are golden, not pale or burned. They should look appetizing and smell like butter and bread. If they’re brown and crispy on the edges but some spots are still soft, that’s perfect. If they’re pale, they need more time. If they’re dark brown or black, they’re overdone.
- Caramelized onions are golden-brown and tender when you taste one. They should smell sweet and rich, almost nutty. They should mash easily under your tooth. If they’re still crunchy and white, they need more time. If they’re completely black, they’re burned (though slightly charred bits are actually delicious).
- Beef is brown throughout, not pink or gray. When you stir it, every piece should have color. It should be tender, not tough or chewy. Taste a small piece before assembly—it should be flavorful and seasoned well.
- Cheese is soft and slightly pooling but not completely liquefied. You should see the slices starting to blend together, but not dissolved into oil. When you push it with a spatula, it should move as one cohesive mass, not slide off separately.
- The final sandwich holds together and doesn’t fall apart when you pick it up. The roll is sturdy enough to support the filling. When you bite into it, you get beef, cheese, onion, and bread in every bite.
What Went Wrong? Beginner Fixes
I’ve made every mistake, and I’ve helped countless home cooks troubleshoot. Here are the most common issues and exactly how to fix them next time.
- Beef is tough or rubbery. This happens when heat is too high for too long, or the beef is cut too thick. Solution: Slice thinner next time, and don’t let the beef sit on high heat for more than 4 to 5 minutes total. High heat is good for searing, but extended time dries meat out. Also make sure you’re buying ribeye or sirloin—lean cuts like round steak become tough more easily.
- Onions aren’t brown; they’re just soft. You probably stirred them constantly or didn’t use high enough heat. Solution: Let them sit longer without stirring, or increase your heat slightly. The key is undisturbed time on a hot surface. If you’re in a rush, cook them on slightly higher heat and stir less frequently.
- Cheese didn’t melt, or it melted but then separated into oil. You either left the heat on too long after adding cheese, or your pan was too hot. Solution: Turn off the heat immediately after adding cheese. The residual warmth is enough. If you left the heat on, the cheese broke from overcooking and separated. Next time, turn off the heat and trust that the pan is still hot enough.
- Rolls are soggy or fall apart when you pick them up. Too much mayonnaise, or you let the sandwich sit for too long before eating. Solution: Use less mayo, and assemble right before serving. Eat immediately while everything is still warm and the bread is still structural.
- You couldn’t get the beef to transfer into the roll cleanly. The beef wasn’t cohesive, or you used a weak spatula. Solution: Make sure the cheese is melted enough to hold everything together. Use a sturdy, flat spatula. If your spatula is flimsy, use a large spoon instead and push more gently.
Your Next Steps After Mastering This
Once you’ve made this cheesesteak successfully, you’ve mastered four skills that translate to dozens of other dishes. You know how to sear meat properly—that skill works for steak dinners, beef tacos, or stir-fries. You know how to caramelize onions, which makes French onion soup, burger toppings, or sides for roasted vegetables. You know how to manage timing so components finish together, which is the heart of all cooking. And you know how to use high heat strategically without drying things out.
Next, try our Chicken Philly Cheesesteak Recipe using the same assembly method but with chicken breast instead of beef. Then move to dishes like steak and potatoes, beef tacos, or any seared meat recipe. The confidence you build from this one dish opens doors to so many others.
Can I Store Cheesesteak?
Cheesesteaks are best eaten fresh and warm, right off the pan. But life is real, and sometimes you have leftovers.
Storing assembled sandwiches: Wrap them tightly in foil or plastic wrap and refrigerate for up to 2 days. To reheat, wrap in foil and warm in a 350°F oven for about 10 minutes until heated through. The bread will soften slightly—this is normal and still tasty.
Storing components separately (better option): Keep beef and onions in an airtight container in the refrigerator for up to 3 days. Keep toasted rolls in a separate container. Store cheese, butter, and mayo separately. To reassemble, reheat the beef and onions in a skillet over medium heat (about 3 minutes), toast fresh bread, and assemble as normal. The sandwich tastes noticeably fresher this way.
Freezing: You can freeze cooked beef and onions in an airtight container for up to 3 months. Thaw overnight in the refrigerator, then reheat gently. Don’t freeze assembled sandwiches or toasted bread—the bread gets soggy and the bread texture is ruined.
Pro tip: If you’re planning ahead, prep the beef and onions early in the day, refrigerate, and finish the sandwich assembly at dinnertime. You’ll save about 15 minutes of active cooking.
Nutrition Information
Based on USDA nutrition data, one homemade cheesesteak (including the roll, beef, cheese, onions, and spread) contains approximately 580 calories, 28 grams of protein, 32 grams of fat, and 48 grams of carbohydrates. This is a full meal, not a side. It’s substantial and satisfying.
Here’s what I notice as a registered dietitian: The protein is excellent—that 28 grams is more than half your daily need at one meal. The fat comes primarily from the beef and cheese, and it’s the kind of fat that triggers satiety, meaning you’ll feel full longer. The carbohydrates are almost entirely from the bread, which provides fiber and B vitamins. Is this a daily food? No. Is it a legitimate, nourishing meal when eaten as part of a balanced week? Absolutely. Pair it with a simple side salad or raw vegetables to add fiber and micronutrients without adding many calories.
Expert’s Nutritional Tip: Ribeye contains more vitamin B12, selenium, and zinc than leaner beef cuts. These nutrients support energy production, immune function, and metabolism. When you’re choosing to spend more on quality beef, you’re also getting superior micronutrient density. This is why I don’t recommend downgrading to the cheapest cut—the nutritional difference matters.
What Can I Serve With Cheesesteak?
A cheesesteak is hearty and complete on its own, but here are sides that complement without overwhelming.
- A simple green salad with vinaigrette. The acid cuts through the richness of cheese and beef. Dress it lightly so it doesn’t feel heavy.
- Roasted vegetables like Air Fryer Potato Wedges. Crispy potatoes are the classic pairing. They’re indulgent but satisfying.
- A pickle or pickled vegetables. Tangy, crunchy, and exactly what you want next to something rich. Serve on the side, not inside the sandwich.
- Coleslaw (creamy or vinegar-based). Cabbage is light and crunchy, and it adds texture contrast to the soft, cheesy sandwich.
- A side of Spiced Lentils With Carrots. If you want something lighter, lentils add protein and fiber without competing with the sandwich.
Make-Ahead Guide: Meal Prep Like a Pro
As someone who’s spent years helping families manage their time and budgets, I want to show you how to make cheesesteaks on a weeknight without stress.
Day before (30 minutes of prep): Buy your beef, slice it, and store in an airtight container in the coldest part of your refrigerator. Dice your onion and store in a separate container. Press your garlic and mix it with softened butter, then wrap tightly in plastic wrap. Do not toast the rolls or assemble—these steps need to happen fresh.
Day of (20 minutes total cooking): Remove all components from the refrigerator 10 minutes before cooking so beef comes closer to room temperature. This helps it cook faster and more evenly. Follow the steps exactly as written, but you’re now pulling pre-prepped ingredients from containers instead of preparing them fresh. You’ll have dinner on the table in 20 minutes.
For a crowd (making 8 sandwiches instead of 4): Double every ingredient except cooking oil. You’ll need to work in batches—toast rolls in batches, caramelize onions in one batch, sear beef in two batches. Total time is about 45 minutes. The beauty of batch cooking is that everything still tastes fresh because the final assembly happens right before serving.
Seasonal Variations: How to Adapt This Recipe
While cheesesteaks are perfect year-round, you can shift flavors slightly with the seasons without changing the core technique.
Spring: Add fresh herbs to your garlic butter—a pinch of finely chopped chives or parsley. Use Vidalia onions if they’re in season (they’re sweeter and more delicate). Add fresh tomato slices inside the roll if you want a vegetable boost.
Summer: Grill your rolls instead of pan-toasting them for a smoky flavor. Add grilled bell peppers alongside the caramelized onions. Use mayo mixed with fresh basil instead of plain mayo.
Fall: Add caramelized shallots along with onions for deeper flavor. Mix a tiny pinch of smoked paprika into your beef seasoning. Use whole grain rolls if you like earthier flavors.
Winter: Add a splash of Worcestershire sauce to your beef while it’s cooking for umami depth. Top with crispy bacon bits before melting the cheese. Use aged provolone instead of mild for sharper, more concentrated flavor.

Cheesesteak Recipe
Ingredients
Method
- This is the easiest step, but it's crucial because you need your rolls ready before the meat is cooked. Use a serrated knife to slice each hoagie roll three-quarters of the way through. You're creating a hinge—the roll stays connected on one side, but opens fully like a book. If you cut all the way through, the bottom half falls away and becomes messy. The three-quarter cut keeps everything together. Now make your garlic butter. Press one fresh garlic clove into a small bowl. If you don't have a garlic press, mince the garlic as finely as you can with your knife. Add your 2 tablespoons of softened butter. Stir until the garlic is completely mixed in. This takes about 30 seconds. You want a uniform golden spread, not garlic chunks floating around. Spread this garlic butter onto the inside of each roll. Use about half a tablespoon per roll. Don't be shy—you want a thin layer covering all the cut surfaces. This will toast beautifully and add incredible flavor.
- Heat your skillet over medium heat for about 2 minutes until it's warm (not screaming hot). Place all four rolls in the skillet, cut-side down. You're toasting the buttered insides until they're golden brown and crispy. This usually takes 3 to 5 minutes depending on your heat. You'll know they're done when the butter is absorbed and the bread is golden, with maybe a tiny bit of char. Don't walk away. This step is fast, and burned bread is bitter and ruined. Stay close and watch. When they look perfect, transfer them to a clean plate and set aside. They'll stay warm for several minutes.
- If your butcher didn't slice your beef, do it now while your pan is still warm. Place your ribeye on a cutting board. Using a sharp knife, slice the beef across the grain (perpendicular to the muscle fibers) into pieces about the thickness of a coin—roughly ⅛ inch. The thinner your slices, the faster they'll cook and the more tender they'll be. If your pieces are slightly uneven, that's okay. Some will be thicker and need 30 extra seconds; some will be thin and cook faster. They all end up delicious. Dice your large sweet onion into ½-inch pieces. It doesn't need to be perfect. Onions will shrink and soften, so exact size matters less here than with the beef. Just aim for roughly equal pieces so they cook evenly.
- This is where patience separates good cheesesteaks from great ones. Add 1 tablespoon of cooking oil to your skillet over medium heat. Wait about 1 minute for it to heat. Add your diced onions to the hot oil. You'll hear a sizzle. This is right. Don't stir constantly. This is the most important instruction in this entire recipe. Stir occasionally—maybe every 2 minutes—but mostly let the onions sit still. When onions sit undisturbed on hot oil, they develop a brown crust on the bottom. This crust is where the flavor lives. If you stir constantly, you never get this crust. After about 8 to 10 minutes, your onions should be soft, golden, and deeply caramelized. You're looking for onions that have turned from white to medium brown. Some darker brown spots are beautiful. The kitchen should smell amazing—sweet, rich, and almost nutty. Sprinkle very lightly with salt. This draws out moisture and helps the caramelization process. Cook another minute or two if needed. Transfer your caramelized onions to a clean bowl. Set aside. This is a component you'll use in the final assembly.
- This is the step that determines whether your beef is tender or tough. Here's what matters: high heat, thin meat, and not moving it around too much. Increase your skillet heat to high. Wait 2 minutes for it to get very hot. Add 1 tablespoon of fresh cooking oil. The oil should shimmer immediately and spread easily across the pan. If it doesn't, your pan isn't hot enough yet. Spread your thinly sliced beef across the pan in a single layer. You want to cover most of the pan, but don't overlap the slices on top of each other. Let the beef sit undisturbed for about 2 to 3 minutes. This is called a sear, and it creates a brown crust on one side. Don't poke it, don't flip it, just let it work. After 2 to 3 minutes, flip each piece. The bottom should be brown and caramelized. If it's still gray, give it another minute. Once flipped, immediately sprinkle with your ½ teaspoon of salt and ½ teaspoon of black pepper. The beef will continue cooking for another 1 to 2 minutes on this side. You're aiming for beef that's cooked through but still tender—no gray or pink should remain. Stir gently. Break up any pieces sticking together, and mix everything so the seasoning distributes evenly. Cook for another 30 seconds to 1 minute, then stir in your reserved caramelized onions. Toss gently until everything is combined.
- Divide your beef and onion mixture into four even portions in the pan. You can do this by pushing the mixture into four rough sections, or by scooping it into four piles. Don't worry about precision—roughly equal is fine. Top each portion with two slices of provolone cheese. Lay the cheese flat over the beef. Immediately turn off the heat. This is critical. The residual heat from the pan will melt the cheese perfectly without overcooking the beef. If you leave the heat on, the beef will dry out while waiting for cheese to melt. Wait 30 to 60 seconds. Watch the cheese. When it's soft and starting to pool, it's ready. You're not waiting for it to be fully melted into a puddle—just soft enough to stay together when you move it.
- Spread a thin layer of mayonnaise on the toasted inside of each roll. About ½ to 1 tablespoon per roll. Not too much—mayo is rich, and a thin layer is all you need. Here comes the fun part, and it requires focus but no special skill. Working with one portion at a time, pick up a toasted roll and position it over one beef portion. The open, mayonnaise-side of the roll should face down toward the beef. Using a spatula, gently push the beef and cheese from the pan onto the bread, then flip the whole thing onto a plate. The roll becomes the top of your sandwich, and everything stays together. Repeat for all four sandwiches. Serve warm immediately. The cheese will still be melting, the bread will still be warm, and everything tastes perfect.
Notes
FAQs
Can I make this with a different cut of beef?
Yes, though some cuts work better than others. Ribeye is ideal because the marbling (fat throughout the meat) keeps it tender even with high heat. Sirloin works well and is cheaper. Flank steak or skirt steak can work but are chewier—slice them even thinner. Avoid very lean cuts like eye of round because they become tough. If you’re on a tight budget, ask your butcher for “sandwich steak” or “thin steak cuts”—they often have affordable options specifically designed for this.
What if I don’t have hoagie rolls?
You can use any substantial bread that won’t fall apart under the weight of beef and cheese. Submarine rolls work (they’re the same thing). Ciabatta rolls are thicker and more sturdy. Even a thick sourdough slice works if cut properly. Avoid soft sandwich bread or thin-sliced white bread—they’ll disintegrate. The bread needs to be sturdy enough to support the filling without becoming soggy immediately.
Can I make this on a flat-top griddle instead of a skillet?
Absolutely. A flat-top griddle is actually ideal because you can manage all four sandwiches at once without crowding. Increase your cooking time slightly because griddles often cook slightly slower than skillets, and you’ll have more surface area so heat distributes differently. Everything else stays the same.
Is there a vegetarian version?
You could make a version with mushrooms or thick slices of eggplant seared the same way, topped with cheese and served on the same bread. But honestly, this would be more “a cheese sandwich with vegetables” than a cheesesteak. If you’re vegetarian and want a similar sandwich, try Filed Under: Uncategorized