This post contains affiliate links. As an Amazon Associate I earn from qualifying purchases.
If you’ve always wanted to make crispy air fryer potatoes but felt intimidated by the appliance or worried about timing, this is your starting point. I’m going to walk you through every single step like you’re standing right here in my kitchen with me. Russet potatoes are one of the most forgiving vegetables you can cook, and an air fryer makes them absolutely foolproof. Pair this recipe with our best meatballs ever for a complete family dinner, or serve them alongside BBQ chicken boneless breast for a backyard feast that costs pennies per plate.
How to Make Air Fryer Russet Potatoes Recipe for the First Time (You’ve Got This)
I still remember the day my mother-in-law gave me her air fryer. I was skeptical. I grew up cooking everything the traditional way—cast iron skillets, deep fryers with oil splashing everywhere, oven trays that never seemed to brown evenly. But that first batch of potatoes changed everything for me. I cut up some russets from a five-pound bag I’d bought on sale, tossed them with olive oil and seasonings, and waited nervously. When that timer went off after twenty minutes, I opened the basket and found golden, crispy edges on every single piece. My kids devoured them. My husband asked when I was making them again. And I realized I’d been spending decades making things harder than they needed to be.
The beauty of this recipe is that it teaches you the fundamentals of air fryer cooking. Once you master these potatoes, you’ll understand temperature, timing, and how to get that perfect golden crisp that makes people actually excited about vegetables.
What to Expect Before You Start
Let me set your expectations before you begin. This recipe takes about thirty minutes from start to finish, with only five minutes of actual hands-on work. The air fryer does almost everything for you. You’ll need access to a kitchen scale or measuring cups (a scale is more accurate, but cups work fine). The hardest part isn’t the cooking—it’s resisting the urge to peek at your potatoes every two minutes.
- Active cooking time is minimal – You’ll spend maybe five minutes prepping, then the appliance handles the rest while you set the table or start a salad. Many beginners worry the potatoes will burn, but they won’t. Air fryers circulate heat evenly, which is exactly why they’re so beginner-friendly.
- You might not need two batches – This depends on your specific air fryer model and basket size. Most standard models fit the full amount in one go, but if yours is smaller, cooking in two batches takes just another fifteen minutes. It’s not a failure—it’s just how your equipment works.
Equipment You’ll Need (And What You Can Skip)
I’m going to be honest with you: you don’t need much. This recipe was designed for minimal fuss, and that extends to your tools. Fancy gadgets won’t make your potatoes better. Smart choices will.
- An air fryer – This is non-negotiable. You can find quality models for under fifty dollars at discount retailers. If you don’t own one, this is your sign to grab one. They last for years and save you money on oil and electricity compared to traditional frying.
- A cutting board and sharp knife – You need to quarter your potatoes, so a board and a decent blade (nothing fancy—a ten-dollar knife from any grocery store works) will make this faster and safer.
- A mixing bowl – Any size ceramic or glass bowl will do. Metal bowls work too. You’re just tossing potatoes with oil and seasonings.
- Measuring spoons – Optional but helpful. I use them because it takes the guessing out of seasoning. But if you’re comfortable eyeballing a tablespoon of olive oil, skip it.
The Ingredients – A Beginner’s Shopping Guide
I’m going to tell you exactly where to find these ingredients and what to look for when you’re standing in the produce section. As a registered dietitian and someone who’s fed a family on a tight budget for decades, I know where to find quality for less. These ingredients should cost you around three dollars total, maybe less if you catch a sale on potatoes.
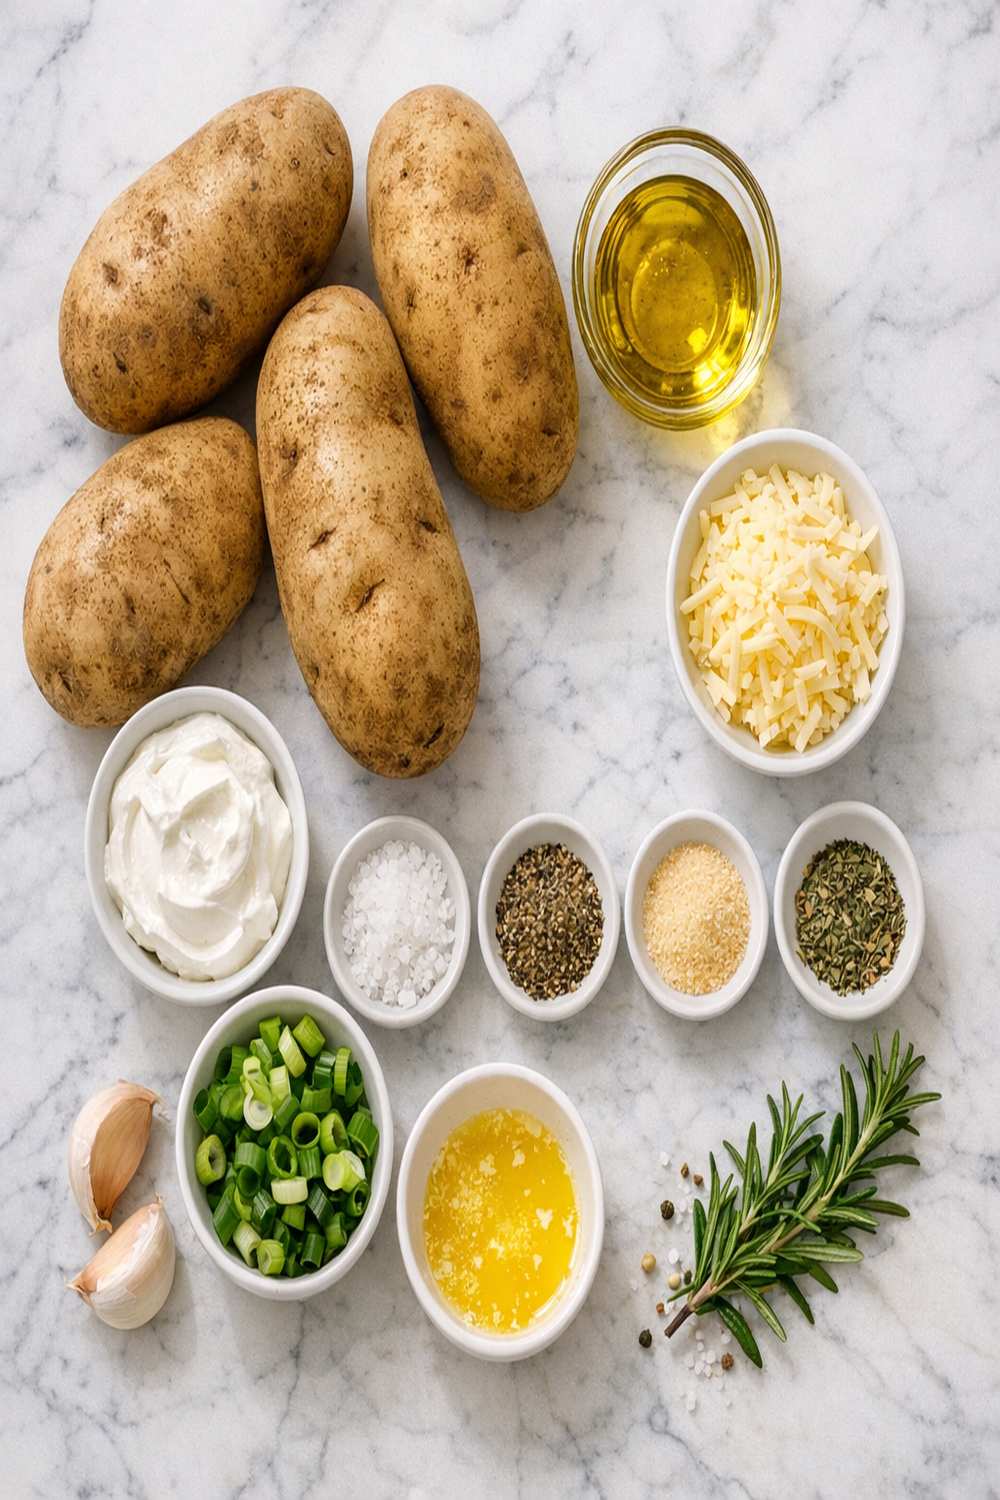
- 3 pounds russet potatoes (look for firm potatoes without soft spots or eyes sprouting; buy the biggest bag available—they’re always the best value per pound)
- 1½ tablespoons extra-virgin olive oil (from the cooking oil aisle; store brands are identical to expensive ones and cost half as much)
- 1½ teaspoons smoked paprika (from the spice aisle; this gives a restaurant-quality flavor that makes people think you spent hours cooking)
- ⅜ teaspoon black pepper (freshly ground pepper from a grinder tastes better, but pre-ground is fine and more convenient)
- ¾ teaspoon fine sea salt (regular table salt works, but sea salt tastes cleaner and you’ll use less of it)
- Cooking spray (any brand; this prevents sticking and adds almost no calories)
- ¾ teaspoon garlic powder (pre-ground from the spice aisle; fresh garlic is lovely, but powder is more budget-friendly and works beautifully here)
Expert’s Nutritional Tip: Russet potatoes contain resistant starch when cooled, which acts like fiber in your digestive system. This means leftovers are actually healthier than freshly cooked potatoes. I always make extra for meal prep.
Step-by-Step: Your First Air Fryer Russet Potatoes Recipe
Here we go. You’re about to make restaurant-quality potatoes in your own kitchen. Take a breath. Follow along. You’ve got this.
Step 1: Gather and Prep Your Potatoes
Start by washing your russet potatoes under cold running water. Use your hands or a soft brush to remove any soil. Russets have thicker skin than other potato varieties, so you don’t need to be gentle—just thorough. Pat them dry with a clean kitchen towel. Wet potatoes won’t crisp up properly in the air fryer, so this step actually matters. Once they’re dry, place them on your cutting board.
Now, cut each potato in half lengthwise. Then cut each half in half lengthwise again. This gives you quarters. The key is making pieces roughly the same size so they cook evenly. If you have one giant piece and one tiny piece, the tiny one will burn before the big one cooks through. Aim for quarters that are about two to three inches long.

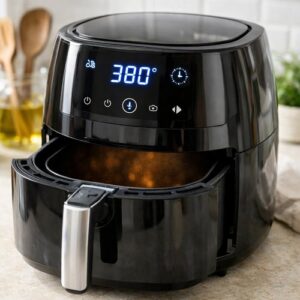
Step 2: Preheat Your Air Fryer
Turn your air fryer on and set the temperature to 380 degrees Fahrenheit. Let it run for about five minutes. This preheating step is important because it ensures your potatoes start cooking immediately, which helps them develop that crispy exterior. If you skip preheating, your potatoes will take longer and might not brown evenly. Think of it like preheating an oven—it’s the professional way to ensure consistent results.
While your air fryer heats up, this is a perfect time to measure out your seasonings and pour your olive oil into a small cup. Organization now means less stress later.
Step 3: Combine Oil and Seasonings
Pour your olive oil into a medium mixing bowl. Add the smoked paprika, garlic powder, salt, and black pepper. Stir everything together until you have a smooth, well-combined mixture. This step prevents seasonings from clumping on your potatoes. You want the flavors distributed evenly. If you skip mixing and just dump everything on the potatoes, some pieces will taste over-seasoned while others taste bland.
The oil acts as a binder. It carries the seasonings and helps them stick to the potato surfaces. Without enough oil, your seasonings will fall to the bottom of the basket during cooking.
Step 4: Coat Your Potatoes
Add all your quartered potatoes to the bowl with the oil and seasonings. Using a spoon or your hands (I prefer hands because you can feel when everything is evenly coated), toss the potatoes gently but thoroughly until every piece is covered with the oil mixture. This takes about one minute of tossing. You should see a light coating of oil on every surface. No white potato showing through.
If you’re worried about getting your hands messy, use a large spoon or salad tongs. But honestly, using your hands is faster and easier. Just wash them when you’re done.

Step 5: Load the Air Fryer Basket
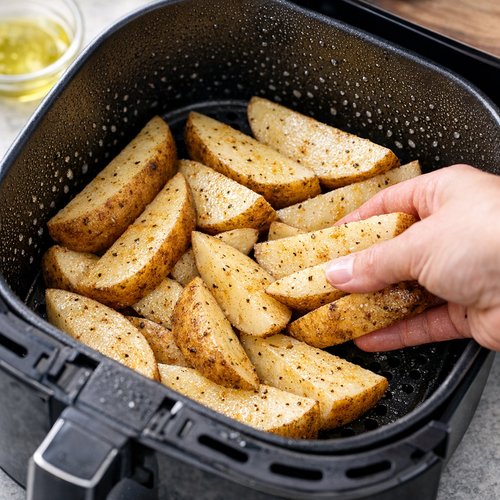
By now, your air fryer should be preheated and ready. Lightly spray your air fryer basket with cooking spray. This creates a non-stick surface and helps prevent sticking (which is the number-one beginner complaint). Transfer your seasoned potatoes into the basket, arranging them in a single layer with as little overlap as possible.
Here’s where things get real: you might not fit all the potatoes in one batch. Most standard-size air fryers hold about two pounds comfortably in a single layer. If your potatoes are overflowing, remove half and set them aside. You’ll cook them after the first batch finishes. This isn’t a problem—it’s just how air fryers work. You can’t stack potatoes on top of each other because the ones on the bottom won’t get crispy.
Step 6: Cook and Shake
Close your air fryer basket and set the timer for twelve minutes. At the twelve-minute mark, open the basket and gently shake it back and forth for about fifteen seconds. This rotation helps potatoes cook evenly on all sides. You’ll see that the potatoes on the edges are starting to brown beautifully. Don’t worry if they’re not fully golden yet—you’ve got more time.
Close the basket again and cook for another eight to ten minutes. The total cooking time is about twenty to twenty-two minutes for the first batch. Some air fryers run slightly hotter or cooler than others, so watch your potatoes. You’re looking for edges that are golden brown and crispy.
Step 7: Check for Doneness
When your timer goes off after the second cooking phase, open the basket and look at your potatoes. You’re aiming for golden-brown edges with a slight crispiness when you touch them. If they still look pale and soft, give them another three to five minutes. If they’re already deeply browned, take them out immediately. They continue cooking slightly from residual heat even after you remove them.
To test if they’re done inside, pick up one quarter and gently squeeze it (use a fork if you want to avoid burning your fingers). It should feel tender inside but firm, not mushy. The outside should have a slight crunch.
Step 8: Season to Taste
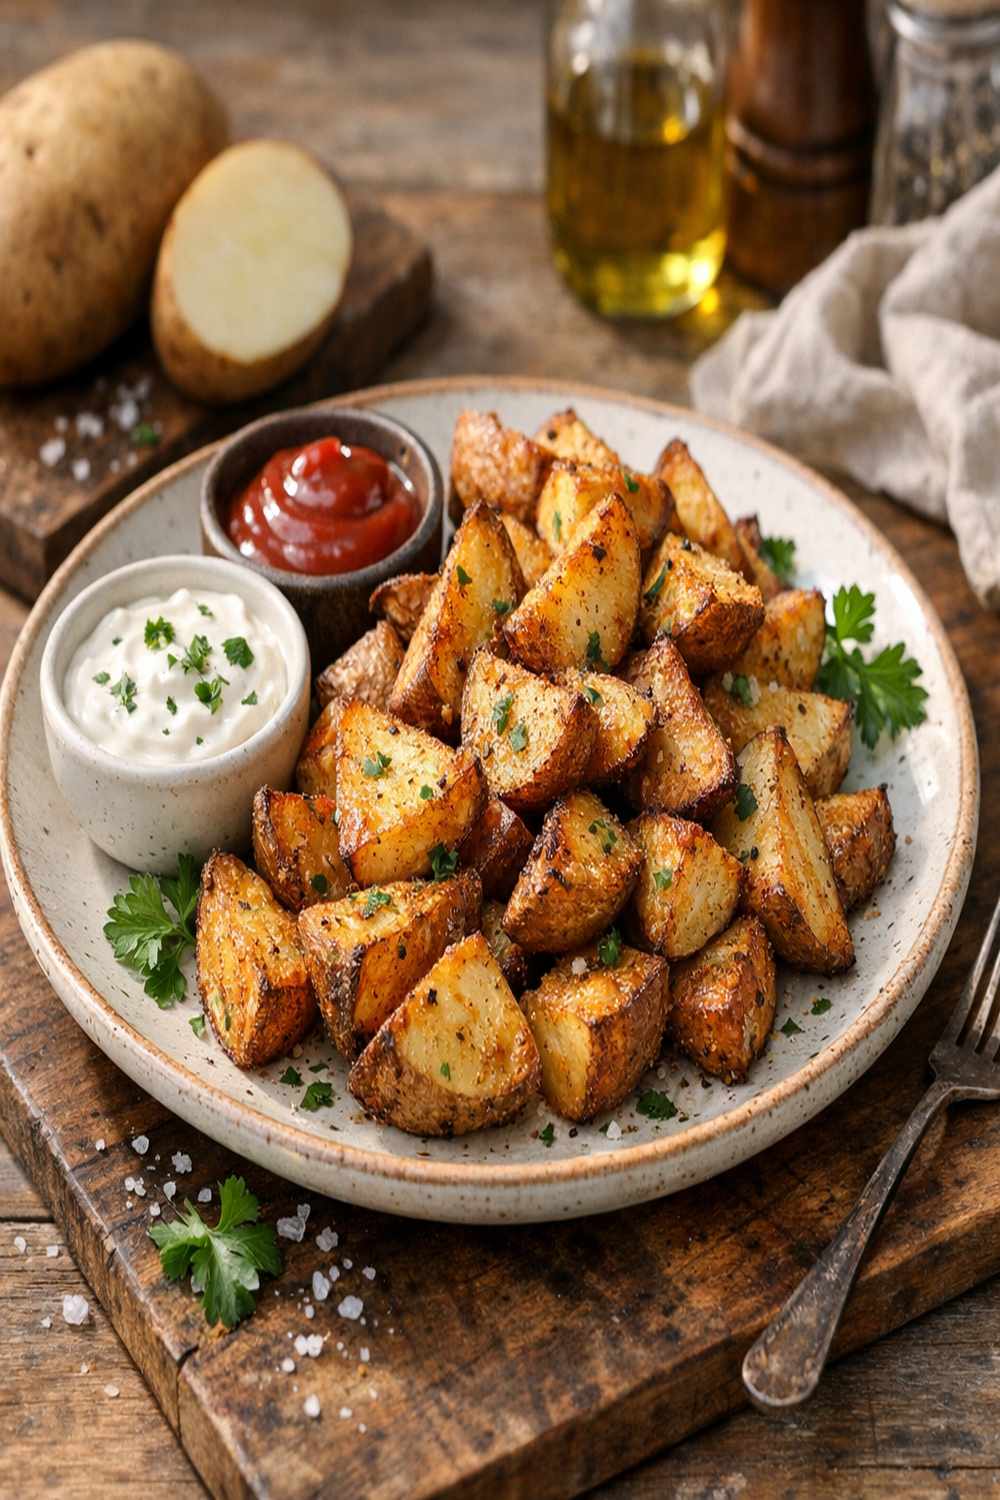
Transfer your cooked potatoes to a serving bowl or plate. Taste one piece before serving. Some people prefer more salt. If your potatoes taste a bit bland, sprinkle a tiny pinch of salt over them and toss. This final seasoning step ensures everyone gets their preferred salt level.
If you have a second batch waiting, repeat steps five through seven with your remaining potatoes. Set the first batch aside somewhere warm—a low oven or even on top of your air fryer basket works.
How to Tell If You Did It Right
Success in air frying comes down to recognizing specific visual and textural cues. Here’s what perfect potatoes feel and look like so you’ll know you’ve nailed it.
- Golden-brown exterior with crispy edges – Your potatoes should have a warm, toasted color on the outside. Burnt black is too far. Pale and pale yellow means they need more time. The edges should feel slightly crispy when you pick one up with a fork, like a chip.
- Tender but not mushy interior – Bite through the crispy exterior and you should hit a soft, fluffy center. If the entire potato is soft and yields with no resistance, it’s overdone. If you bite down and it’s still hard in the center, it needs more time.
- Aroma that fills your kitchen – Properly cooked potatoes with paprika smell warm, toasted, and savory. Your family will smell it from other rooms and come asking what you’re making.
- Even browning across most pieces – Not every single potato will brown identically. Some edges will be darker than others. This is normal and actually desirable. You’re aiming for mostly golden with some darker spots, not uniform color.
What Went Wrong? Beginner Fixes
- Potatoes are soggy and not crispy – This happens when potatoes weren’t dried before cooking or when you didn’t use enough oil. Fix it: Pat your potatoes completely dry next time, and use the full amount of olive oil specified. The oil is what creates crispiness. Don’t skimp.
- Potatoes are burnt on the outside but hard inside – Your temperature was too high or cooking time was too long. Every air fryer is slightly different. Fix it: Lower your temperature to 370 degrees next time and check at the fifteen-minute mark instead of waiting the full twenty minutes.
- Some potatoes are done while others are raw – Your pieces were different sizes. Fix it: Cut potatoes into uniform quarters next time. I know it seems tedious, but it’s the difference between perfect potatoes and inconsistent results.
- Seasonings taste bland or uneven – You didn’t mix the oil and seasonings together before adding potatoes, or you didn’t toss thoroughly enough. Fix it: Always combine oil and seasonings separately first, then toss well. It takes one extra minute and makes a huge difference.
Your Next Steps After Mastering This
Once you’ve made these potatoes three or four times, you’ve learned something powerful: how to properly season vegetables and get them crispy in an air fryer. These skills transfer everywhere. Next, try air frying other root vegetables like sweet potatoes or carrots. They follow the exact same method. Then move on to air fryer BBQ wings or beef meatballs. You’ll realize you’ve already mastered the technique—you’re just applying it to different ingredients.
Once you’re comfortable with timing and temperatures, start experimenting with seasonings. Try ranch powder, cajun spice, Italian seasoning, or curry powder. Your air fryer becomes a gateway to learning flavors and building confidence in the kitchen.
Make-Ahead Guide: Meal Prep Like a Pro
I learned years ago that preparing ingredients ahead of time eliminates weeknight stress. Here’s my approach with these potatoes.
The night before: Wash, dry, and quarter your potatoes. Store them in a covered container in the refrigerator. They’ll stay fresh for up to twenty-four hours. Don’t soak them in water (that makes them watery)—just keep them in a dry container.
The morning of cooking: Mix your oil and seasonings in a small container. Keep them separate from the potatoes until you’re ready to cook. This prevents potatoes from absorbing all the liquid and becoming soggy.
Right before dinner: Combine potatoes with oil and seasonings, load the air fryer, and you’re cooking within two minutes. What would have taken thirty minutes of prep now takes five minutes because you’ve done the thinking ahead of time.
Can I Store Air Fryer Russet Potatoes Recipe?
Yes, and they actually keep really well. Refrigerate leftovers in an airtight container for up to four days. They lose some crispiness but remain delicious. Reheat them in your air fryer at 350 degrees for five to seven minutes to restore crispiness, or eat them cold as a potato salad component.
Freezing: You can freeze cooked potatoes for up to three months. I freeze them in a flat layer on a baking sheet first, then transfer to a freezer bag. This prevents them from freezing in a clump. Reheat directly from frozen in your air fryer at 360 degrees for about ten minutes.
Pro tip: Cold leftover potatoes are actually higher in resistant starch, which is a beneficial carbohydrate for your digestive health. This is one of the few cases where leftovers are nutritionally superior to freshly cooked food.
Nutrition Information
Based on USDA data for russet potatoes and olive oil, a serving of one quarter-pound of air fryer russet potatoes contains approximately 95 calories, 3 grams of protein, 18 grams of carbohydrates, 2 grams of dietary fiber, 3 grams of fat, and 160 milligrams of potassium. This is for the seasoned potato only.
Russet potatoes are surprisingly nutrient-dense. They provide vitamin B6, manganese, and pantothenic acid. The fiber in the skin supports digestive health. The potassium content supports heart health. Combined with the healthy fat from olive oil, this is a genuinely nutritious side dish, not empty calories.
What Can I Serve With Air Fryer Russet Potatoes Recipe?
These potatoes are incredibly versatile. They pair beautifully with almost any protein because they’re seasoned but not overpowering. Here are my favorite combinations, and I’ve included a couple of our most popular recipes that work perfectly alongside them.
- Grilled or air-fried chicken – The paprika in the potatoes complements any chicken preparation. Try our BBQ chicken boneless breast recipe for a complete family dinner.
- Beef stir-fry – These potatoes make an excellent side to our beef stir-fry recipe for an easy weeknight meal.
- Meatballs – Pair with our best meatballs ever recipe plus a simple green salad for a balanced plate.
- Grilled fish – Potatoes and fish are a classic combination. Serve with a squeeze of lemon and steamed vegetables.
- Roasted vegetables – Combine with roasted broccoli, Brussels sprouts, or carrots for a vegetable-forward meal.
- Salad with protein – Chop cold leftover potatoes and add to green salads with grilled chicken or beans for a hearty lunch.
Air Fryer Russet Potatoes Recipe
Ingredients
Method
- Start by washing your russet potatoes under cold running water. Use your hands or a soft brush to remove any soil. Russets have thicker skin than other potato varieties, so you don't need to be gentle—just thorough. Pat them dry with a clean kitchen towel. Wet potatoes won't crisp up properly in the air fryer, so this step actually matters. Once they're dry, place them on your cutting board. Now, cut each potato in half lengthwise. Then cut each half in half lengthwise again. This gives you quarters. The key is making pieces roughly the same size so they cook evenly. If you have one giant piece and one tiny piece, the tiny one will burn before the big one cooks through. Aim for quarters that are about two to three inches long.

- Turn your air fryer on and set the temperature to 380 degrees Fahrenheit. Let it run for about five minutes. This preheating step is important because it ensures your potatoes start cooking immediately, which helps them develop that crispy exterior. If you skip preheating, your potatoes will take longer and might not brown evenly. Think of it like preheating an oven—it's the professional way to ensure consistent results. While your air fryer heats up, this is a perfect time to measure out your seasonings and pour your olive oil into a small cup. Organization now means less stress later.
- Pour your olive oil into a medium mixing bowl. Add the smoked paprika, garlic powder, salt, and black pepper. Stir everything together until you have a smooth, well-combined mixture. This step prevents seasonings from clumping on your potatoes. You want the flavors distributed evenly. If you skip mixing and just dump everything on the potatoes, some pieces will taste over-seasoned while others taste bland. The oil acts as a binder. It carries the seasonings and helps them stick to the potato surfaces. Without enough oil, your seasonings will fall to the bottom of the basket during cooking.
- Add all your quartered potatoes to the bowl with the oil and seasonings. Using a spoon or your hands (I prefer hands because you can feel when everything is evenly coated), toss the potatoes gently but thoroughly until every piece is covered with the oil mixture. This takes about one minute of tossing. You should see a light coating of oil on every surface. No white potato showing through. If you're worried about getting your hands messy, use a large spoon or salad tongs. But honestly, using your hands is faster and easier. Just wash them when you're done.
- By now, your air fryer should be preheated and ready. Lightly spray your air fryer basket with cooking spray. This creates a non-stick surface and helps prevent sticking (which is the number-one beginner complaint). Transfer your seasoned potatoes into the basket, arranging them in a single layer with as little overlap as possible. Here's where things get real: you might not fit all the potatoes in one batch. Most standard-size air fryers hold about two pounds comfortably in a single layer. If your potatoes are overflowing, remove half and set them aside. You'll cook them after the first batch finishes. This isn't a problem—it's just how air fryers work. You can't stack potatoes on top of each other because the ones on the bottom won't get crispy.
- Close your air fryer basket and set the timer for twelve minutes. At the twelve-minute mark, open the basket and gently shake it back and forth for about fifteen seconds. This rotation helps potatoes cook evenly on all sides. You'll see that the potatoes on the edges are starting to brown beautifully. Don't worry if they're not fully golden yet—you've got more time. Close the basket again and cook for another eight to ten minutes. The total cooking time is about twenty to twenty-two minutes for the first batch. Some air fryers run slightly hotter or cooler than others, so watch your potatoes. You're looking for edges that are golden brown and crispy.

- When your timer goes off after the second cooking phase, open the basket and look at your potatoes. You're aiming for golden-brown edges with a slight crispiness when you touch them. If they still look pale and soft, give them another three to five minutes. If they're already deeply browned, take them out immediately. They continue cooking slightly from residual heat even after you remove them. To test if they're done inside, pick up one quarter and gently squeeze it (use a fork if you want to avoid burning your fingers). It should feel tender inside but firm, not mushy. The outside should have a slight crunch.
- Transfer your cooked potatoes to a serving bowl or plate. Taste one piece before serving. Some people prefer more salt. If your potatoes taste a bit bland, sprinkle a tiny pinch of salt over them and toss. This final seasoning step ensures everyone gets their preferred salt level. If you have a second batch waiting, repeat steps five through seven with your remaining potatoes. Set the first batch aside somewhere warm—a low oven or even on top of your air fryer basket works.
Notes
FAQs
Can I use other types of potatoes instead of russets?
Yes, but results will vary slightly. Russets are best for this recipe because they’re starchy and get crispy. Yukon golds work and produce creamier results with a slightly different texture. Red potatoes are too waxy and won’t crisp up properly. New potatoes are too small and cook too fast. Fingerlings work beautifully and look elegant on a plate, though they take slightly longer to cook. Start with russets while you’re learning, then experiment.
Do I have to preheat my air fryer?
Technically, you don’t have to, but I strongly recommend it. Preheating for five minutes ensures even cooking and better browning. Without preheating, your potatoes will take three to four minutes longer and might not develop that crispy exterior. It’s a small time investment that significantly improves results.
How do I know if my air fryer runs hot or cold?
Every air fryer is slightly different due to manufacturing variations. Your first batch is your baseline. If potatoes brown too quickly and cook too fast, your air fryer runs hot—lower the temperature by ten to fifteen degrees next time. If potatoes take longer than twenty-two minutes or don’t brown well, your air fryer runs cool—increase the temperature by ten degrees next time. Make small adjustments and take notes. After two or three batches, you’ll know exactly how your specific air fryer behaves.
Can I cut potatoes into different shapes—like wedges or thin fries?
Absolutely. Thinner cuts like wedges or fries cook faster (twelve to fifteen minutes instead of twenty) and get crispier. Thicker cuts like whole baby potatoes take longer (twenty-five to thirty minutes). The method is identical—coat with oil and seasonings, shake halfway through, cook until golden. Just adjust your timing based on size.
What if my basket is smaller and I can only cook half the recipe at a time?
This is perfectly normal. Two batches just means you’ll have cooked potatoes ready in about forty-five minutes total instead of thirty. Keep your first batch warm on a plate covered with foil or in a low oven while the second batch cooks. Both batches will be warm and fresh when you serve them.
Can I make these potatoes ahead for parties or meal prep?
Yes. Cook them up to two days ahead, refrigerate in an airtight container, then reheat in your air fryer at 350 degrees for five to seven minutes right before serving. They won’t be quite as crispy as fresh, but they’ll be delicious and save you stress during busy moments. I do this regularly when hosting dinners.
Seasonal Variations: Keep It Fresh Year-Round
I love adapting recipes to what’s in season and what’s on sale. Here are my favorite variations by season.
Spring: Add fresh herbs like chives, parsley, or dill mixed into the oil before coating. Fresh herbs are at their peak and most affordable in spring.
Summer: Try cajun seasoning or a combination of paprika, garlic, onion powder, and cayenne pepper for extra heat. Summer potatoes pair beautifully with grilled everything.
Fall: Use smoked paprika (as in the original recipe), but add a pinch of cumin and a tiny bit of chili powder. This gives a warm, autumn-spiced flavor that pairs perfectly with pork and chicken.
Winter: Stick with the original recipe, or add rosemary and thyme. Root vegetables shine in winter cooking, and herbs enhance that earthiness.
More Beginner-Friendly Recipes
- Fried Cabbage and Noodles – A budget-friendly vegetable dish that teaches you basic seasoning techniques
- Best BBQ Wings Recipe – Perfect air fryer practice and an impressive appetizer
- Slow Cooker Marinara – An easy sauce that pairs beautifully with these potatoes
You did it. You made air fryer russet potatoes from scratch, and I guarantee they turned out beautifully. This is the beginning of your air fryer journey, and I’m genuinely excited for you. Every meal you cook builds your confidence and teaches you something new. That first batch might not be perfect, and that’s completely fine. Perfect doesn’t matter nearly as much as trying.
These potatoes prove that eating well on a budget isn’t about sacrifice—it’s about knowing where to shop, what to buy, and how to cook simple things really well. You’ve already done that today. Next time will be even easier because you’ll know what to expect.
Happy Cooking!
