Before we dive into the spicy world of homemade chili seasoning, let’s talk about what goes well with it. Chili is a versatile dish, and its flavors can complement a variety of sides or toppings.
Picture creamy sour cream melting on top of a steaming bowl. Or imagine crunchy tortilla chips ready to scoop up each delicious bite.
You could also think about shredded cheese. Mozzarella or sharp cheddar can balance out the heat perfectly.
I can’t ignore the crunch of fresh jalapeños or the sweetness of diced avocados, both adding freshness to the robust chili taste.
And don’t forget about cornbread! Its fluffy texture and slight sweetness create a delightful contrast that rounds out the meal beautifully.

What Is Homemade Chili Seasoning?
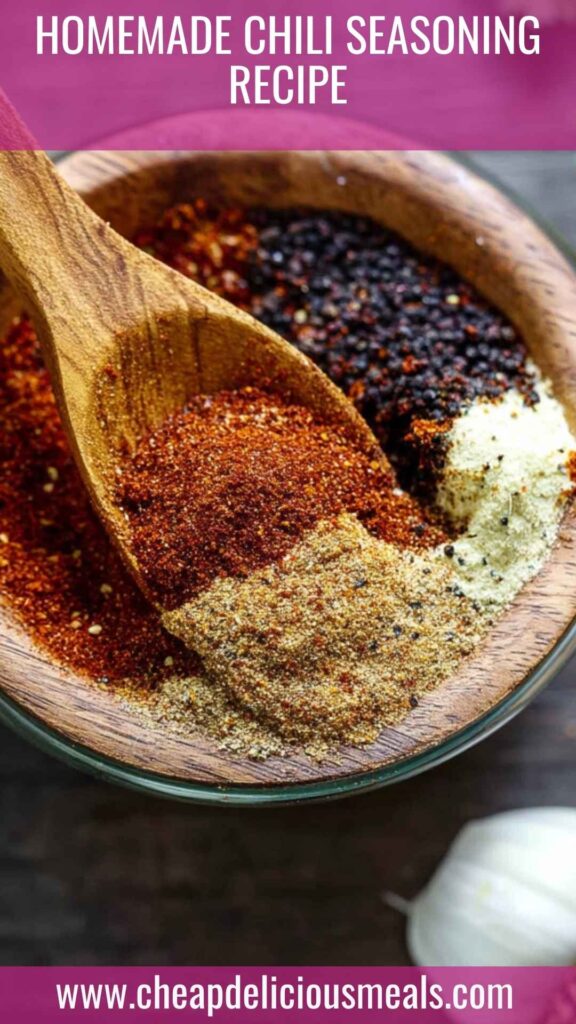
Homemade chili seasoning is a customized blend of spices that brings warmth and depth to your chili dishes. Unlike store-bought mixes, which may include preservatives or fillers, making your own allows you to handpick each ingredient.
Typically, it includes spices like chili powder, cumin, garlic, and onion powder, among others. This combination enhances not only the flavor of your chili but also gives you the freedom to experiment and make it your own.
What Does It Taste Like?
Imagine a warm embrace on a chilly day—that’s what homemade chili seasoning feels like on your palate. The rich aroma of spices hits you first, teasing your taste buds.
There’s a perfect balance of heat from the chili powder, earthiness from cumin, and a touch of zing from garlic. Each texture and flavor dances on your tongue, creating a robust experience that keeps you coming back for more.
No more boring, bland meals; this seasoning transforms the ordinary into the extraordinary.
Why This Recipe Works
Creating your own chili seasoning is just smart; here’s why:
1. Customization
You’re the chef. This means endless options to suit your taste. Want it hotter? Add more chili powder or red pepper flakes.
Prefer a milder flavor?
Reduce the spiciness without losing all the flavor. This flexibility lets you cater to different palates at the dinner table.
2. Freshness
Using whole spices allows you to grind them fresh, maximizing their flavor and aroma. Herbs and spices lose potency over time. By making your seasoning at home, you are ensuring every sprinkle is bursting with flavor, giving you the best results possible.
3. Healthier Ingredients
Manufactured seasoning blends often contain additives or preservatives. With homemade seasoning, you control what goes in.
This means no artificial ingredients and no hidden sugars. You can even adjust the salt level, making it a healthier choice overall.
4. Cost-Effective
Buying individual spices in bulk can save you money compared to frequently purchasing pre-mixed packets. Plus, once you create this blend, you can use it in different recipes, eliminating the need for multiple blends.
Ingredients for Homemade Chili Seasoning
Let’s gather our spices! Here’s what you’ll need:
– 1 teaspoon of sea salt
– 1 tablespoon of chili seasoning
– 1/4 teaspoon of onion powder
– 1/2 teaspoon of dried garlic granules
– 1 teaspoon of ground cumin
– 1/4 teaspoon of red pepper flakes
– A pinch of freshly ground black pepper
– 1/2 teaspoon smoked paprika
These ingredients are pretty pantry-friendly, and I bet you’ll find most of them in your kitchen right now.

Step-by-Step Instructions
Let’s get into the kitchen and mix things up. Here’s how to make your own chili seasoning:
Step 1: Gather Your Tools
Start by gathering your mixing bowl, measuring spoons, and a whisk or fork. You want to have everything within reach to keep things efficient. If you have a small airtight jar, that’s even better for storage.
Step 2: Measure Your Ingredients
Now it’s time to measure out each ingredient carefully.
This is where the magic begins! Pour each spice into your mixing bowl. Remember to level off your measurements for accuracy.
Step 3: Mix It Up
Once all the ingredients are in the bowl, grab your whisk or fork. Blend the spices until they’re evenly combined. This may take a minute or two—it’s worth it to ensure every bite of chili packs the same punch!
Step 4: Store Your Seasoning
Transfer your chili seasoning to your airtight jar. Label it with the date and name. This ensures you remember when you made it and what’s inside.
Stored in a cool, dark place, it will stay flavorful for up to six months.
Step 5: Get Cooking!
Now that you have your homemade seasoning, it’s time to use it. Add it to your chili recipes, sprinkle it on grilled vegetables, or mix it into your tacos for a flavorful boost.
Notes
Here are some tips to keep in mind:
- Start Slowly: If you’re unsure about spiciness, start by adding a small amount to your dish. You can always increase it if needed.
- Experiment: Feel free to adjust the ratios of spices until you find your perfect balance.
- Storing: Keep your seasoning in an airtight jar away from heat and light to maintain its freshness.
- Double the Batch: If you love it, consider making a larger batch to have on hand.
- Label Clearly: Include the date on your jar so you know when to replace it.
How to Store the Leftovers?
If you find yourself with extra seasoning, simply ensure it’s in an airtight container. Stored in a dry, cool place, it should stay fresh for up to six months.
Just be aware that over time, the flavors may weaken. If it smells dull or lacks aromatic qualities, it’s time to whip up a fresh batch.
Sides for Homemade Chili Seasoning
Pair your chili with delicious sides to enhance the experience:
1. Cornbread
Cornbread is a classic pairing. Its slight sweetness complements the spicy flavors of chili well. Serve it warm with butter for a comforting treat.
2. Rice
Plain white or brown rice absorbs chili’s rich flavors beautifully. It’s also a great way to stretch your meal further.
3. Grilled Cheese Sandwich
A gooey grilled cheese sandwich next to a bowl of chili creates a lovely contrast. The crispy exterior and melty interior add a delightful texture.
4. Mixed Green Salad
A simple salad with fresh greens, tomatoes, and a light vinaigrette can balance the heat of the chili. Plus, it adds a refreshing crunch.
Alternative Choices to the Ingredients
Did you run out of a spice? No need to panic! Here are some alternatives:
1. Chili Powder
If you’re out of chili powder, you can mix an equal amount of paprika with a pinch of cayenne for heat.
2. Sea Salt
Regular table salt works fine if you don’t have sea salt. Just use a tad less, as table salt can be saltier by volume.
3. Dried Garlic Granules
If you don’t have dried granules, use fresh minced garlic. Just remember, fresh garlic is stronger, so start small.
4. Cumin
In a pinch, you can swap cumin with coriander. It gives a different flavor profile but still pairs well with chili.

Conclusion
Homemade chili seasoning is more than just a blend of spices; it’s a way to create unforgettable meals tailored to your tastes.
With a few simple ingredients and steps, you’re ready to elevate your cooking game. Whether it’s chili night or a casual taco Tuesday, this seasoning adds that perfect punch.
With your newfound knowledge, you can spice up your pantry, impress your friends at dinner gatherings, and savor each warming bite.
So gather those spices, mix them up, and embark on a culinary adventure. You’ll never want to go back to store-bought blends again! Enjoy the flavorful journey ahead!
You’ll also like the following recipes!
- Chicken and Long Rice Copycat Recipe
- How To Make Chicken Cheese and Rice Recipe
- Best Creamy Chicken and Rice Recipe

Homemade Chili Seasoning Recipe – Cheap Delicious Meals
Description
Welcome to the spicy journey of creating your own homemade chili seasoning! Sure, you could easily grab a packet from the store, but where’s the fun in that?
Making your own seasoning is not just about flavor; it’s about empowerment in the kitchen. You control the ingredients, and you can adjust the levels of heat and flavor according to your unique tastes.
Whether you’re preparing a hearty chili on a cool evening or adding a kick to your weekday meals, this spice mix is a must-have.
In this guide, we’ll explore what homemade chili seasoning is, what it tastes like, and why this recipe really stands out.
You’ll find a detailed ingredient list, simple steps to create your seasoning blend, and plenty of tips to ensure your culinary journey is as enjoyable as your final dish. Let’s spice things up!
Ingredients
Instructions
Step 1: Gather Your Tools
-
Start by gathering your mixing bowl, measuring spoons, and a whisk or fork. You want to have everything within reach to keep things efficient. If you have a small airtight jar, that’s even better for storage.
Step 2: Measure Your Ingredients
-
Now it’s time to measure out each ingredient carefully.
This is where the magic begins! Pour each spice into your mixing bowl. Remember to level off your measurements for accuracy.
Step 3: Mix It Up
-
Once all the ingredients are in the bowl, grab your whisk or fork. Blend the spices until they're evenly combined. This may take a minute or two—it’s worth it to ensure every bite of chili packs the same punch!
Step 4: Store Your Seasoning
-
Transfer your chili seasoning to your airtight jar. Label it with the date and name. This ensures you remember when you made it and what’s inside.
Stored in a cool, dark place, it will stay flavorful for up to six months.
Step 5: Get Cooking!
-
Now that you have your homemade seasoning, it’s time to use it. Add it to your chili recipes, sprinkle it on grilled vegetables, or mix it into your tacos for a flavorful boost.
Nutrition Facts
Servings 1
- Amount Per Serving
- Calories 16kcal
- % Daily Value *
- Total Fat 0.6g1%
- Saturated Fat 0.1g1%
- Sodium 2331mg98%
- Total Carbohydrate 3g1%
- Dietary Fiber 1g4%
- Protein 1g2%
* Percent Daily Values are based on a 2,000 calorie diet. Your daily value may be higher or lower depending on your calorie needs.
Note
- Start Slowly: If you’re unsure about spiciness, start by adding a small amount to your dish. You can always increase it if needed.
- Experiment: Feel free to adjust the ratios of spices until you find your perfect balance.
- Storing: Keep your seasoning in an airtight jar away from heat and light to maintain its freshness.
- Double the Batch: If you love it, consider making a larger batch to have on hand.
- Label Clearly: Include the date on your jar so you know when to replace it.