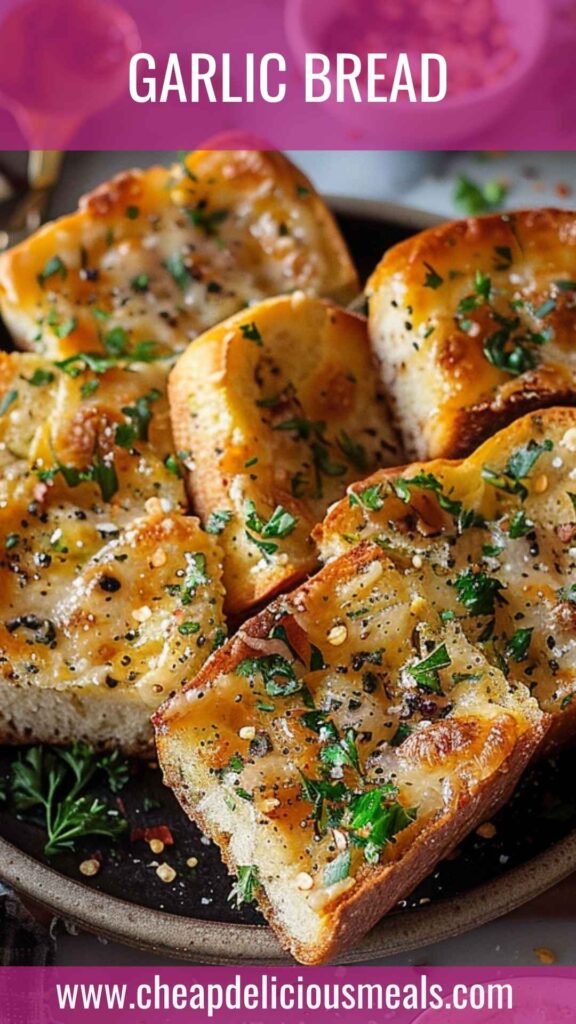
If you’ve ever sat at an Italian restaurant, fingers tingling in anticipation, you know the magic that garlic bread brings. Now, imagine dining on a warm evening with a plate of luscious pasta.
You hear the crunch of toasted bread as it meets your teeth, and a wave of garlicky goodness floods your senses. Trust me, absolute bliss!
But garlic bread isn’t just a sidekick—it’s a superhero in its own right. And today, I’m here to share not only the classic garlic bread recipe but stories and tidbits to elevate your culinary journey.

What Pairs Well with Garlic Bread?
Garlic bread is a fantastic companion to a multitude of dishes. Picture this: your favorite pasta dishes, a hearty primavera, or even a classic marinara. But that’s not all! Here are some other fantastic pairings:
- Soups: A warm bowl of minestrone or tomato basil pairs beautifully with garlic bread.
- Salads: Think Caesar or a fresh Caprese salad, where the crunch of garlic bread will balance the freshness.
- Grilled Meats: Whether it’s a juicy steak or grilled chicken, a side of garlic bread can take your meal from good to unforgettable.
- Pizza: Yes, you can double down on the flavor! Garlic bread is also a great side for your pizza night.
- Dips: Serve it up with dips like spinach artichoke or a simple olive oil dip.
Now, let’s dive into the delicious world of garlic bread!
What is Garlic Bread?
Garlic bread is, at its essence, bread that is enhanced with a luscious mixture of garlic and butter. It often features herbs and cheese, adding layers of flavor. Typically served warm, it benefits from a crispy crust and a soft, buttery interior.
Originally, the concept of garlic bread dates back to Italy, where it was called bruschetta.
However, the American version varies, showcasing its unique twist on this Italian classic. With its crunchy texture and fragrant aroma, it’s no wonder garlic bread has found its way into our hearts and kitchens.
Why You’ll Love This Garlic Bread
All right, let’s get to the good stuff. Here’s why you’ll love making (and devouring) this garlic bread:
- Delicious Flavor: The blend of garlic and butter will make your taste buds sing.
- Quick and Easy: No complicated steps! You can whip it up in less than 30 minutes.
- Versatile: Enjoy it alongside pasta, as an appetizer, or even as a snack.
- Impressive Presentation: Slice up that golden, glistening loaf, and you will be the star of the dinner table.
- Customizable: Feel free to tweak the recipe to suit your tastes—add more garlic, toss in your favorite herbs, or sprinkle more cheese.
I promise you, once you try it, you’ll be hooked. Nothing beats that homemade touch!
The Ingredients You Will Need to Make Garlic Bread
Before jumping into the kitchen, let’s gather our ingredients. Here’s what you need for that mouthwatering garlic bread:
- 1 (15-ounce) crusty French loaf, Italian bread, or artisan baguette
- 2 cloves garlic, freshly grated or finely minced
- 1 tablespoon minced fresh parsley or snipped chives
- ¼ teaspoon lemon zest
- ½ cup softened unsalted butter (1 stick), at room temperature
- 2 tablespoons finely shredded Parmesan cheese
- 1 teaspoon olive oil
- ½ teaspoon fine sea salt
- Flaky sea salt, for finishing touch

Directions to Make Garlic Bread
Now that we have our ingredients ready, let’s get cooking! Follow these steps:
Step 1: Prepare the Oven
Begin by preheating your oven to 400°F (200°C). This step is critical. A hot oven ensures an irresistible, crispy exterior.
Step 2: Create the Garlic Butter Mixture
In a medium bowl, combine your softened butter, minced garlic, parsley, lemon zest, Parmesan, olive oil, and fine sea salt.
Use a fork or a spatula to mix everything until it blends into a creamy spread. The aroma will already be enticing!
Step 3: Slice the Bread
Take your loaf of bread and slice it in half lengthwise. If you want individual pieces, you can also slice them into smaller sections, but leaving it in halves will make for a more dramatic presentation.
Step 4: Spread the Mixture
Generously spread the garlic butter mixture on both halves of the bread. Ensure you cover every inch; more butter means more flavor.
Step 5: Bake to Perfection
Place the bread halves on a baking sheet (cut side up!) and slide them into your preheated oven. Bake for about 10-15 minutes. Keep an eye on it—you want the edges to turn a golden brown without burning.
Step 6: Finish with Flaky Salt
Once the bread is aromatic and golden, pull it out of the oven. Just before serving, sprinkle a little flaky sea salt on top for a delightful crunch.
Step 7: Serve and Enjoy
Slice the garlic bread as needed and serve it warm. It’s best enjoyed fresh but still delicious the next day!
Notes: Pro Tips for Perfect Garlic Bread
Here are some of my favorite tips to elevate your garlic bread game:
- Use Fresh Garlic: Freshly minced garlic offers a stronger flavor than jarred garlic. It makes a noticeable difference.
- Experiment with Cheeses: Feel free to mix in mozzarella or Gruyère for an extra cheesy version.
- Add Heat: Sprinkle crushed red pepper flakes into the butter mixture for some heat.
- Use Herb Variations: Try using rosemary, thyme, or basil instead of parsley for different flavor profiles.
- Don’t Skimp on Butter: Use plenty of butter for a rich taste. It’s garlic bread, after all!
Storage Tips
Garlic bread is best enjoyed fresh, but if you have leftovers, you can store them. Here are a few tips:
- Wrap it Up: Place the leftover garlic bread in foil or use an airtight container to keep moisture in.
- Reheat Appropriately: To reheat, place the bread in an oven preheated to 350°F (175°C) for about 10 minutes. You want it warm and crisp, not soggy.
- Freezing: You can also freeze the garlic bread. Wrap it tightly with plastic wrap or foil first, then place it in a freezer bag. When ready to enjoy, simply let it thaw in the fridge and reheat.
Serving Suggestions
Garlic bread is extremely versatile. Here are five ways to serve it up:
- As an Appetizer: Serve warm with a side of marinara sauce for dipping. It sets the stage for dinner.
- With Pasta: Pair it with your choice of pasta dishes. Whether it’s creamy Alfredo or tangy marinara, it complements beautifully.
- On a Charcuterie Board: Slice it up and include it in your charcuterie spread. Its flavor enhances the aroma of cheeses and cured meats.
- Next to Soups: Garlic bread is a delightful dunking companion for soups. Tomato basil is a classic choice.
- With Salad: Enjoy it alongside a fresh salad. The crunchiness offers a spectacular contrast to the greens.
What Other Substitutes Can I Use in Garlic Bread?
If you’re in a pinch for ingredients, don’t fret. Here are five substitutes to consider:
- Store-Bought Garlic Butter: If you’re short on time, pre-made garlic butter works fine. Slather it generously on the bread before baking.
- Olive Oil: For a dairy-free option, replace butter with olive oil. Mix it with garlic and herbs for excellent results.
- Vegan Butter: Perfect for an all-vegan dish while keeping that essential buttery flavor.
- Dried Herbs: If you don’t have fresh ones, use dried herbs like oregano or Italian seasoning; just use about a teaspoon for the butter mixture.
- Different Breads: Experiment with different types of bread! Ciabatta, sourdough, or even gluten-free bread can be excellent alternatives.

Conclusion
When it comes to making garlic bread, you’re not just following a recipe; you’re participating in a time-honored tradition of culinary delight. It’s about creating memories, sharing good food, and enjoying the simple pleasures in life.
I hope you’ll give this recipe a try and discover your own joy in creating the perfect garlic bread.
Keep it warm, crunchy, and bursting with flavor! Whether you serve it with pasta, soup, or just enjoy it on its own, garlic bread has that unique ability to bring everyone together. So fire up that oven, and let’s embrace the comfort that is garlic bread!
Buon appetito!
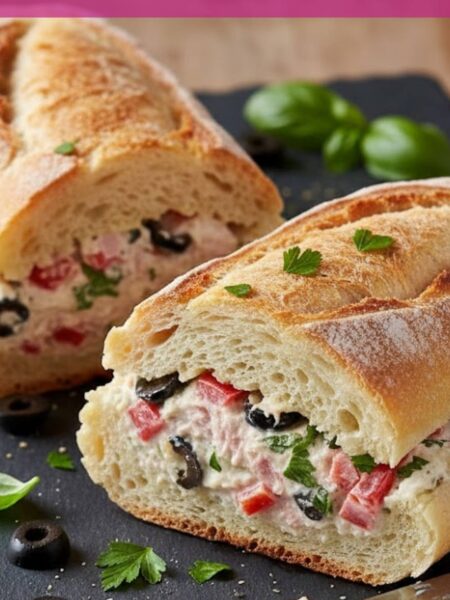
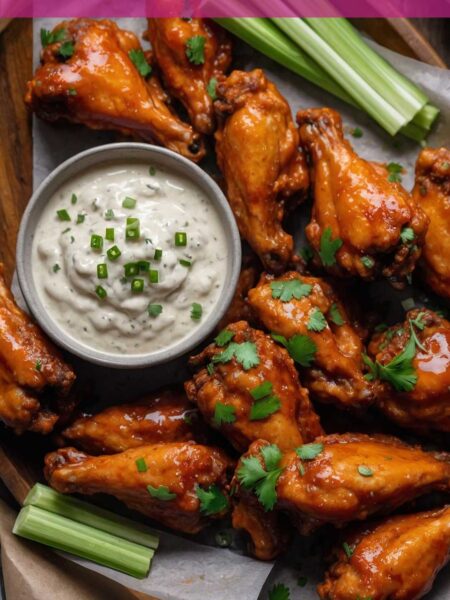
You’ll also like the following recipes!

Garlic Bread – Cheap Delicious Meals
Description
Garlic bread is more than just butter and bread. It’s an experience, a sensory delight. I recall the first time I made garlic bread for myself.
I thought, “How hard can it be?” Little did I know, this simple dish would become my ultimate go-to. It’s impressive yet uncomplicated—a perfect combination for any busy home cook. Over the years, I’ve perfected my recipe, and today, I want to share that with you.
Whether you’re hosting friends or craving a cozy night in, this garlic bread is sure to become a staple in your kitchen. Don’t just take my word for it; let’s break down what makes this dish so special.
Ingredients
Instructions
Step 1: Prepare the Oven
-
Begin by preheating your oven to 400°F (200°C). This step is critical. A hot oven ensures an irresistible, crispy exterior.
Step 2: Create the Garlic Butter Mixture
-
In a medium bowl, combine your softened butter, minced garlic, parsley, lemon zest, Parmesan, olive oil, and fine sea salt.
Use a fork or a spatula to mix everything until it blends into a creamy spread. The aroma will already be enticing!
Step 3: Slice the Bread
-
Take your loaf of bread and slice it in half lengthwise. If you want individual pieces, you can also slice them into smaller sections, but leaving it in halves will make for a more dramatic presentation.
Step 4: Spread the Mixture
-
Generously spread the garlic butter mixture on both halves of the bread. Ensure you cover every inch; more butter means more flavor.
Step 5: Bake to Perfection
-
Place the bread halves on a baking sheet (cut side up!) and slide them into your preheated oven. Bake for about 10-15 minutes. Keep an eye on it—you want the edges to turn a golden brown without burning.
Step 6: Finish with Flaky Salt
-
Once the bread is aromatic and golden, pull it out of the oven. Just before serving, sprinkle a little flaky sea salt on top for a delightful crunch.
Step 7: Serve and Enjoy
-
Slice the garlic bread as needed and serve it warm. It’s best enjoyed fresh but still delicious the next day!
Nutrition Facts
Servings 4
- Amount Per Serving
- Calories 157kcal
- % Daily Value *
- Total Fat 16.2g25%
- Saturated Fat 10g50%
- Cholesterol 32mg11%
- Sodium 348mg15%
- Total Carbohydrate 2g1%
- Sugars 1g
- Protein 2g4%
* Percent Daily Values are based on a 2,000 calorie diet. Your daily value may be higher or lower depending on your calorie needs.
Note
- Use Fresh Garlic: Freshly minced garlic offers a stronger flavor than jarred garlic. It makes a noticeable difference.
- Experiment with Cheeses: Feel free to mix in mozzarella or Gruyère for an extra cheesy version.
- Add Heat: Sprinkle crushed red pepper flakes into the butter mixture for some heat.
- Use Herb Variations: Try using rosemary, thyme, or basil instead of parsley for different flavor profiles.
- Don’t Skimp on Butter: Use plenty of butter for a rich taste. It’s garlic bread, after all!